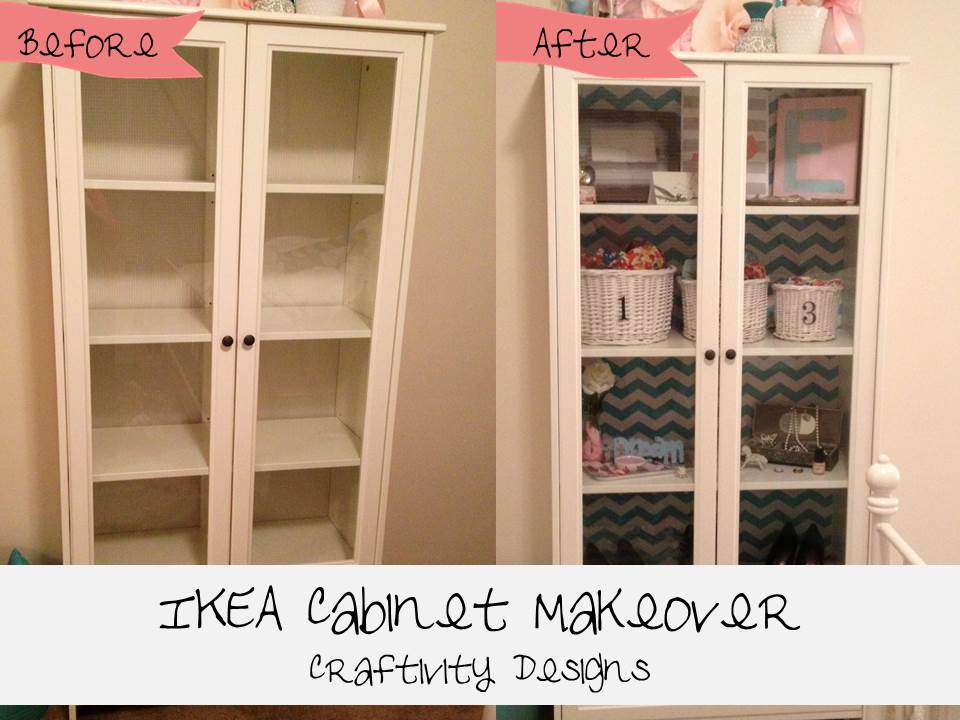
So… it’s no secret that I love IKEA! Seriously….my house is 90% IKEA furniture. One of my favorite IKEA pieces in my home is this white cabinet (no longer available) in my bedroom. Since the walls in my room are off-white, the cabinet tends to blend in so I wanted to add something to make it POP!
Disclosure: This page includes affiliate links.
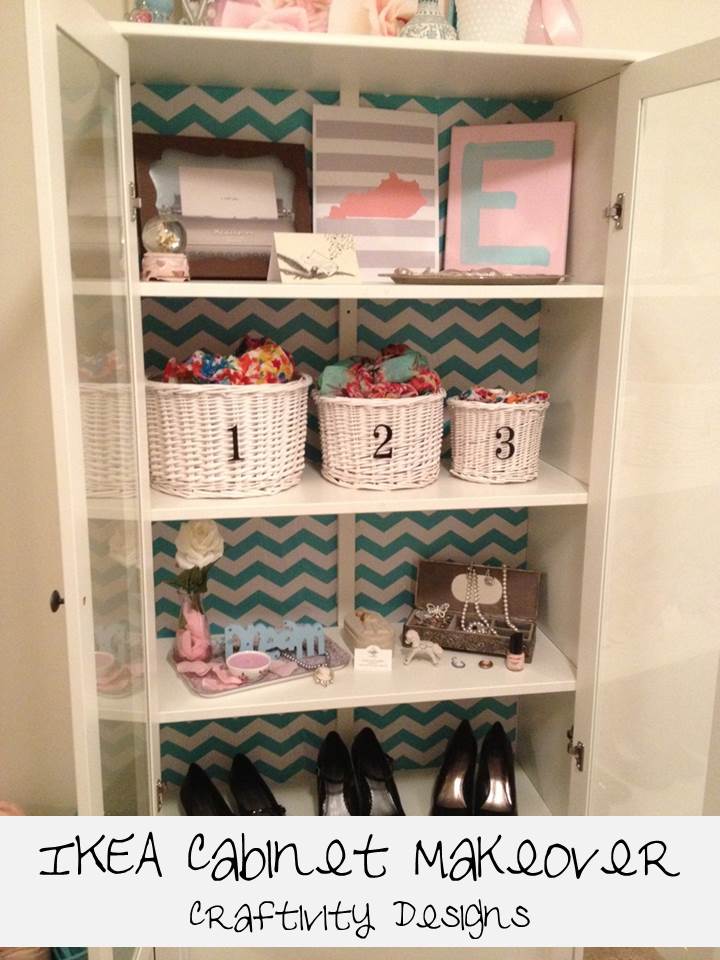
After creating my painted tray, I was looking for more ways to incorporate this chevron shelf paper in my home. My bedroom colors include aqua/teal, coral, and gold details (like my polka dot knobs). I knew the aqua chevron would work perfectly in my room so I decided to add it to the back of my cabinet.
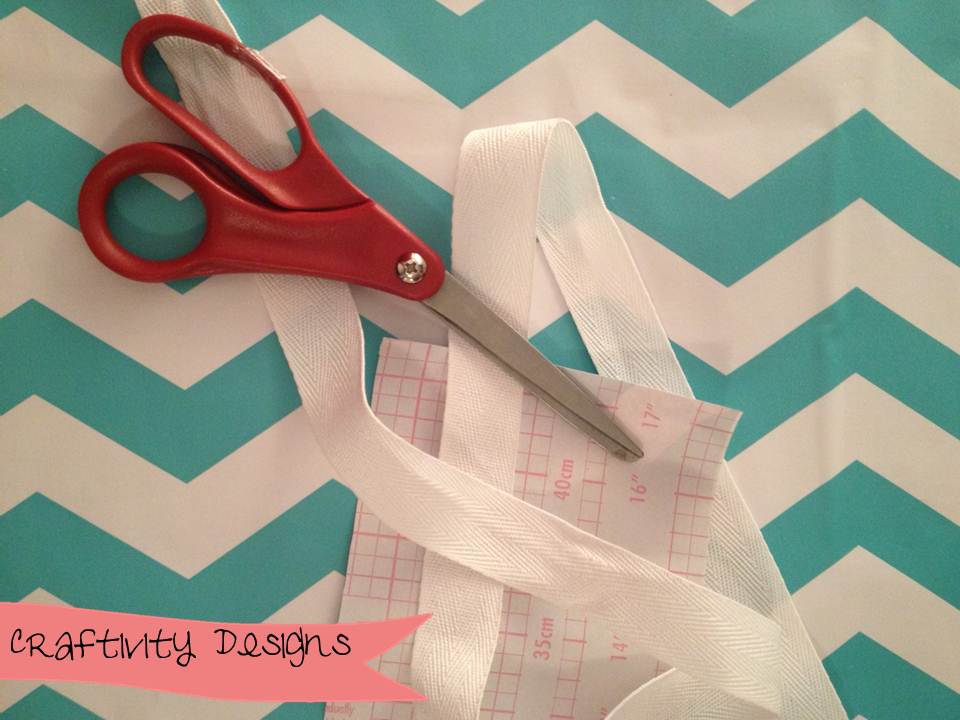
I started this project by measuring the back of the cabinet. I couldn’t find my tape measure so I ended up using a piece of ribbon to measure the distance and measured the paper using the grid on the back. Before applying the paper to the back of the cabinet, I removed all of the wooden shelves.
When I started peeling the backing off of the shelf paper, I pulled too much off at once and it was a big sticky mess! After finishing the first section, I started only peeling off a small amount of the backing away from the top while smoothing the paper onto the cabinet.
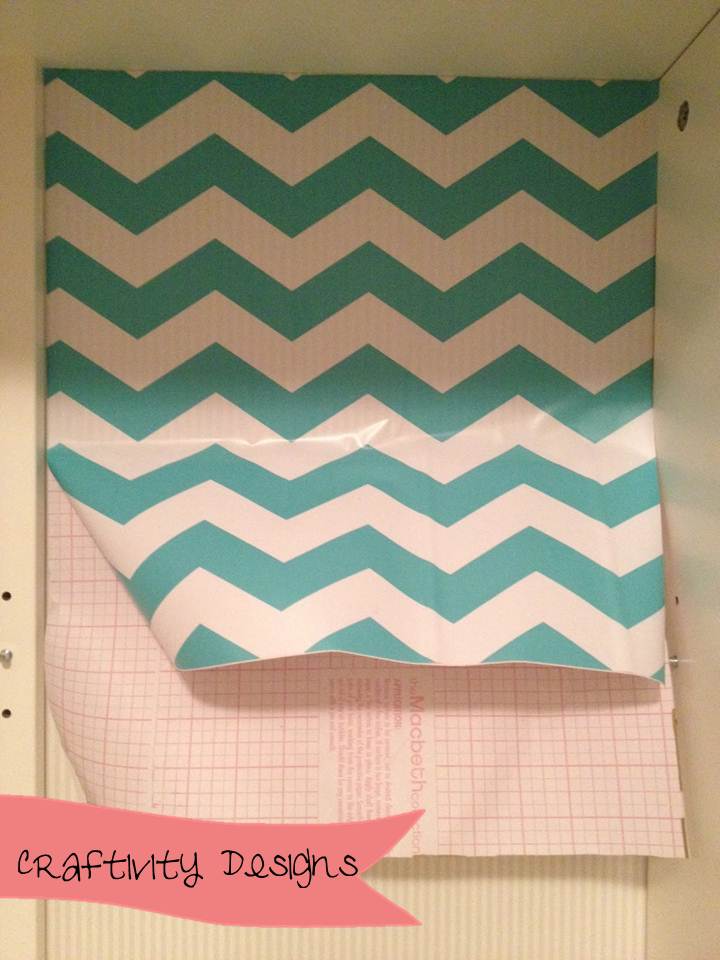
I continued this process of measuring and applying the shelf paper until the entire back of the cabinet was covered.

After finishing with the shelf paper, I began my favorite part–filling the shelves! I love how the chevron paper looks with my floral scarves that are housed in white wicker baskets.

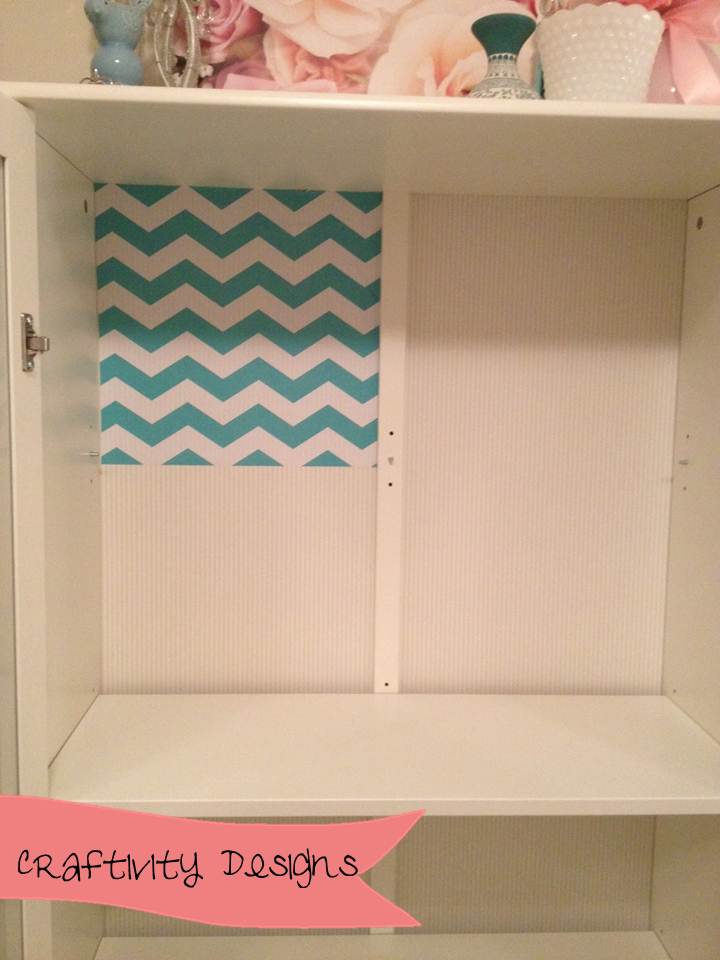
The best part about this project? It was cheap and simple! I spent $4 on a 2-pack of shelf paper (I still have a whole roll left) and the project was complete in less than an hour.

Is it perfect? No. Are there bubbles in the paper? Yes. However I’ve made my peace with the bubbles in the paper and I’m okay with them. What I love about using shelf paper is that it’s easily removable so when I get tired of chevron, I can take it off and start all over again!
The best part about this project? It was cheap and simple! I spent $4 on a 2-pack of shelf paper (I still have a whole roll left) and the project was complete in less than an hour.
In addition to the chevron print, I also got some shelf paper in a pink quatrefoil print which I plan on using to line the wooden drawers in my dresser. I’ll share the final pics when I finish that project. Have you used shelf paper in any of your home projects? If so, I’d love to hear about it!
Craftivity Designs
Friday 24th of May 2013
Thanks Leah! I'll check it out! Have a great weekend!
Erica
Leah S
Friday 24th of May 2013
Thanks for sharing this last Friday at the Friday follow along. Come share another today! Www.leahinspired.com
Craftivity Designs
Wednesday 22nd of May 2013
Thanks so much for the feature Judy!!
Erica
Judy K
Tuesday 21st of May 2013
I love what you did with the shelf paper. I will be featuring this tonight at my Swing into Spring party that opens at 8pm EST. Please stop by and pick up an I've Been Featured button. Thanks. http://diybydesign.blogspot.com
Craftivity Designs
Sunday 19th of May 2013
Thanks So much Suzy!!! What a great idea! Have a wonderful day!
Erica