The weather here has been beautiful and we’ve been trying to focus some attention on the exterior of our home.

The front porch is nice and long with a wood-lined flower bed sitting directly in front of it. Here’s a photo from just before we purchased the house:

Early in the summer we filled the flower bed with some annuals and perennials; but we hadn’t done much else until recently.
We’ve got a long list of “to do” items… many of which probably won’t be accomplished this year; but we’ve made some progress.
- Remove the shutters on each side of the front door 100%
- Replace the house number sign {it’s a cutesy ceramic plaque} 50%
- Paint the rocking chairs 100%
- Paint the shutters 0%
- Fill the flower bed with easy-care perennials 75%
- Remove/replace or fix the non-working lamp post {including the surrounding ivy} 0%
- Replace the sconce next to the door 0%
- Update the door hardware 0%
- Paint the door 25%
- Add some color and personality to make it more inviting 25%
Today I’m chatting about our house number sign. Conveniently, this whole nice weather/working on the house thing has landed us right near the beginning of October…. which just happens to be the perfect time to decorate our porch for fall.
Over the weekend we picked up some pumpkins and mums, then headed home to fill the porch with our goodies. The sweet little ceramic house numbers were bugging me when a temporary, but fun, solution came to mind.

I picked up this chalkboard at a thrift sale for $10 and planned to eventually use it in the house. For the time being, though, it’s a great stand-in as our house number sign — and a little seasonal decorating too!
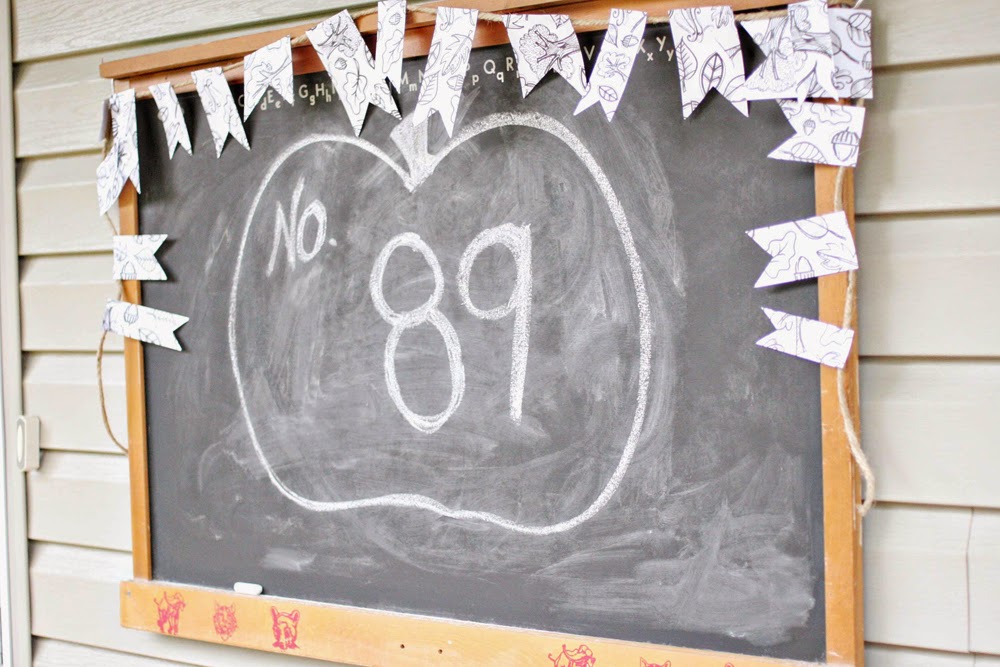
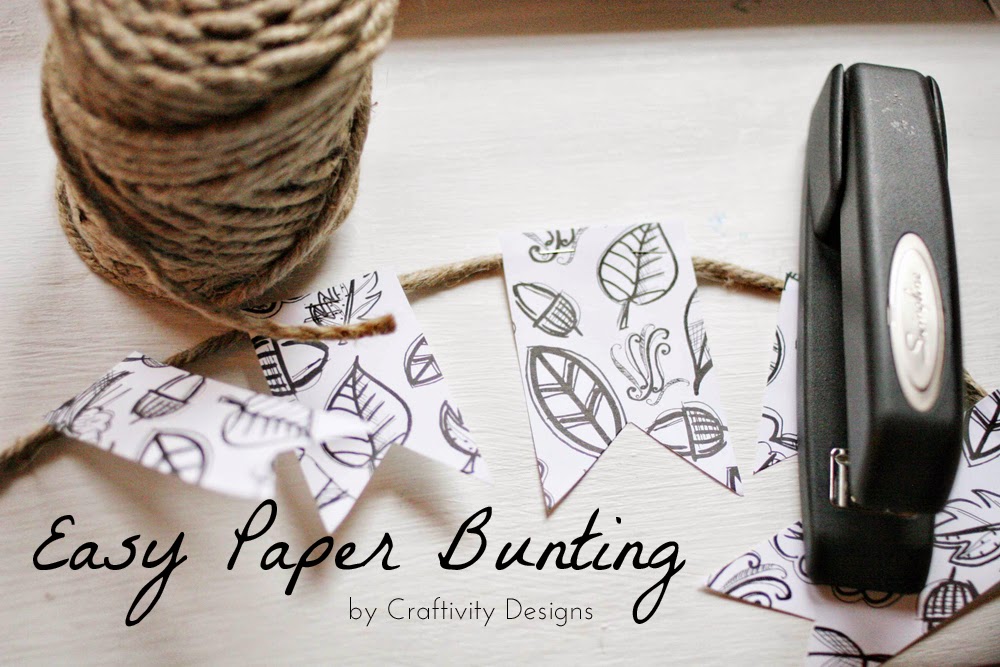
I free-handed a pumpkin and the house number in chalk. Until we get our permanent numbers, I’ll have fun switching this up for the holidays. Since we’ve been doing some other fall decorating, I also added some festive paper bunting.

I started with a fall-themed scrapbook paper and cut it into strips of various thicknesses {3″, 2.5″, 2″, 1.5″}.

Next, I cut each strip into thirds {5″, 4″, 3″} and clipped a triangle out of one end.

Using a stapler, I attached each strip to some thick jute twine {you can purchase the twine here, affiliate link}. Sometimes it took a couple staples to get the paper attached firmly.

I draped it around the chalkboard using some small Command Hooks on each end.


Simple and festive!!
Oh, and here is a little glimpse as to how our fall porch is shaping up.

Have you been doing any fall decorating? I hope the weather has been lovely where you live, too!