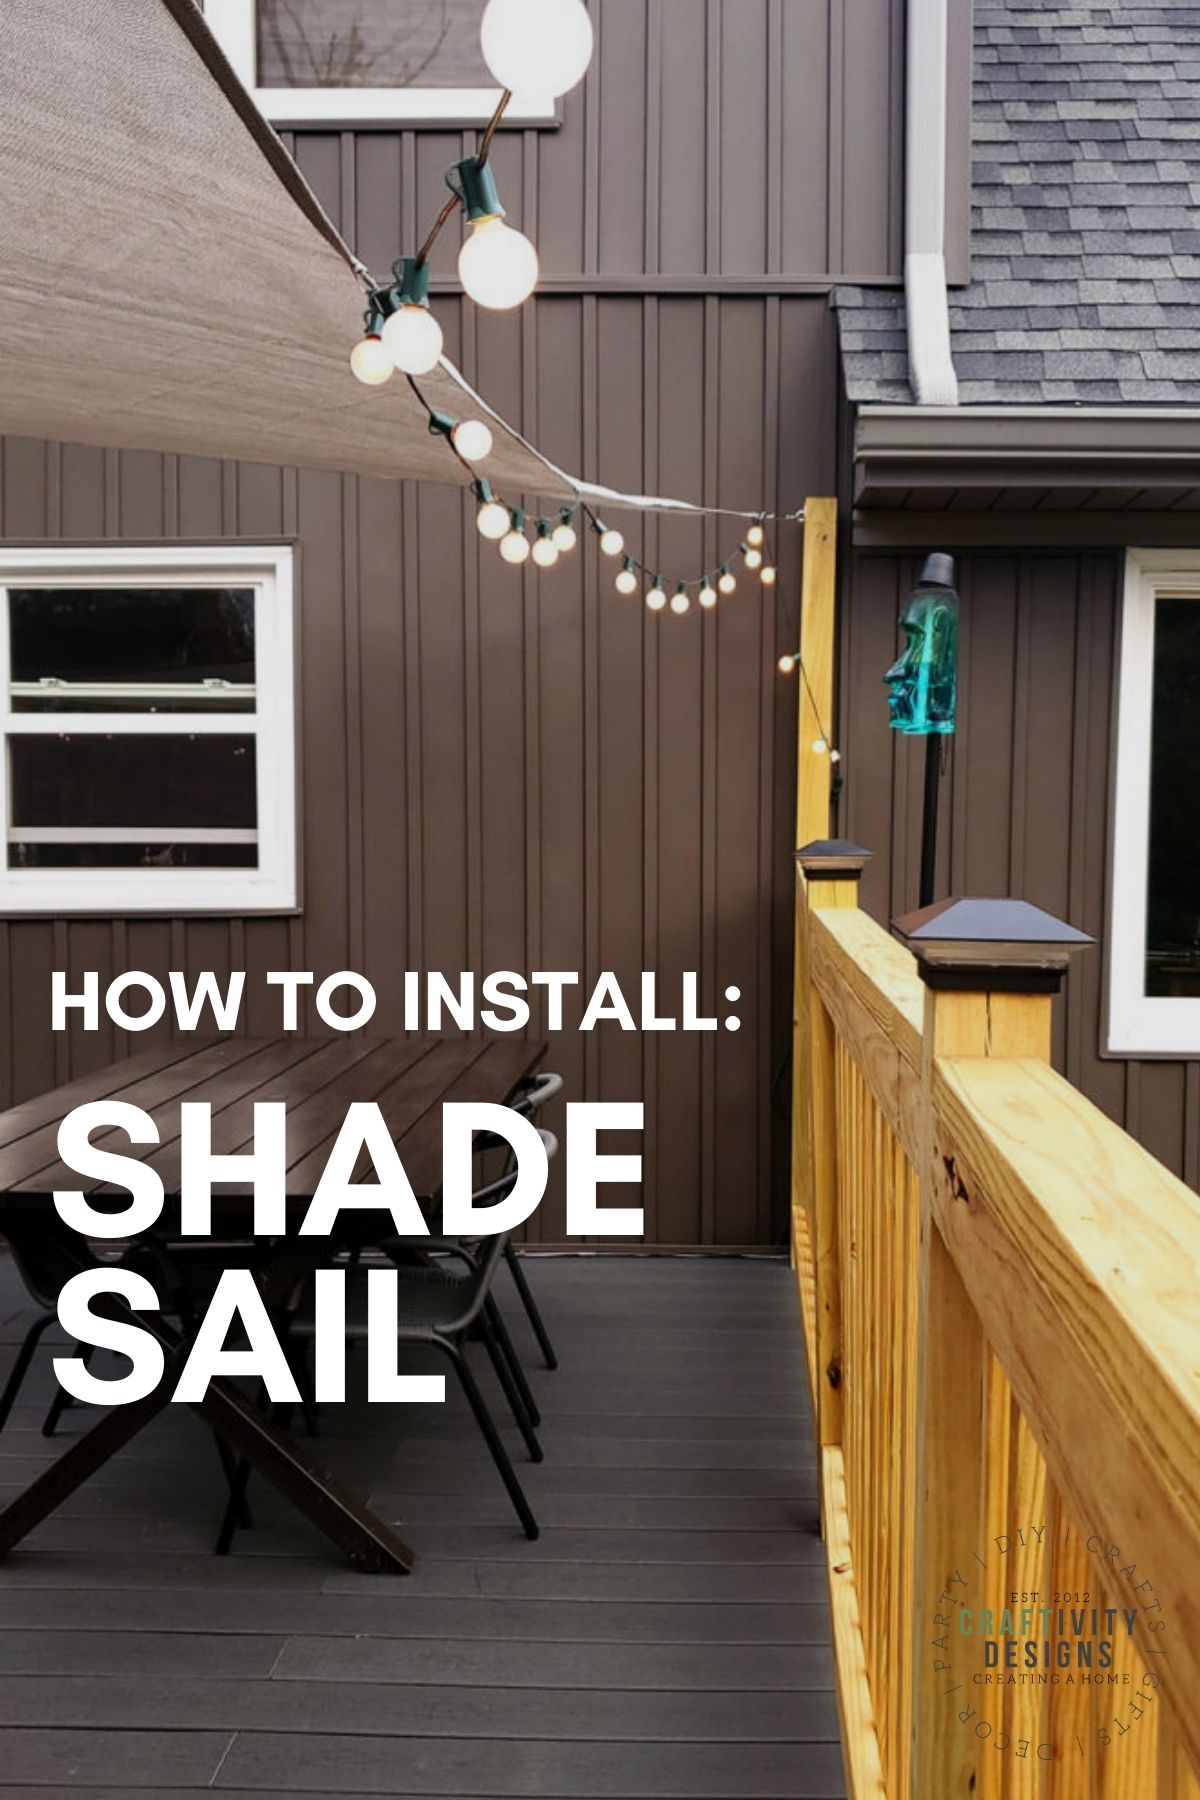
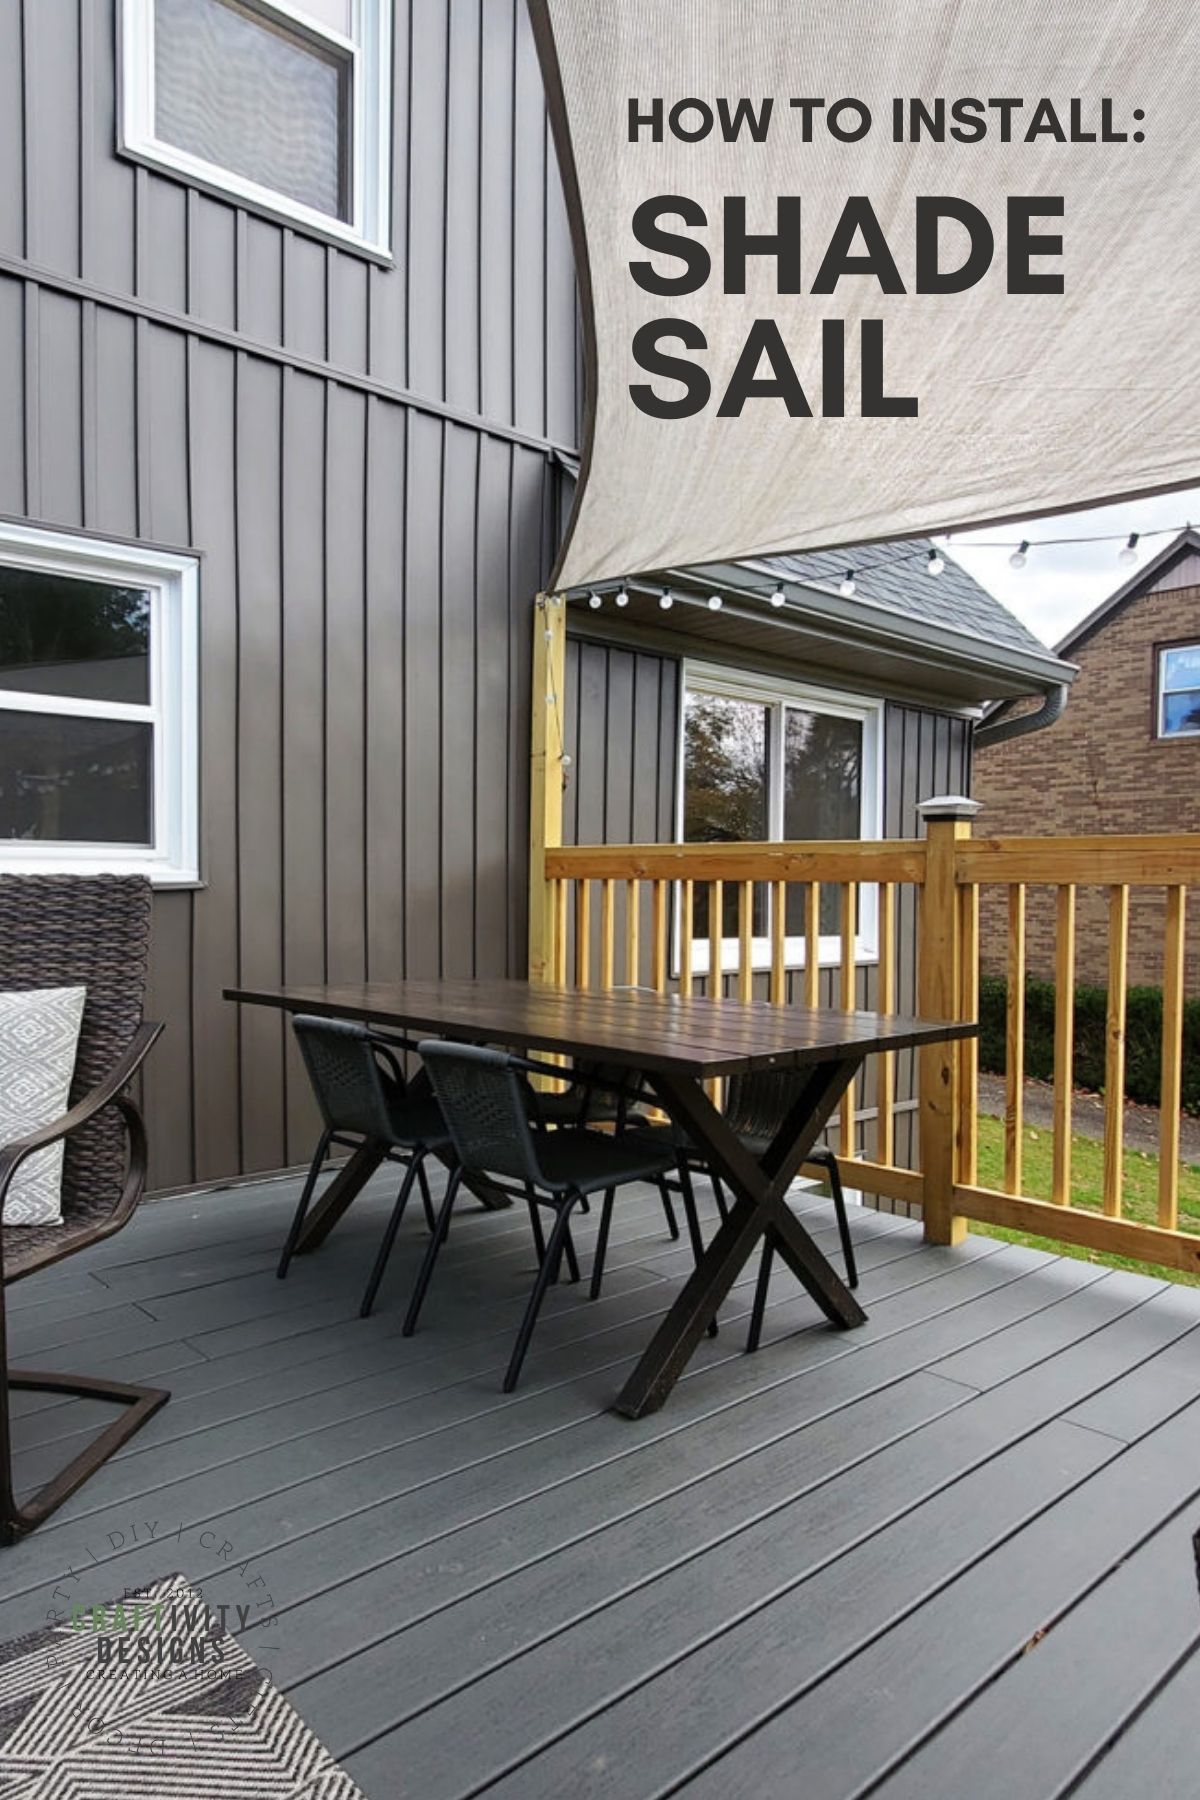
Learn how to install a shade sail. A DIY Shade Sail installation is a budget-friendly way to add shade over your deck or patio.
If a standard patio umbrella isn’t cutting it, upgrade to a shade sail (also called a sun shade). These affordable sails are a beginner-friendly DIY project that you can complete in a few hours.
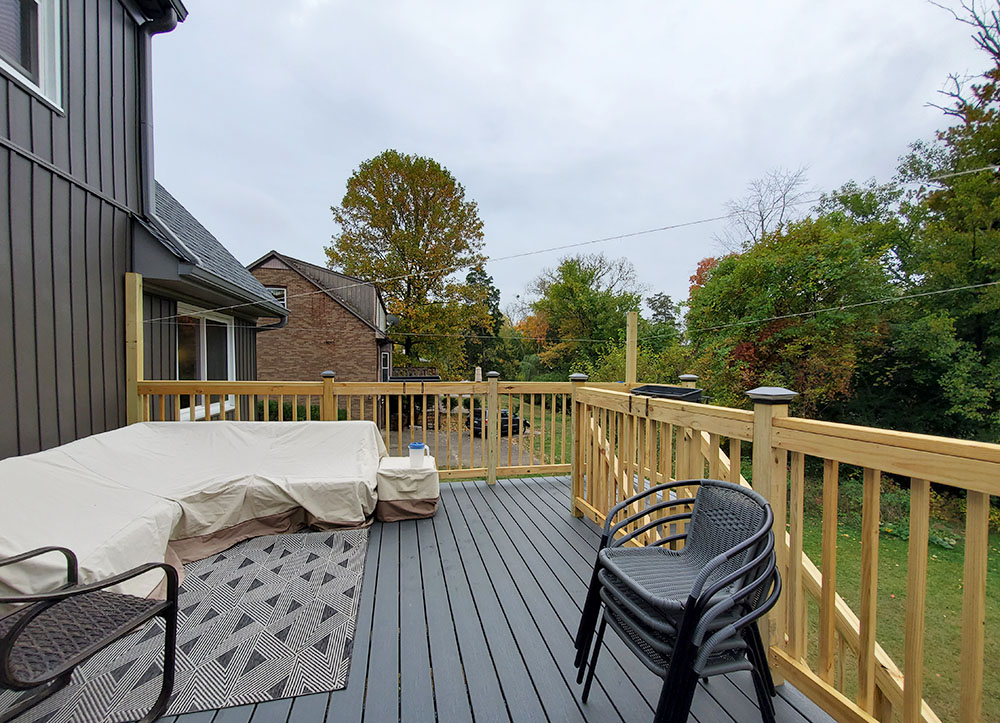
Our deck gets hours of hot sun in the afternoons. This makes it both:
- unenjoyable during the summer and
- difficult to grow any plants.
Disclosure: This page includes affiliate links.
Shade Sails vs. Awnings, Umbrellas and Pergolas
We have a large patio umbrella, but it only covers a small portion of our deck with shade. Originally, we planned to add another umbrella.
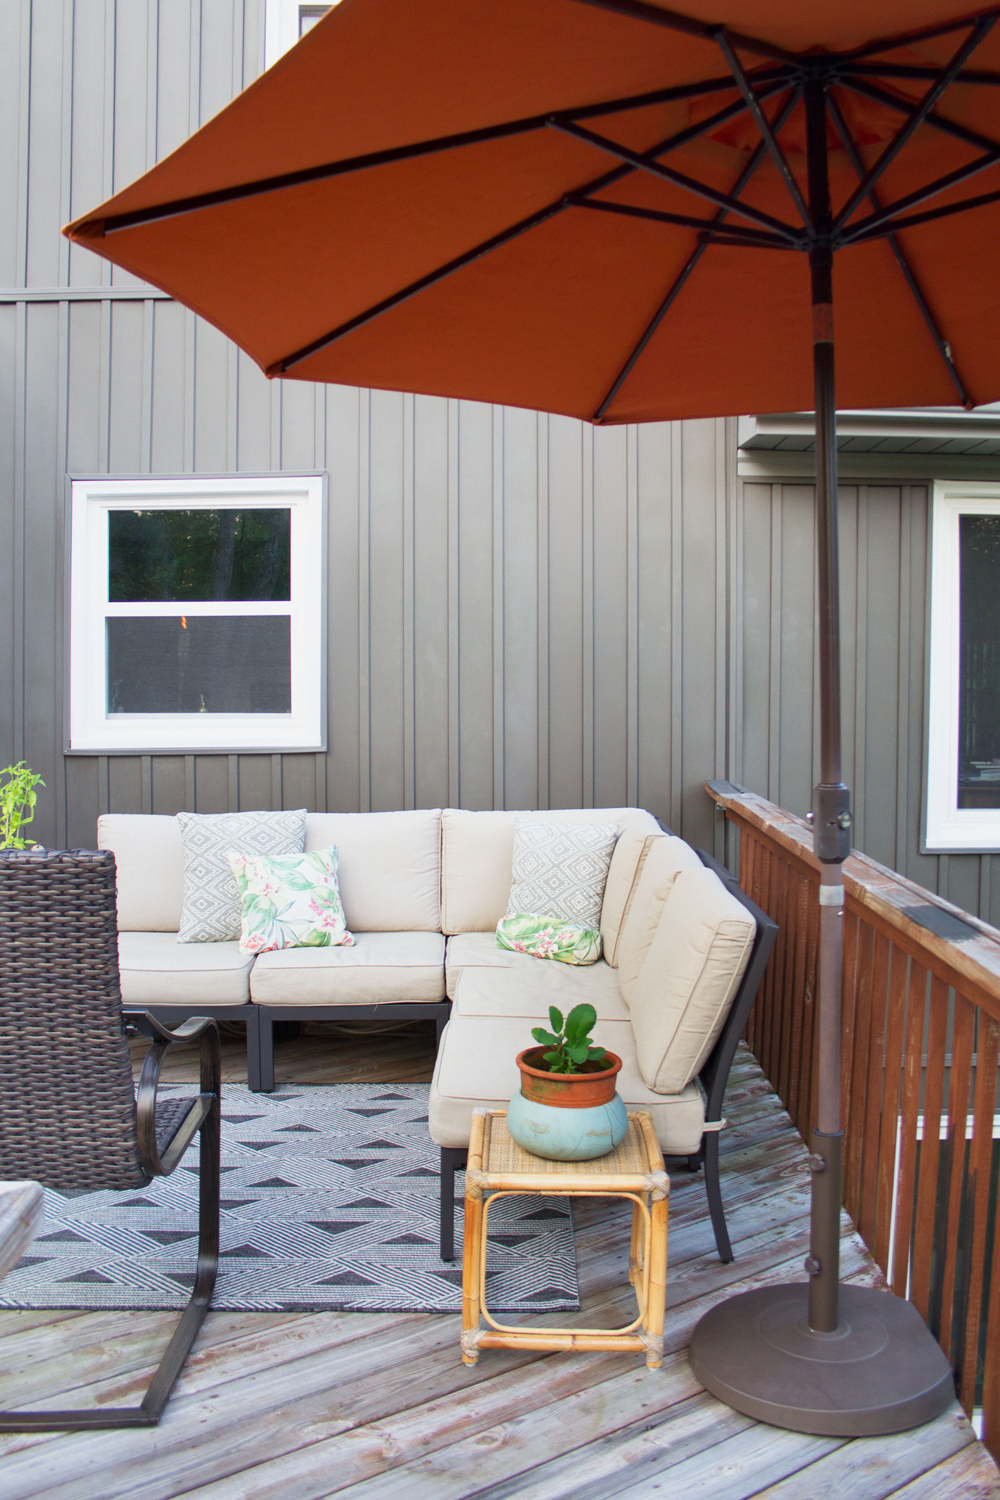
However, at ~$75 for the umbrella and ~$75 for a sturdy base, it’s more expensive to add an umbrella than to install a shade sail (and provides less shade than a sail).
Not to mention, the umbrella bases take up valuable floor space.
Another option is to install an awning. However, with an awning, the house would get much less natural light since it would be over the kitchen windows.
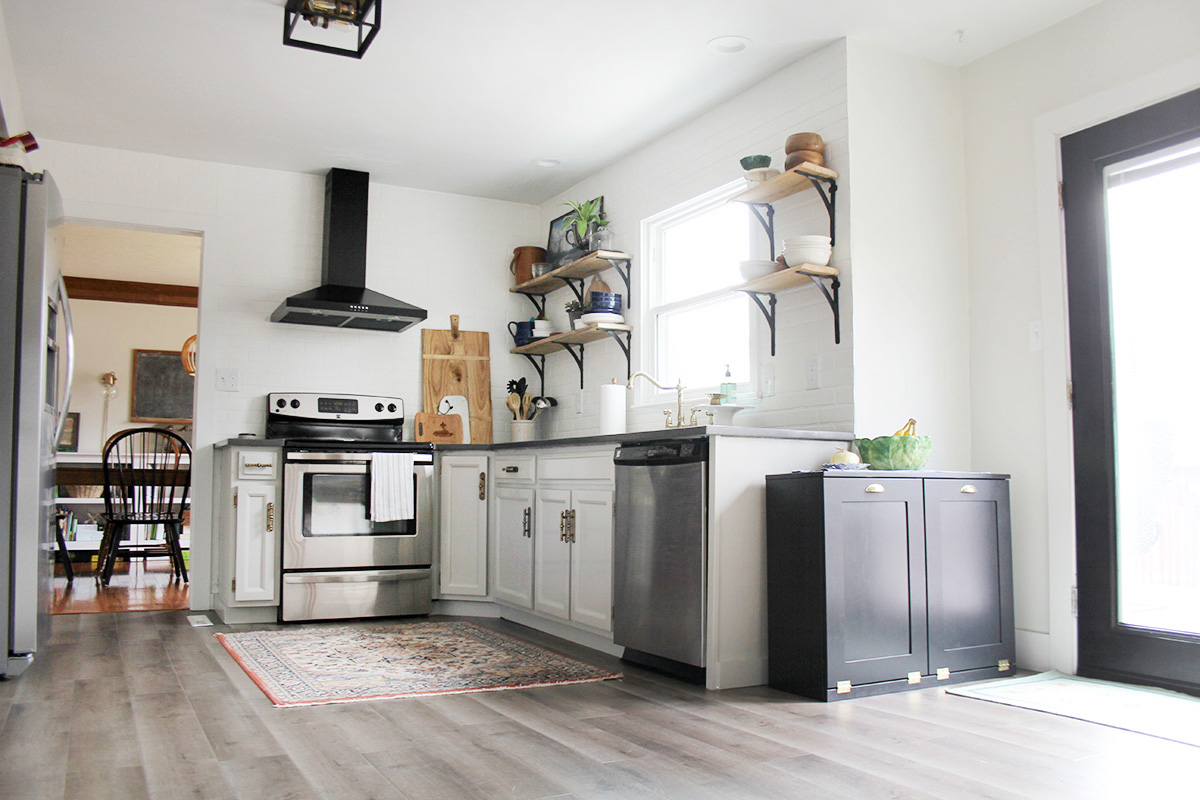
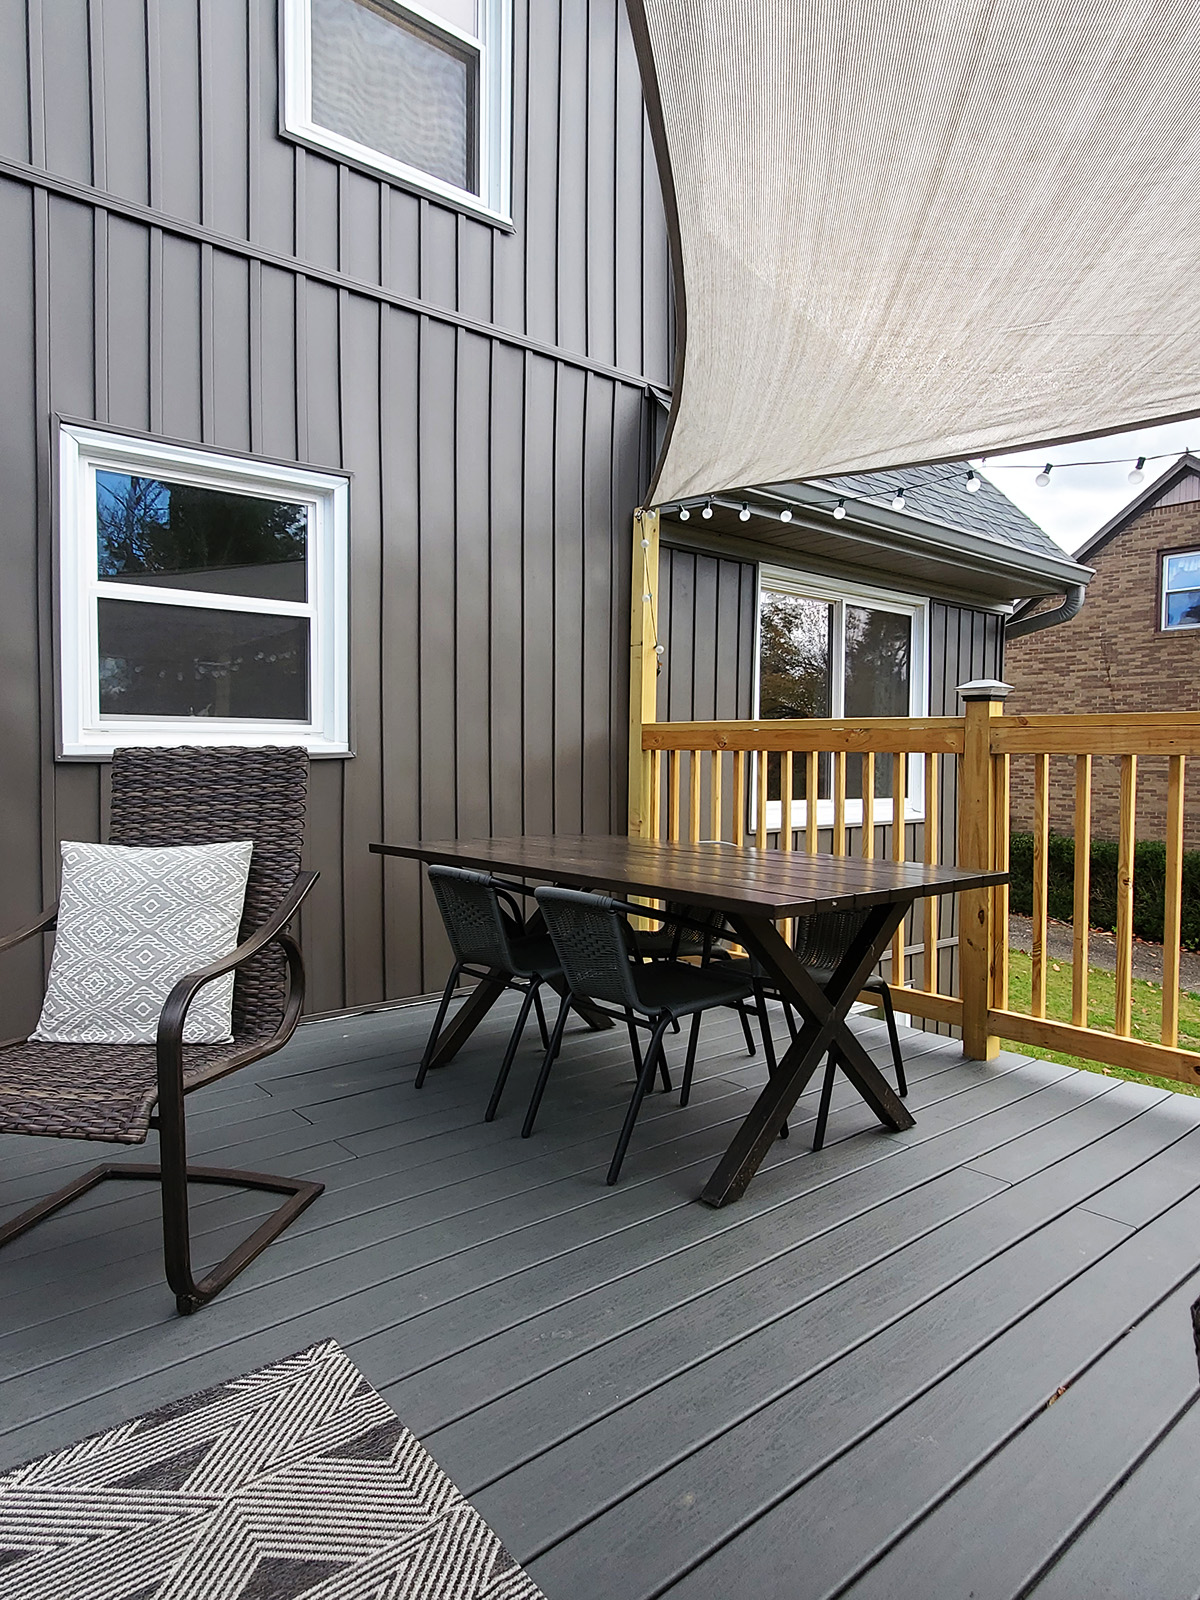
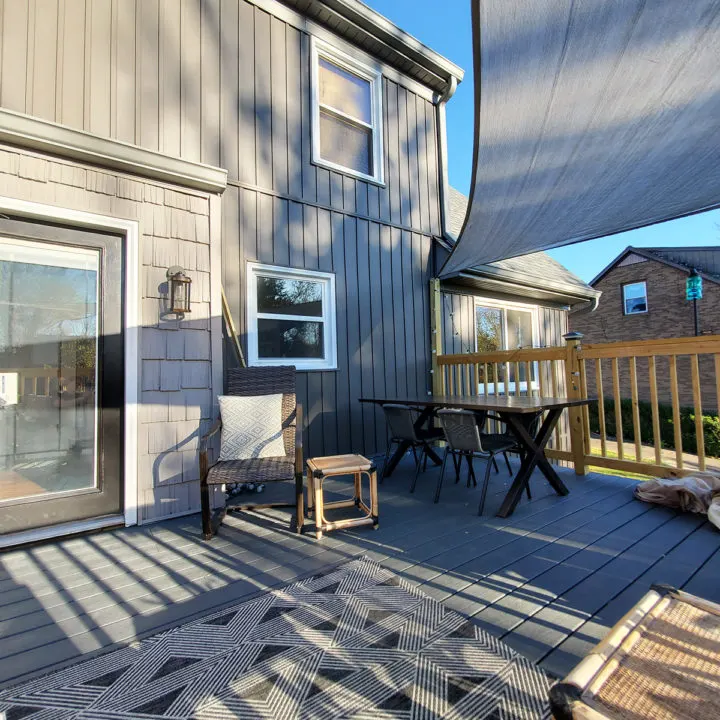
A shade sail allows us to cover the deck away from the house – leaving the windows with access to plenty of natural sunlight.
A pergola would be lovely, but we nixed that idea due to cost and weight. A pergola is more expensive and would put more weight onto our deck supports and frame.
Selecting a Sun Shade Sail
In order to select a shade sail, you’ll need to choose a shape in the correct size and in a color complementary to your home’s exterior.
Let’s discuss selecting the shape, size, and color for a shade sail.
SHAPE | How to Choose the Right Shape
Most shade sails are available in 1 of 3 shapes:
- Triangle (equilateral and right angle)
- Square
- Rectangle
Choose the best shape based on the area which you are trying to cover (and the area you don’t want to cover). What do I mean by that?
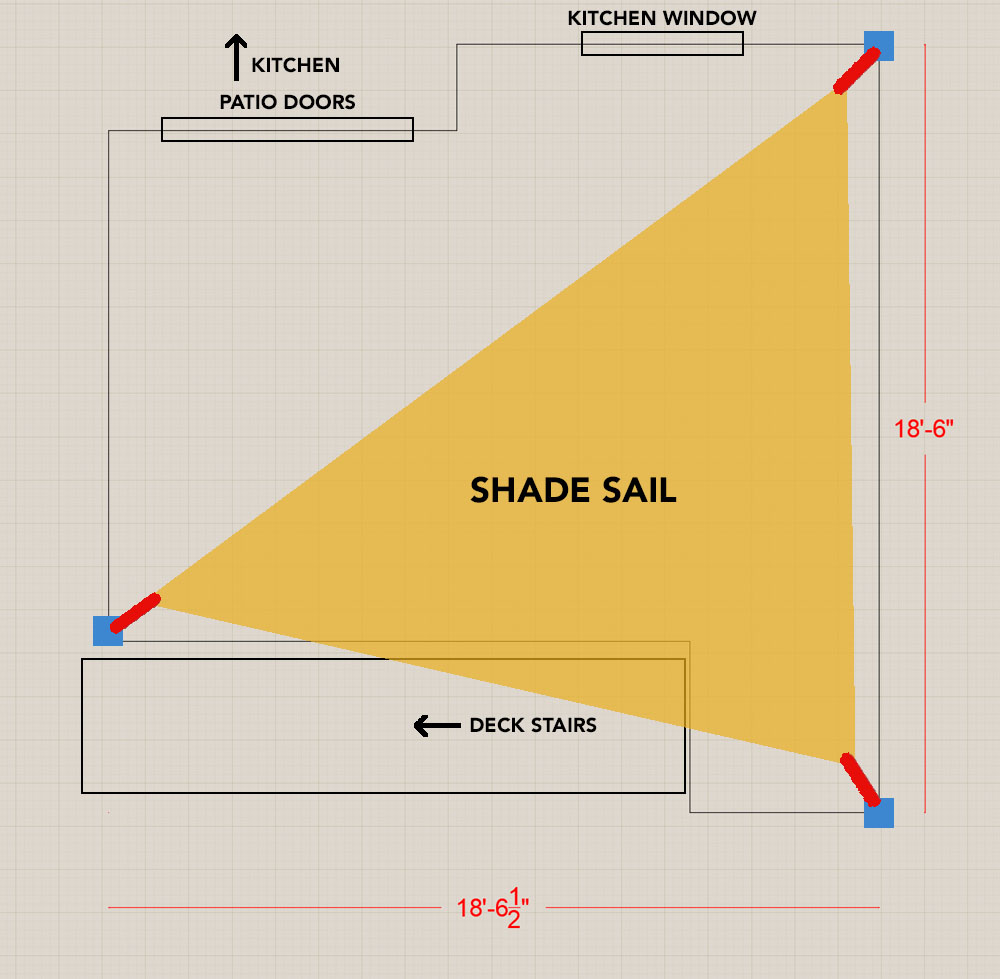
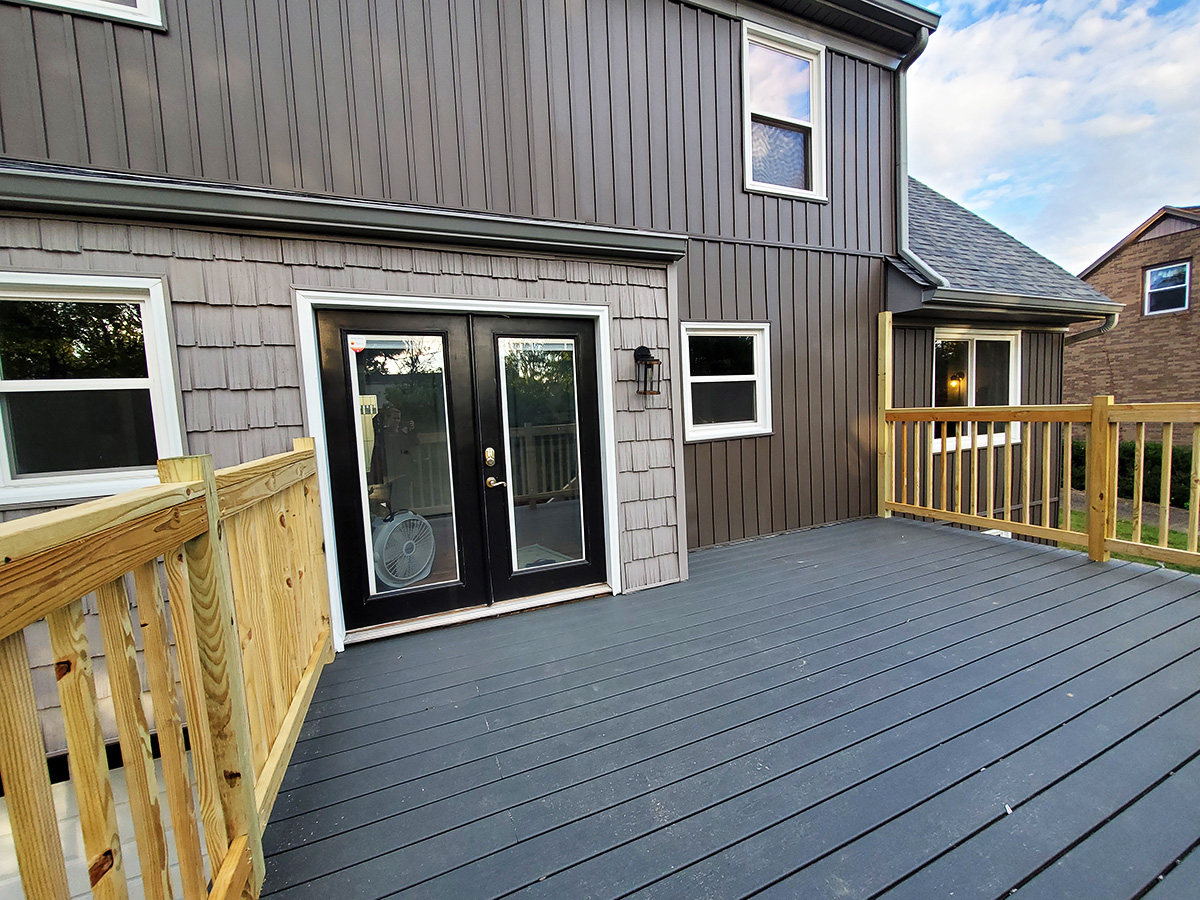
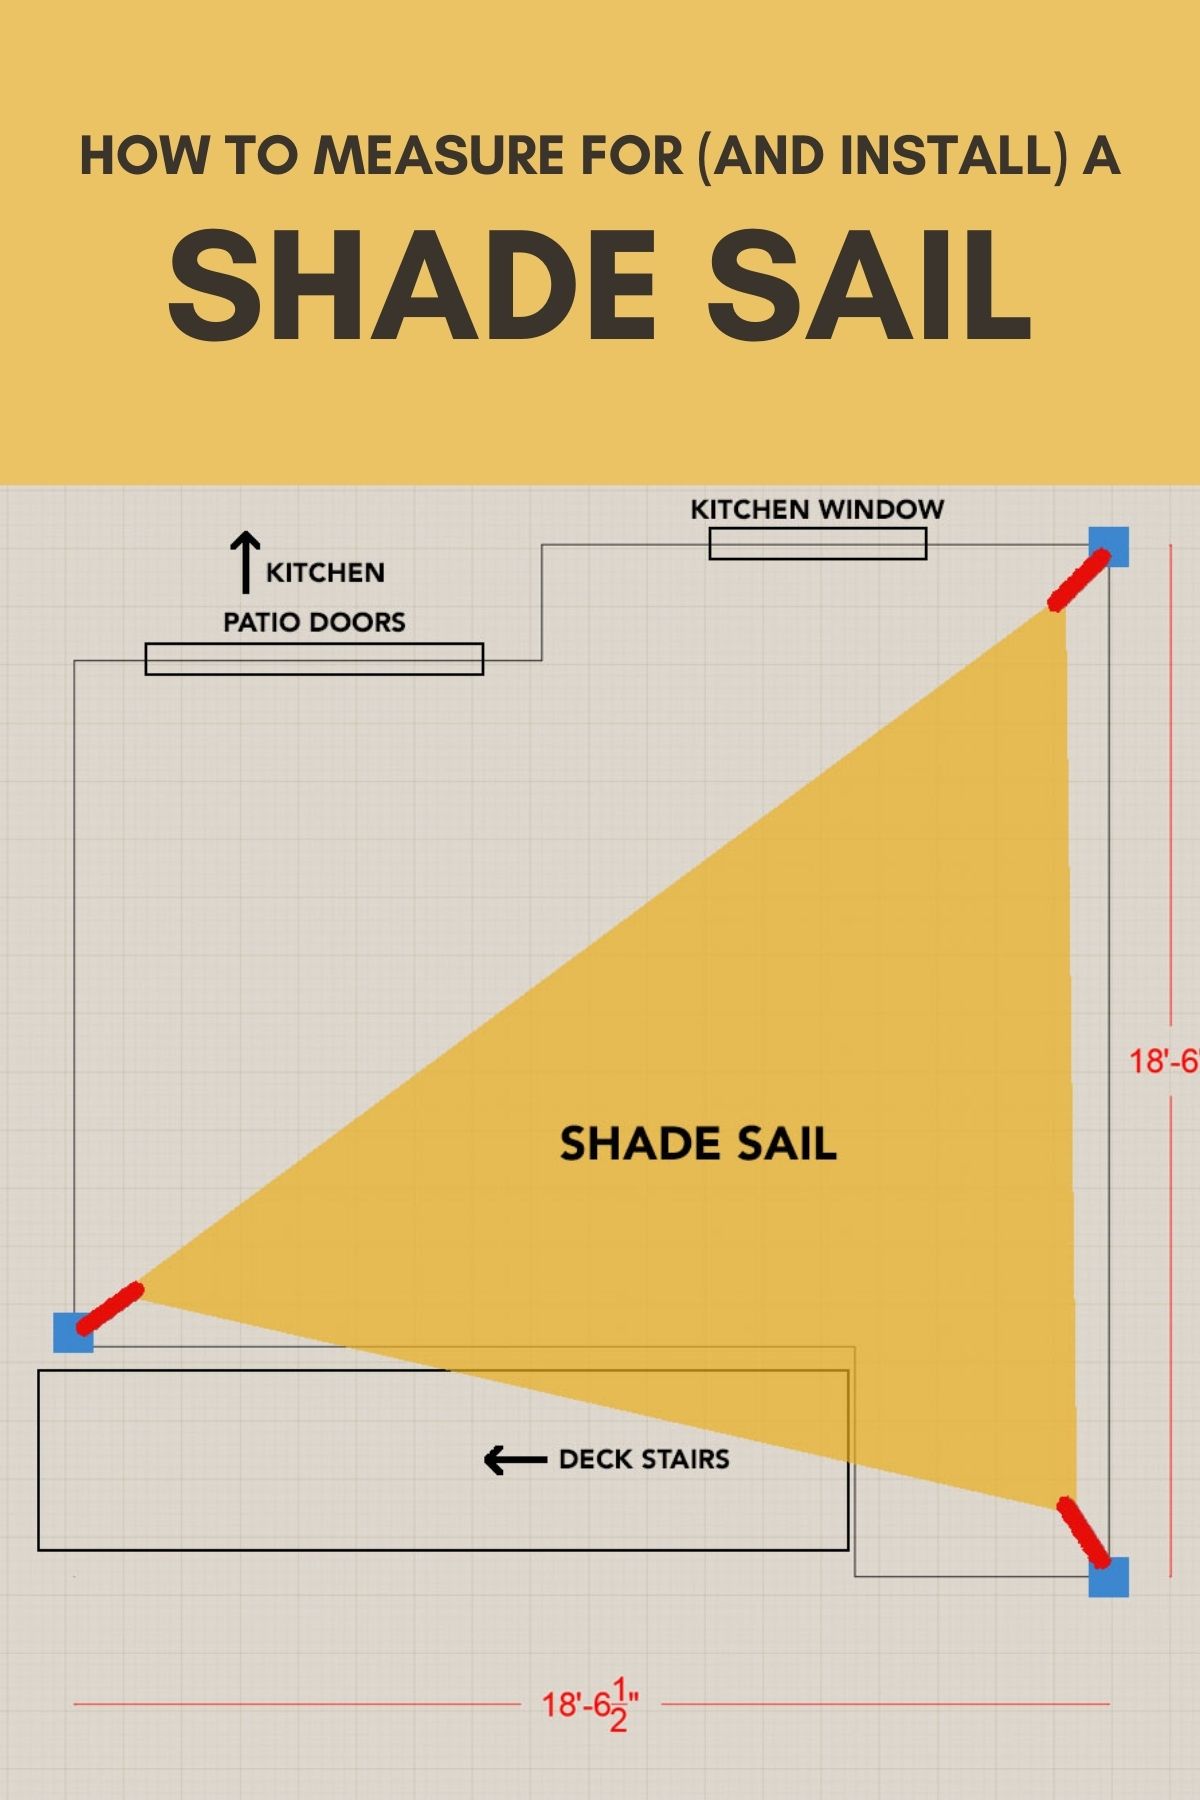
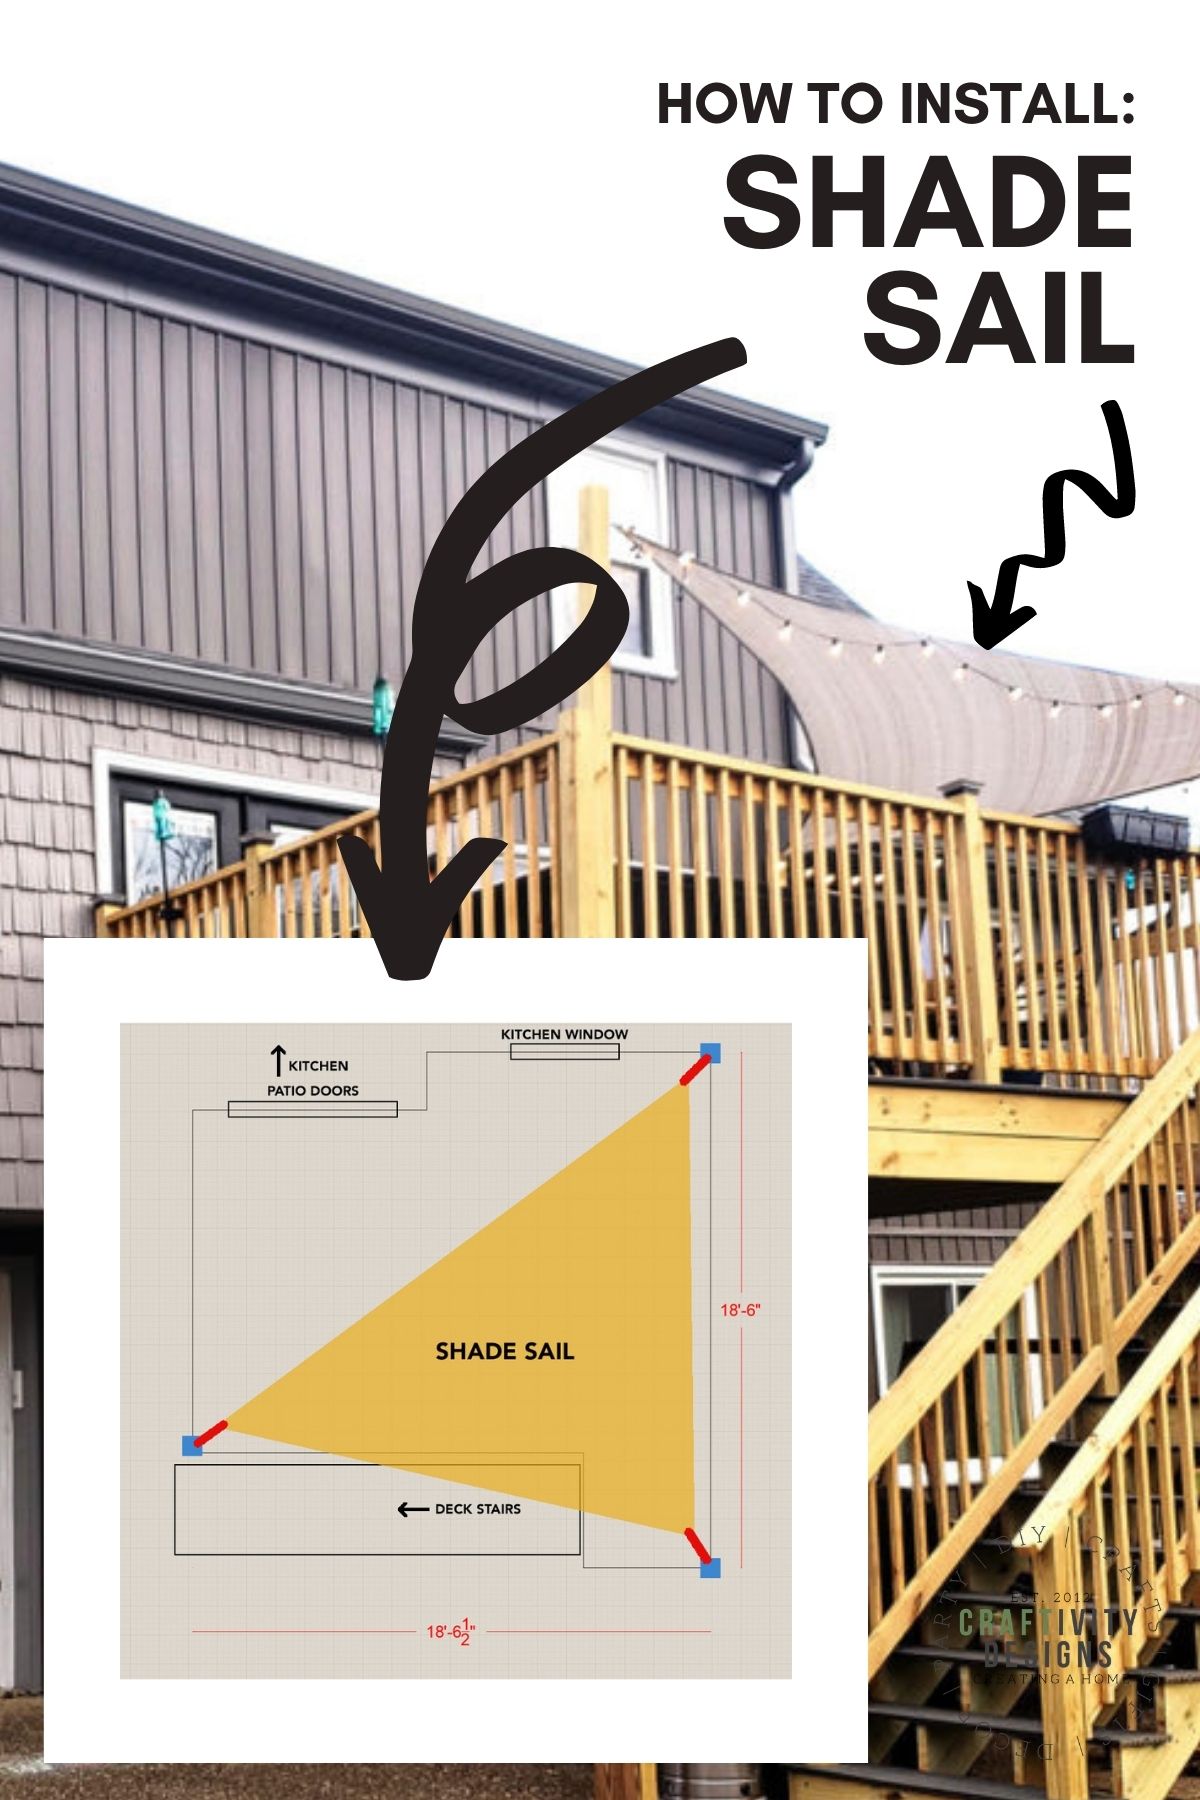
For example, our deck is square (18.5’x18.5’). Therefore, it may seem the obvious choice would a square shade sail.
However, we wanted to leave the portion of the deck nearest the house uncovered. Why? Sunlight through the patio door and kitchen window is a priority. Therefore, we wanted the sun shade to hang out away from the house.
This led us to choose a right angle triangle shade that covers half of the deck.
Note: Sun shades are not perfectly triangle, square, or rectangle. There are concave curves on each side of the shape which help make the shade sail taut.

Save Your Favorite Ideas & Get Updates
- Save your favorite content (from my site and thousands of other sites including: home, DIY, craft, recipe, and travel blogs)
- Receive my weekly newsletter
- Gain access to my Freebie Library
SIZE | How to Measure for a Shade Sail
To determine the correct shade sail size, you must first determine where it will be mounted. Even if you don’t yet have the mounts installed, you’ll need to know where the mounts will be located.
Measure the distance from each mounting point to the next mounting point. There are several ways to do this:
- For a good estimate, use measuring tape stretched from point to point.
- For an exact measurement, string twine from point to point. Mark the endpoints in the twine. Take the twine down, and measure the string length.
We used measuring tape initially, then used twine for a visual and to confirm our plans before purchasing the shade sail.
Once measured, buy a shade sail that is smaller than the overall dimensions. For example, our dimensions were 17’x17’x22.5′ and we purchased a 15’x15’x21′ shade.
You’ll also need to account for at least 8-12″ allowance between the mounting point and the sail. This may differ by shade sail, so make sure to confirm this distance before purchasing.
Therefore, the best size will follow this formula:
Distance between Mounting Posts – Allowance = Size of Sail
Example (using our post distance of 17’x17’x22.5′):
- 17′ between posts – 12″ allowance on each side = 15′
- 22.5′ between posts – 9″ allowance on each side = 21′
COLOR | Shade Sail Ideas
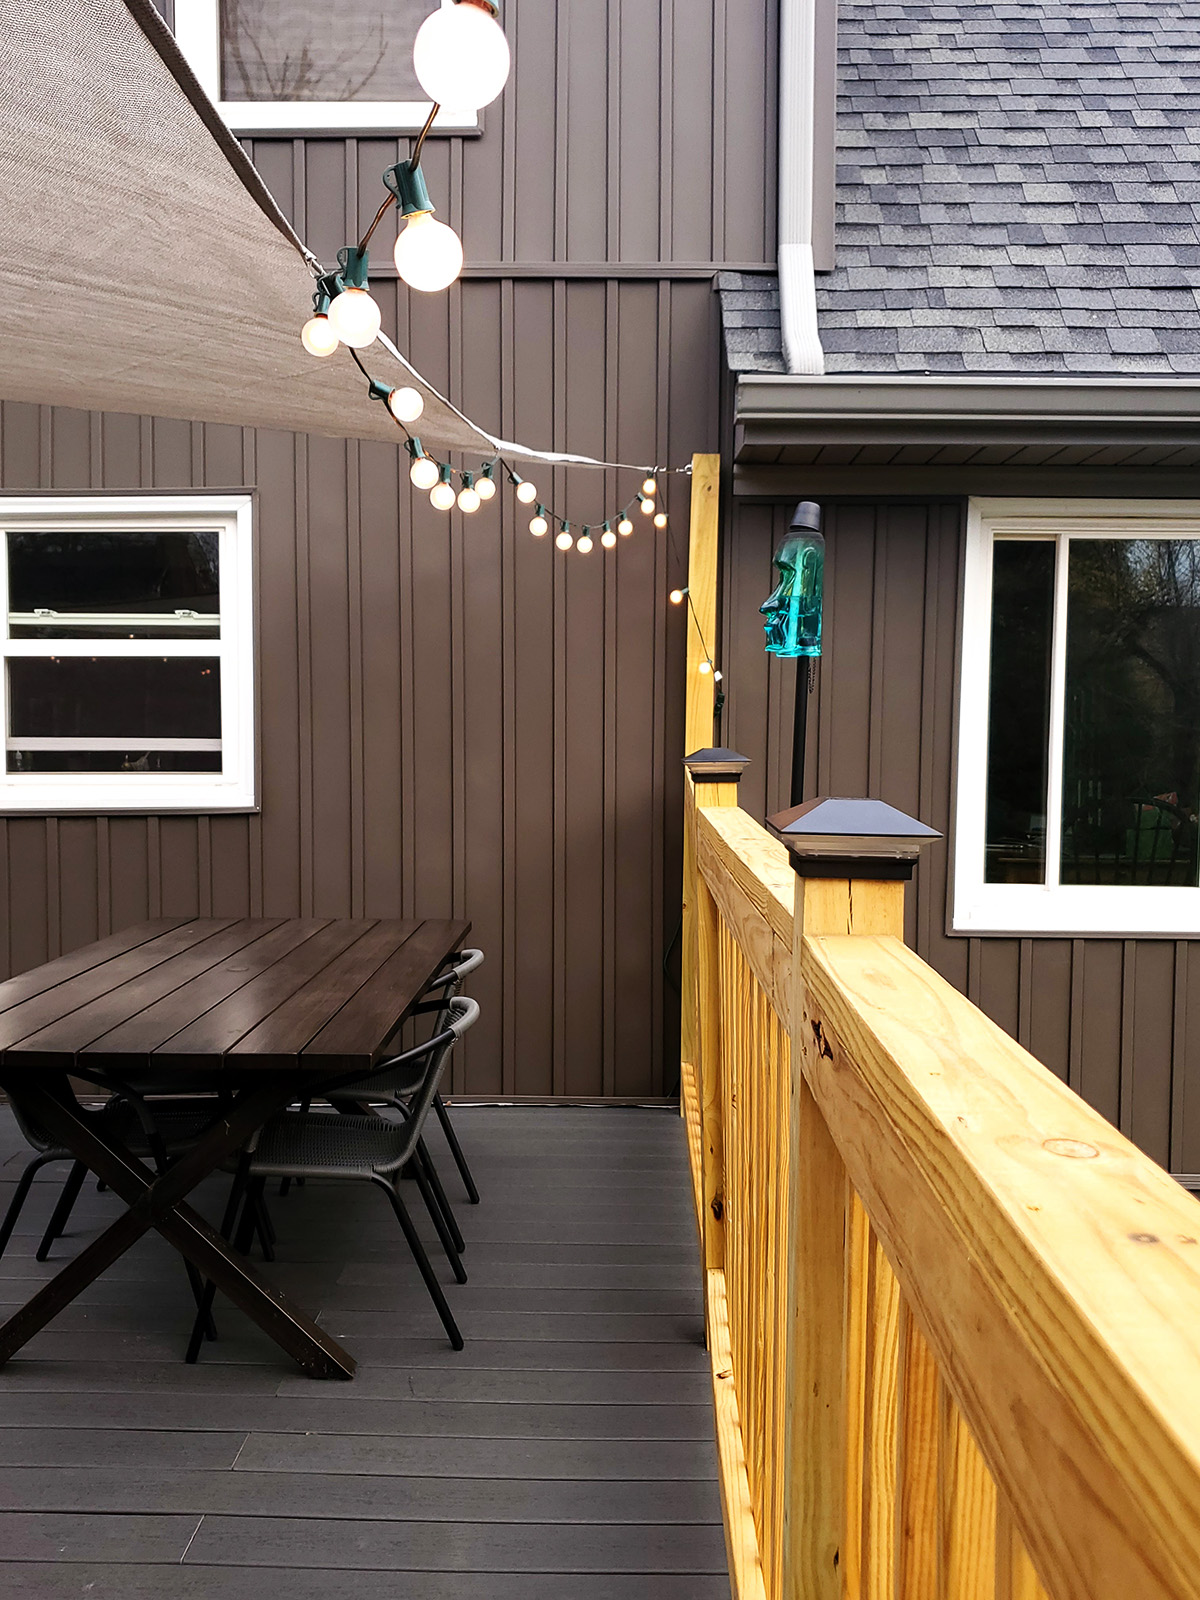
The best color shade sail will be based on personal preference. For our home, we choose a light gray-brown similar to our shake siding.
We weren’t looking to add contrast, so a muted tone made sense for our deck.
However, if we wanted it to be a focal point we could choose something like a clay red shade.
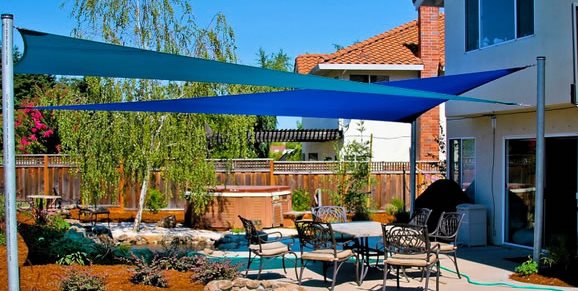
If the shade sail is covering a pool or poolside patio, you might choose a teal or aqua color.
Adding shade over a playground? Consider an energetic, playful color like orange.
Want your shade to blend into the natural surroundings? Try a forest green.
You don’t even have to stick to solids, there are prints, too! This striped blue and white would be perfect for a coastal home.
DIY Shade Sail Installation
Installing a shade sail occurs in 2 phases: mounting the posts and hanging the sail. Let’s discuss how to complete each process.
How to Mount a Shade Sail
Shade sails can be mounted to several materials:
- wood posts
- steel posts
- exterior of a home
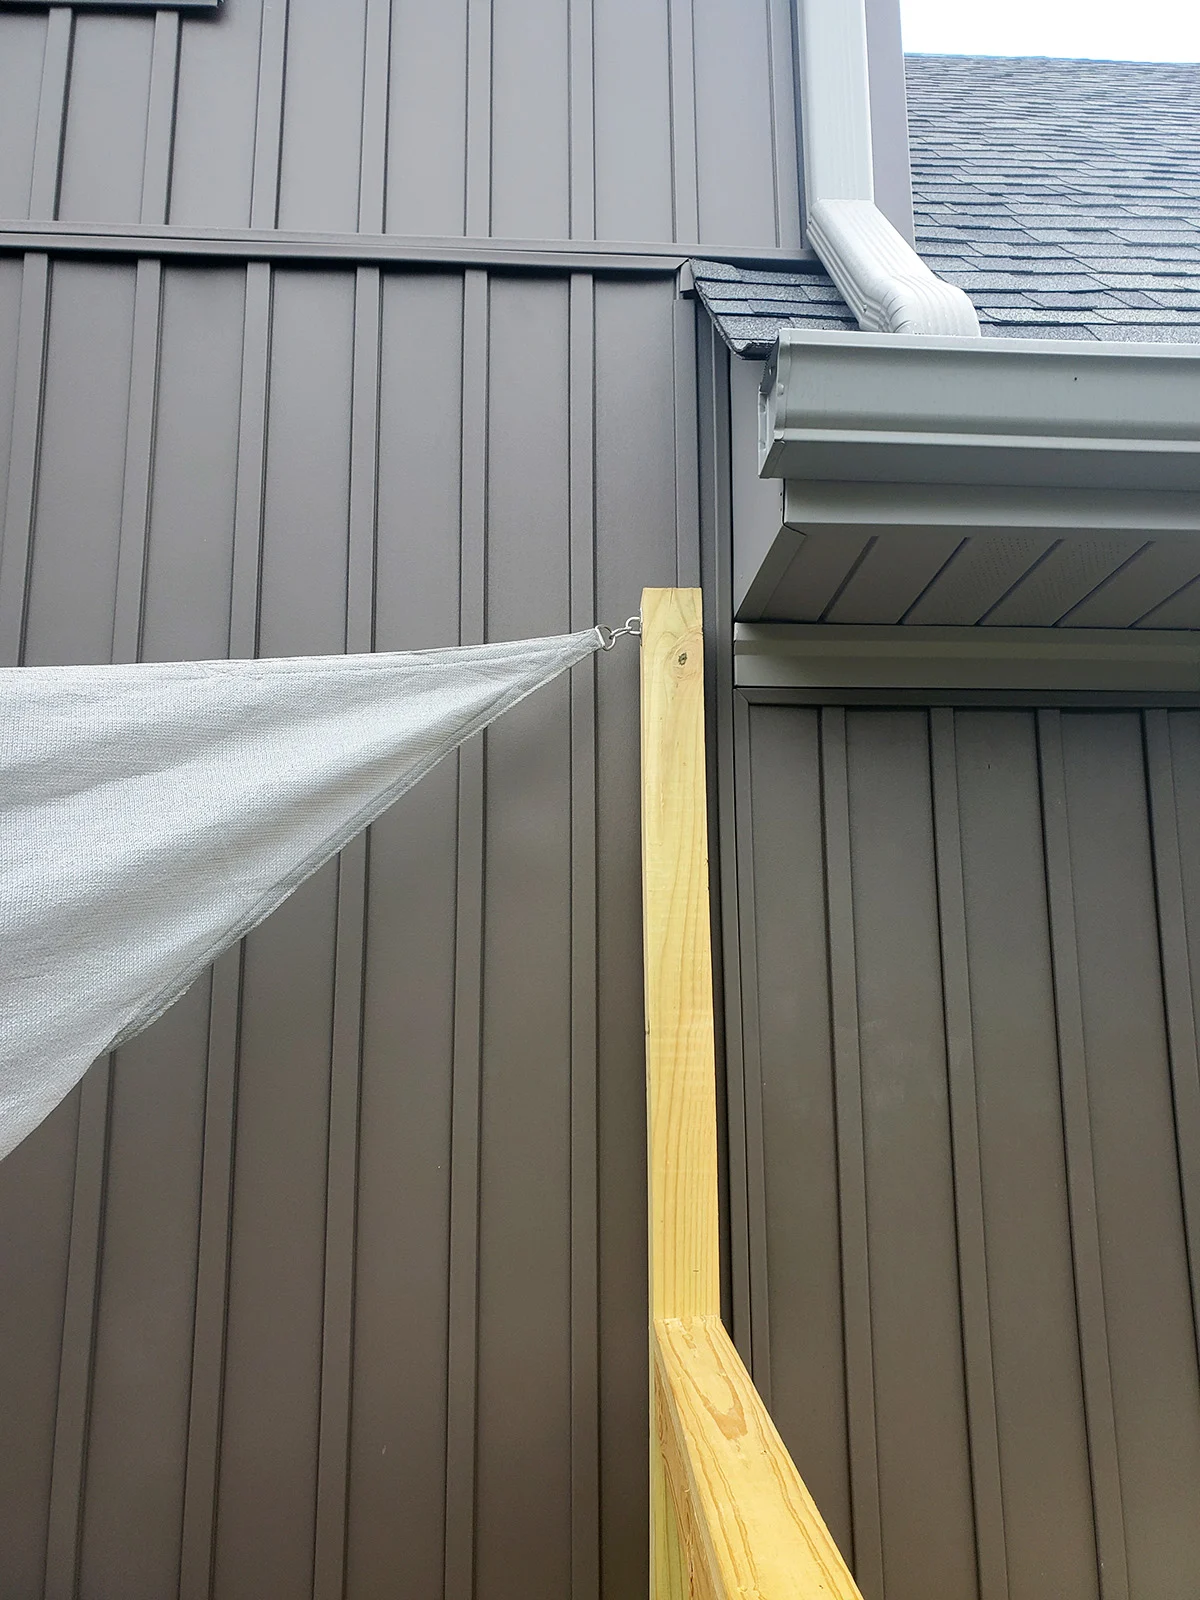
If you choose to mount it to the exterior of your home, be sure to mount it to a strong location (such as concrete, brick, etc.). The mounting point must withstand the force of strong winds without damaging your home.
We chose not to mount the shade sail to our house because we didn’t want to risk damaging our siding.
Mount to Wood Posts
Wood posts are the most affordable method for mounting shade sails. The wood posts can be:
- integrated into a deck or fence, or
- cemented into the ground.
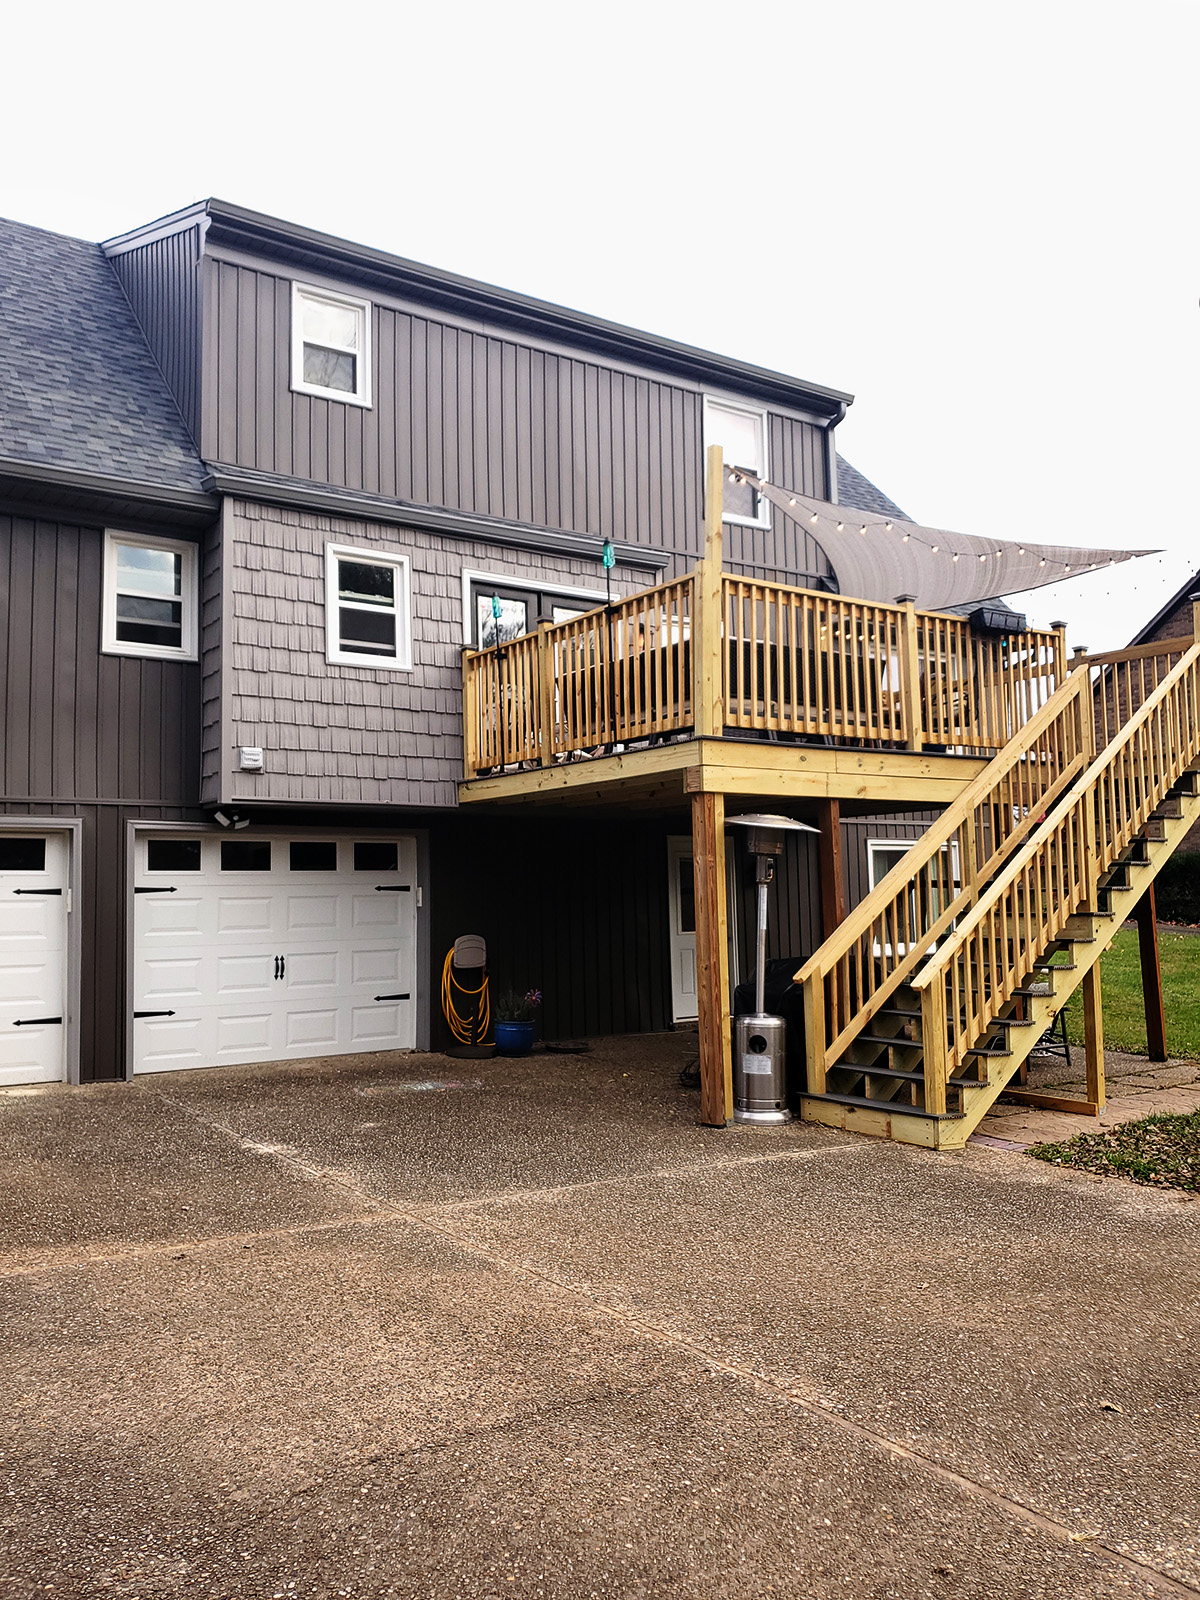
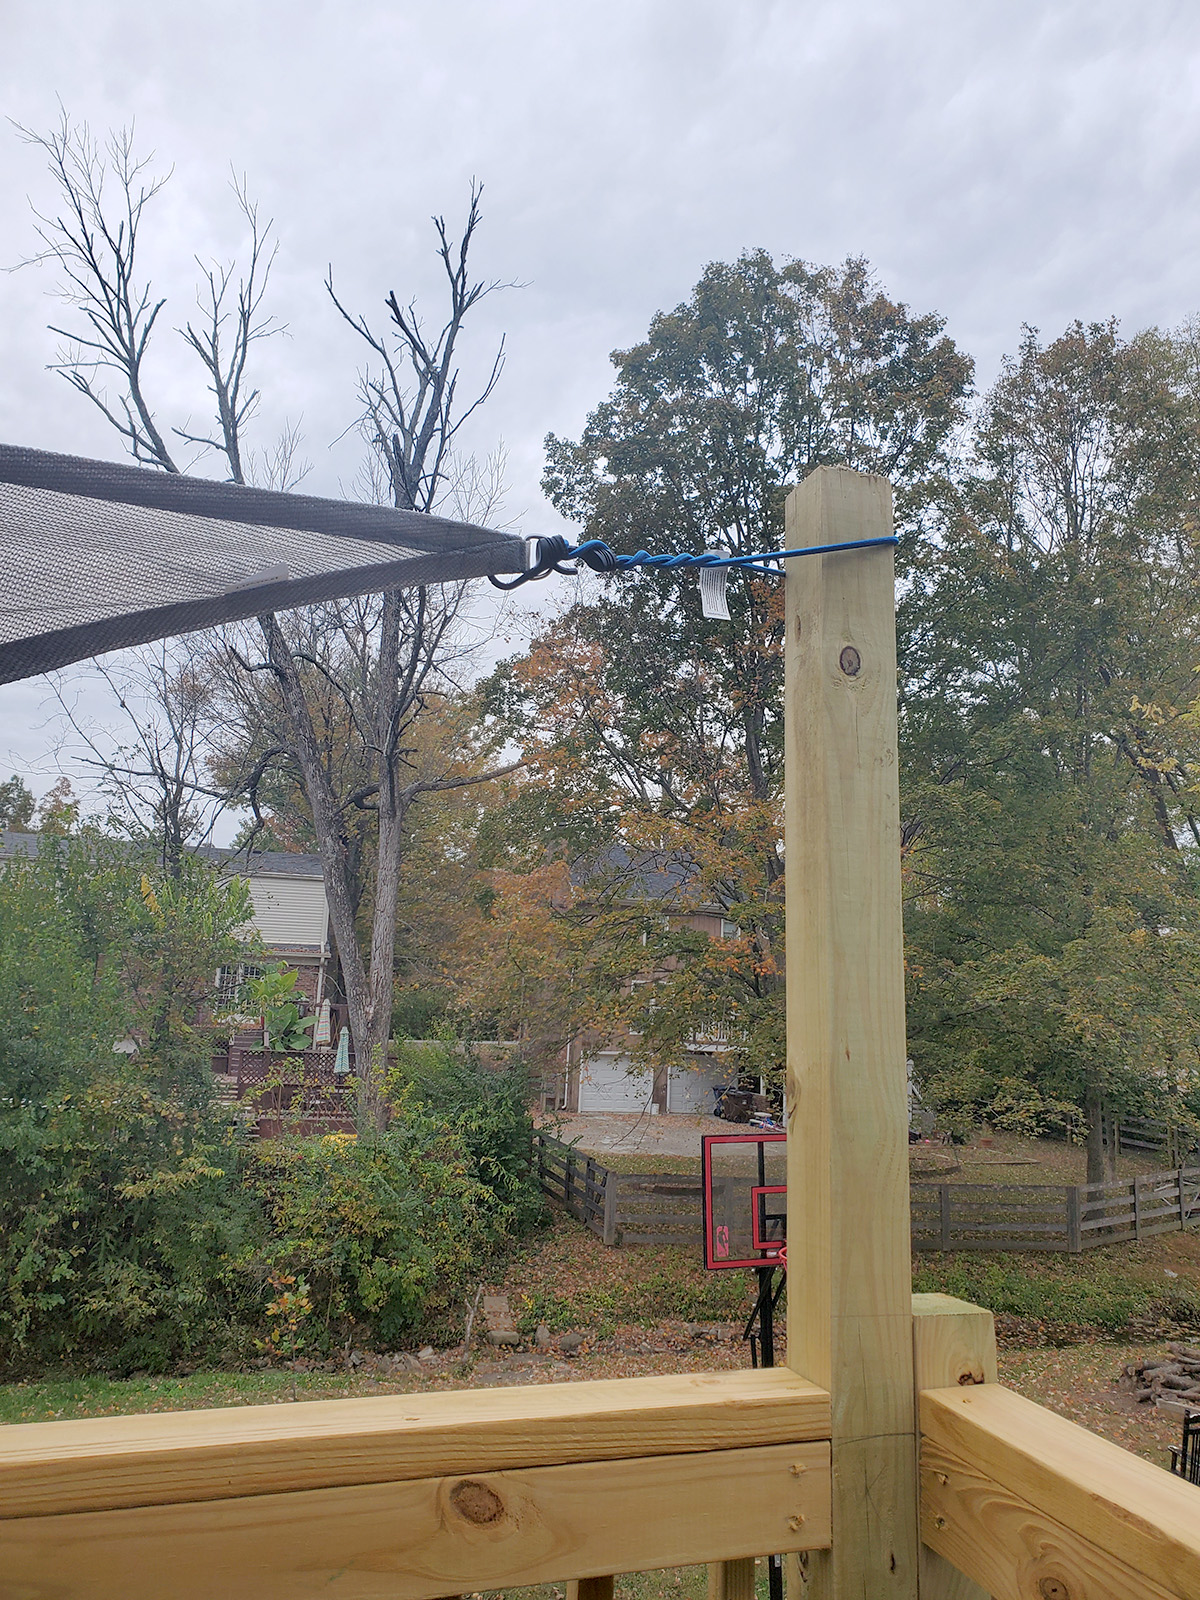
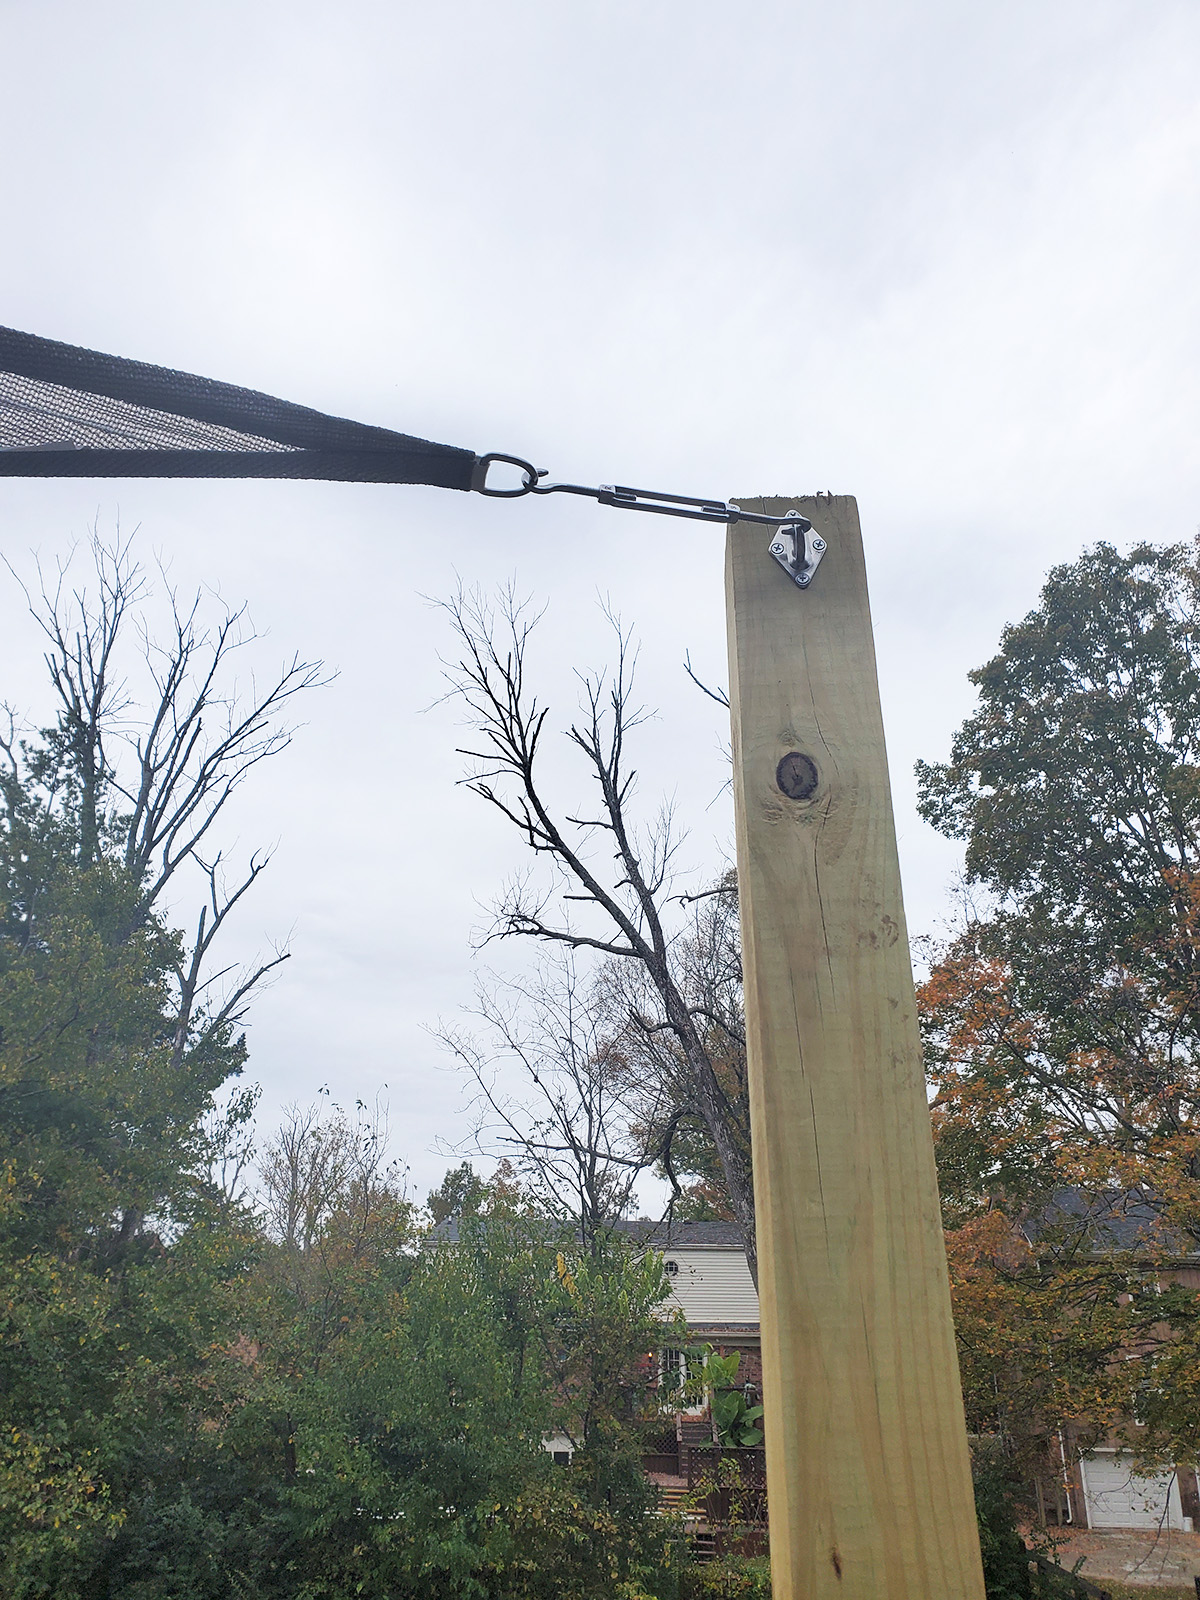
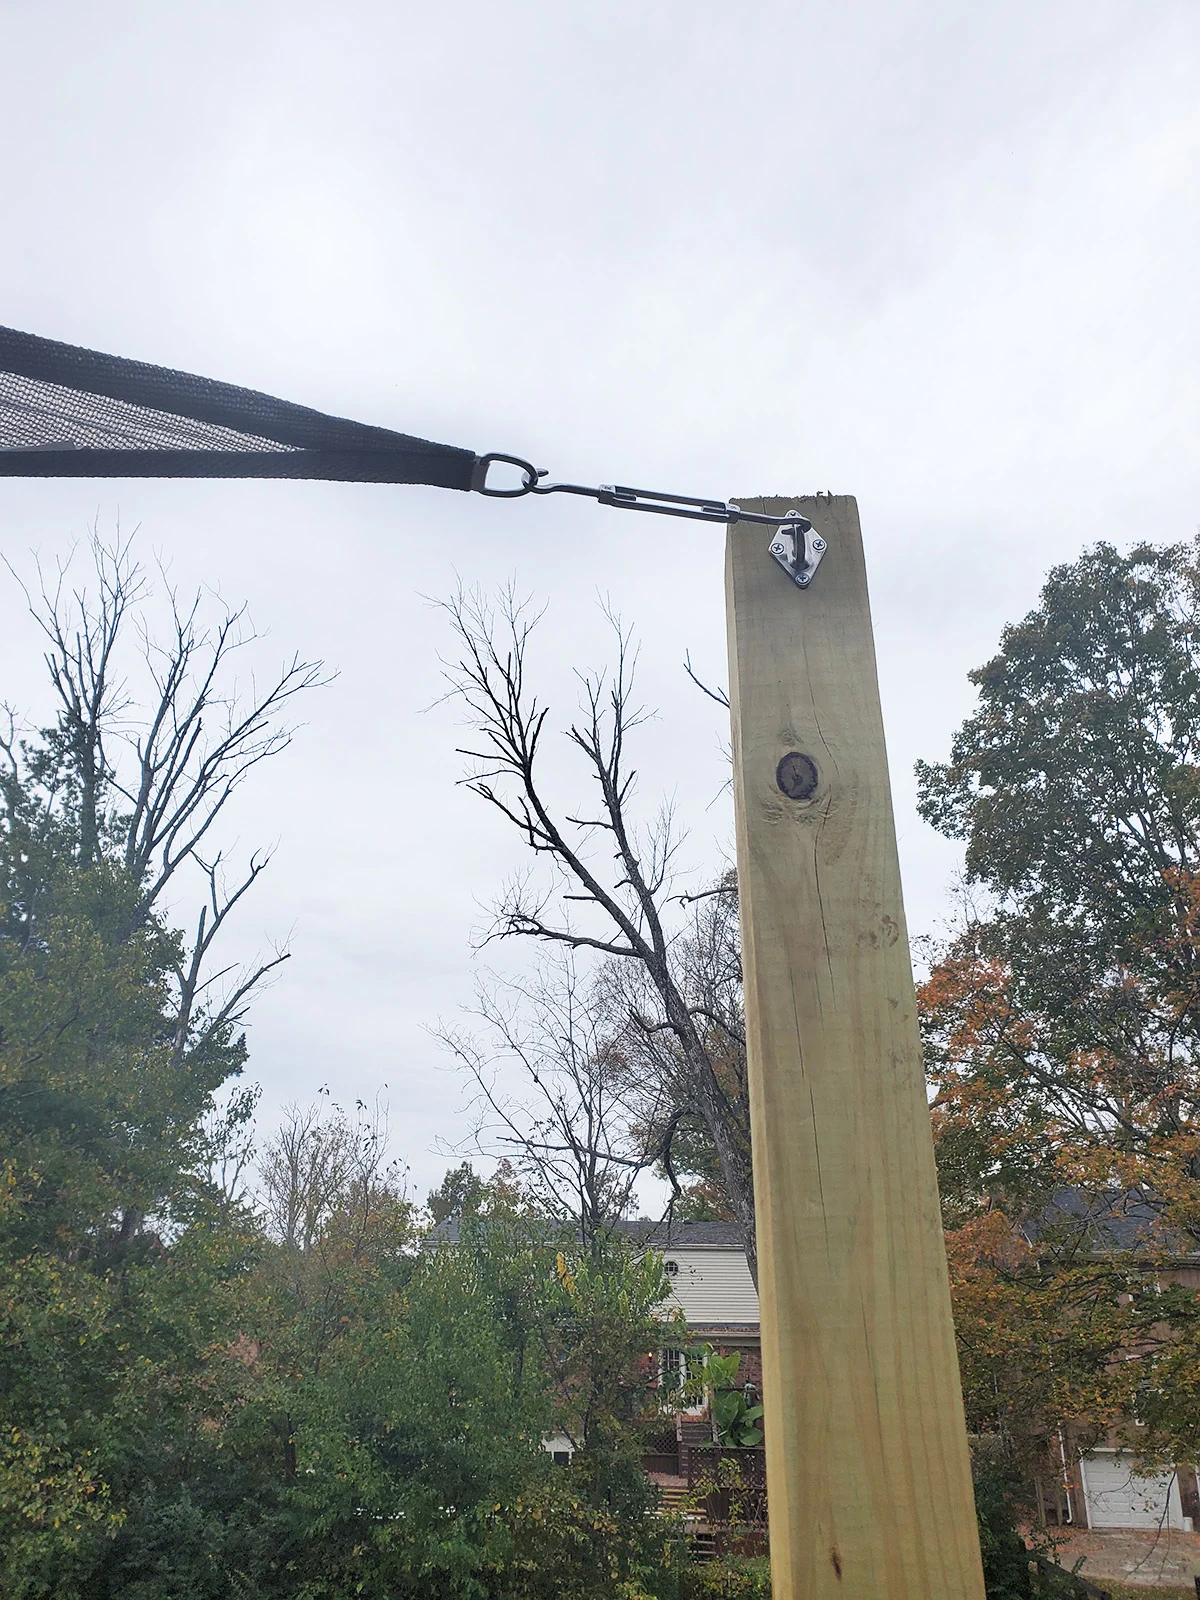
We chose 4×4 treated wood posts and installed them while renovating our deck. If we had not been rebuilding the deck, we could have attached wood posts to the outside of the deck frame.
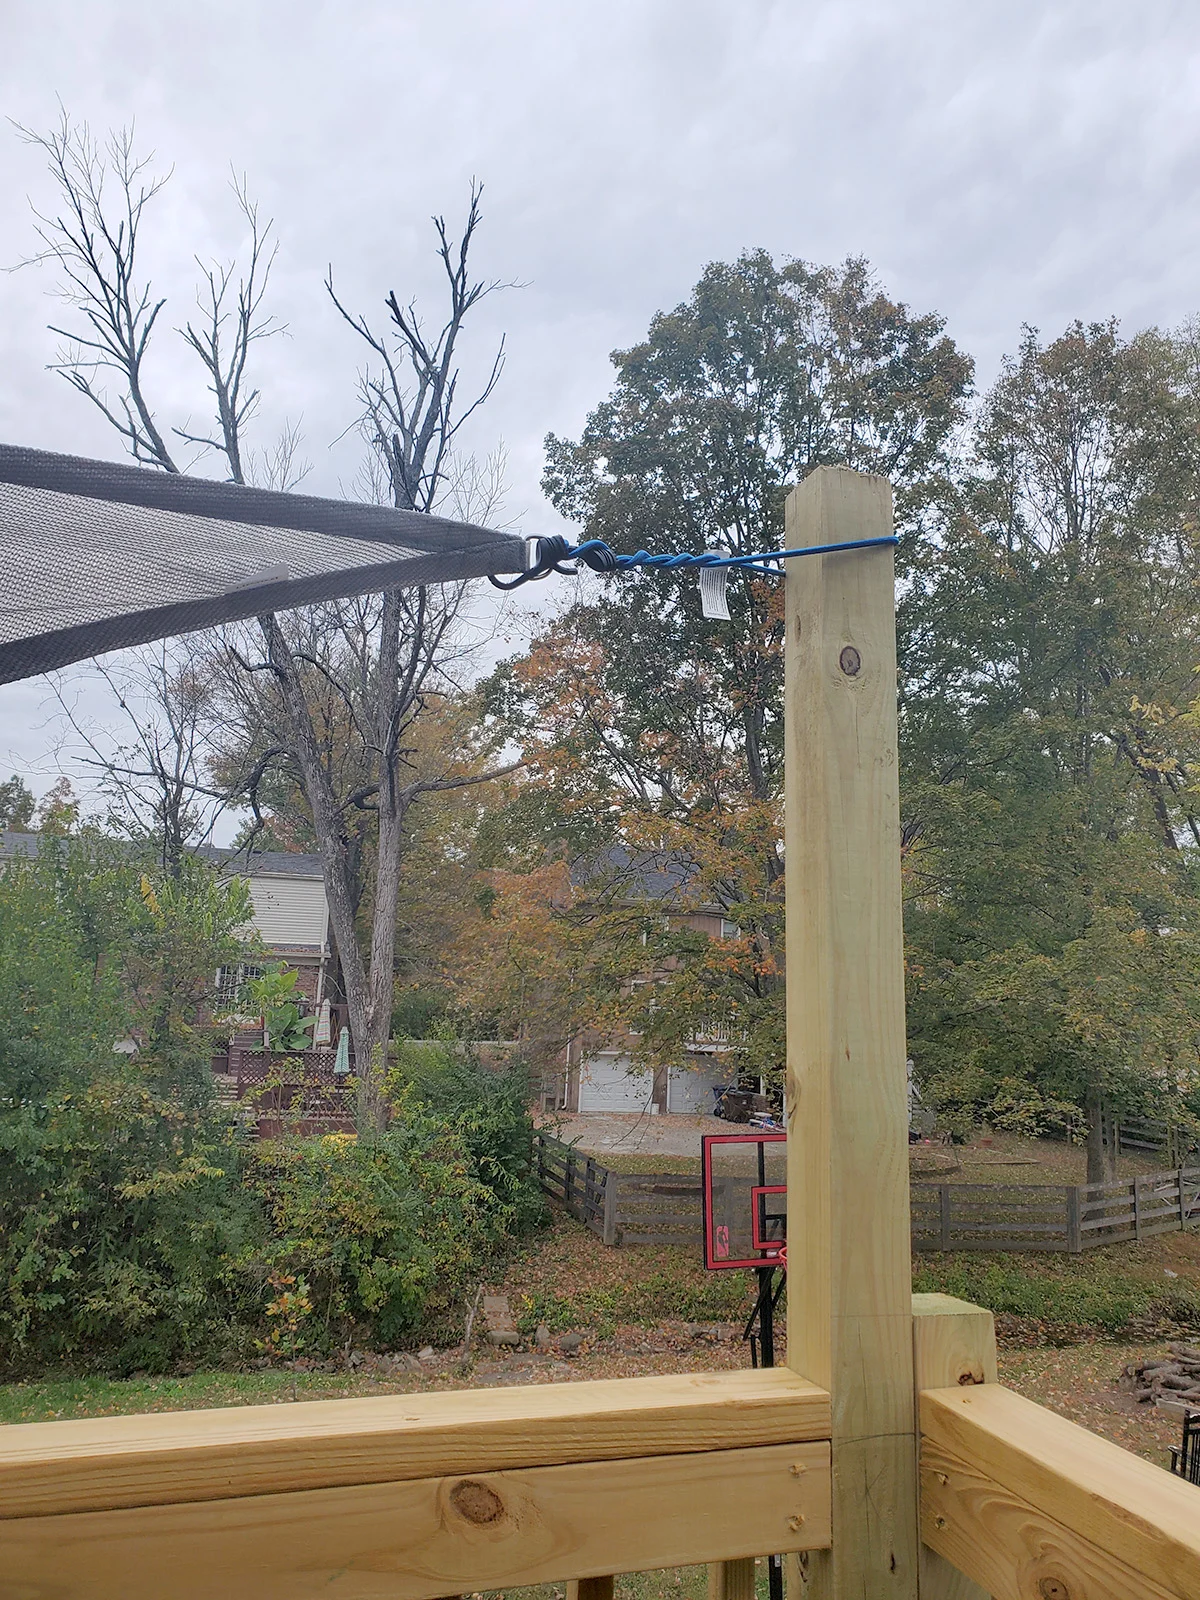
If you are using wood posts, purchase a steel hardware kit like this (make sure to select either triangle or square/rectangle, depending on your shade sail).
Important Note: These sets only come with 2 turnbuckles. There are carabiners for the other corner(s). We chose to go buy an extra turnbuckle for the 3rd corner. This isn’t necessary, but we felt it gave us more precise control to tighten the sail.
Mount to Steel Posts
Of course, there are disadvantages to wood posts (such as maintenance) which may lead you to select steel posts to mount a shade sail.
Similar to wood, metal posts can be:
- attached to deck or fence posts, or
- cemented into the ground.
Make sure to purchase posts that are durable and sturdy, such as galvanized steel.
Depending on the post size, you will need round connector clamps like this to attach the sails.
And, finally, like the wood hardware kit, you will still need the turnbuckles and carabiners.
Important Note: These sets only come with 2 turnbuckles. There are carabiners for the other corner(s). We chose to go buy an extra turnbuckle for the 3rd corner. This isn’t necessary, but we felt it gave us more precise control to tighten the sail.
How to Install a Shade Sail
In the printable card, you’ll find the directions for how to install a shade sail. After the card, review the FAQs and tips and tricks for additional info.

How to Install a Shade Sail
Learn how to install a shade sail. A DIY Shade Sail installation is a budget-friendly way to add shade over your deck or patio.
Materials
Sail
Posts
- Wood or Steel Posts
- Cement (for mounting in ground)
- Lag Bolts (for attaching posts to another structure)
Tools
- Drill
- Drill Bits
- Bungee Cords
- Pencil
- Measuring Tape
- Screwdriver
Instructions
Sail (Wood Posts)
- First, determine which direction rain should run off the shade sail.
- In that direction, the shade sail hardware must be mounted 2"-3" lower than the other mounting locations.
- Use a pencil to mark all of the mounting locations.
- Once marked, drill pilot holes into the wood posts.
- Attach the mounting hardware to the posts with a screwdriver.
- Next, use bungee cords to hang the sail temporarily. This simple trick will help you "hang" and center the sail quickly, taking some weight off the sail while you attach the turnbuckles, carabiners, rope, or chain. Remove the bungee cords as you permanently install each corner.
- Now, attach the sail in the highest one (if triangle) or two (if square/rectangle) corners with carabiners.

- Add rope if or chain if additional length is needed.
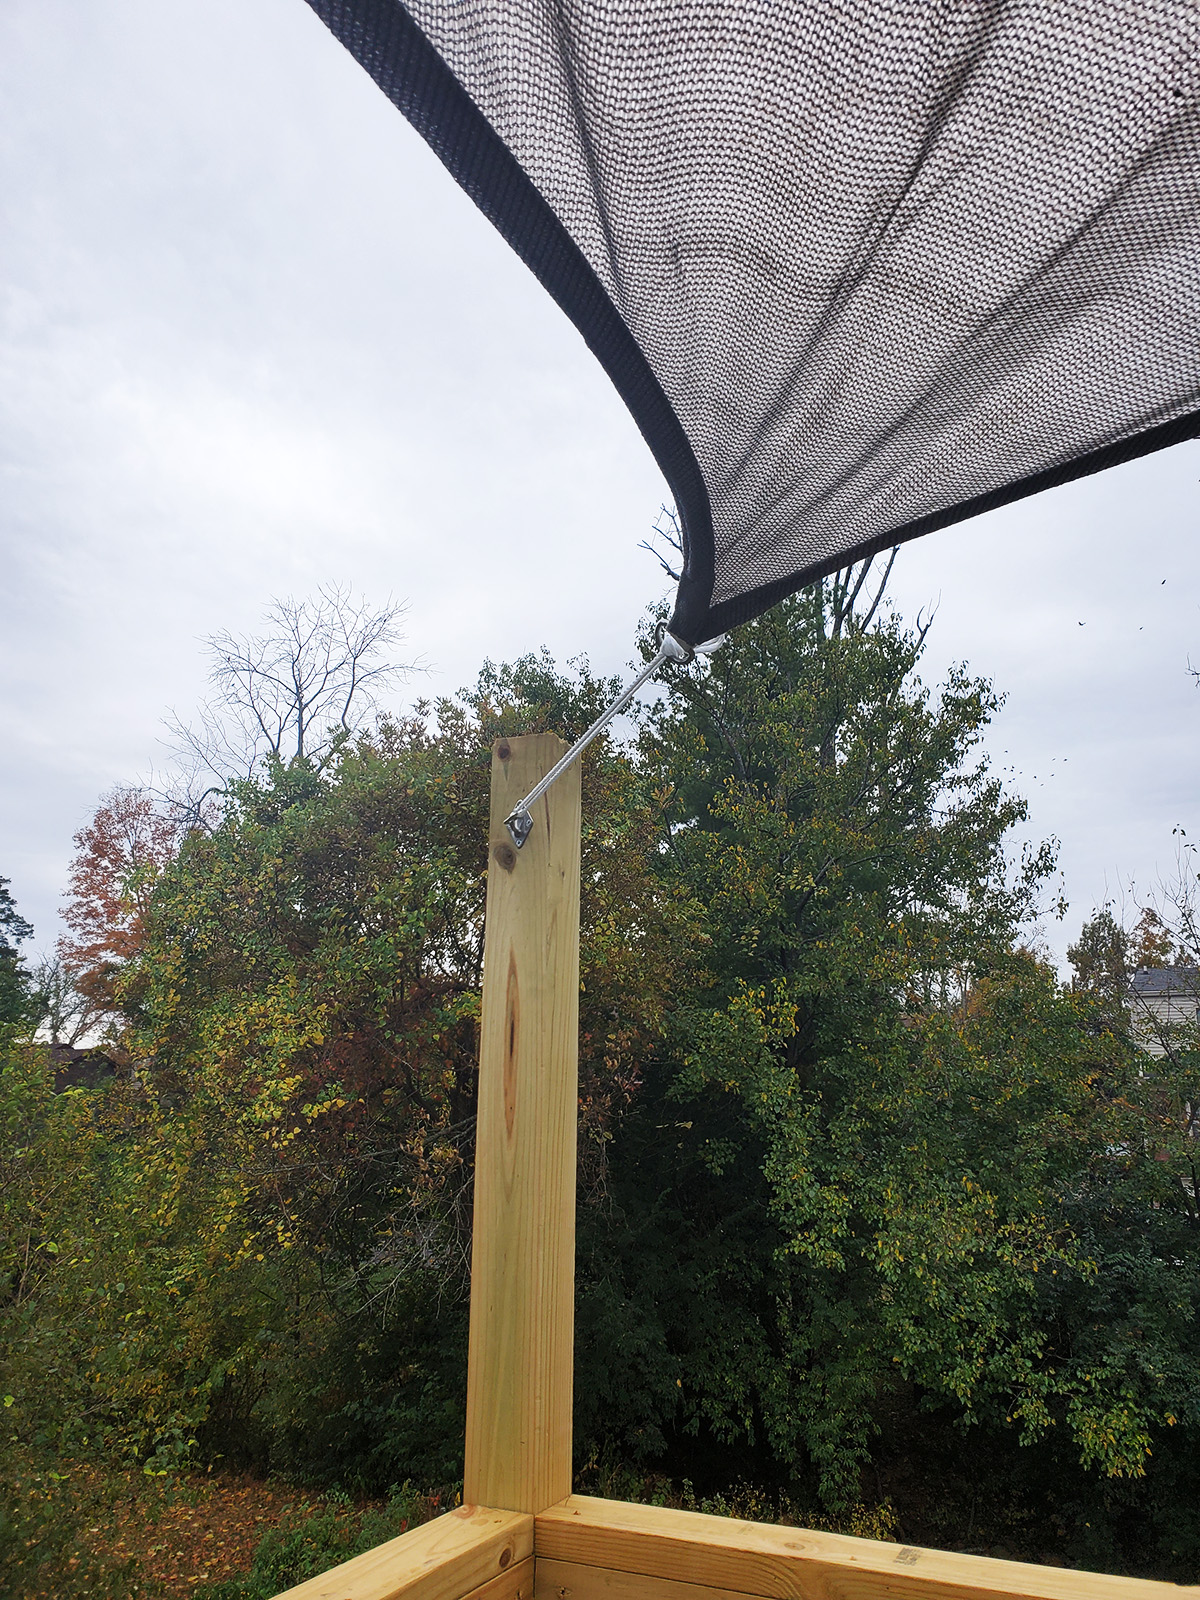
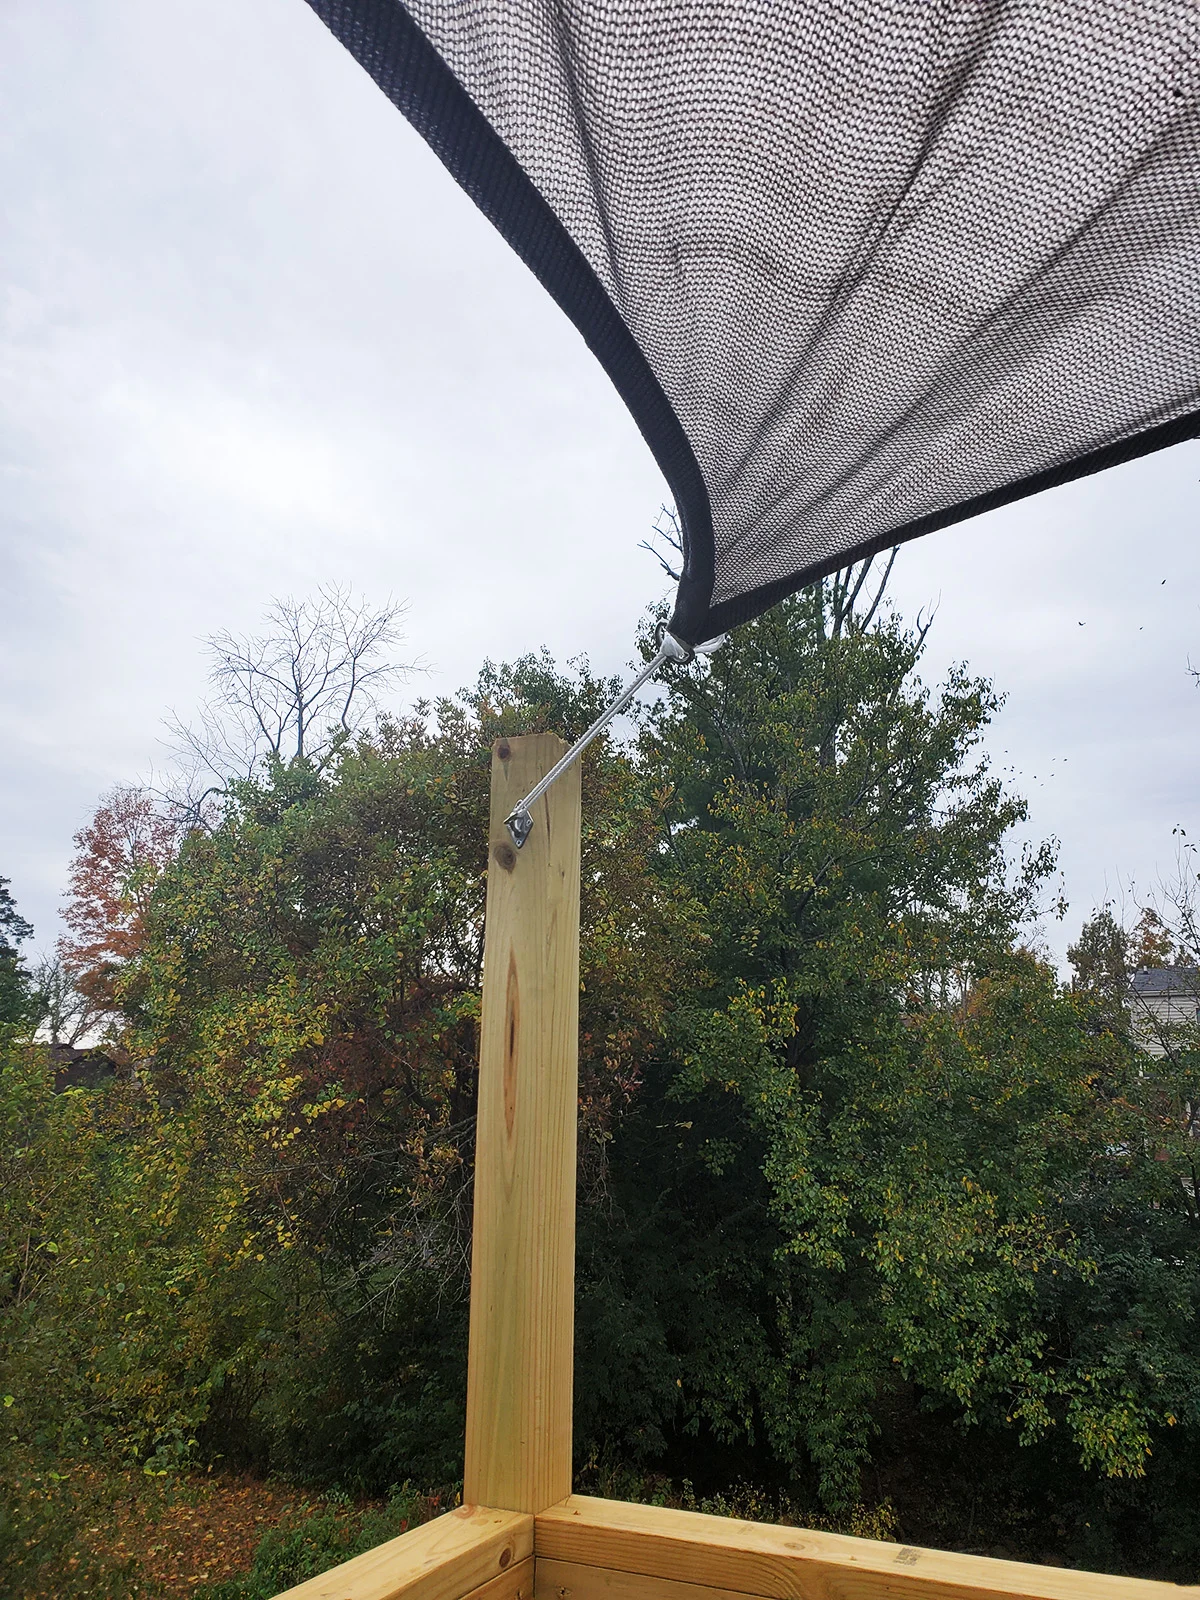
- Next, attach the sail at the other two points, with turnbuckles.
- Tighten the turnbuckles until each side is taut. Do NOT overtighten or the shade's fabric may weaken quicker.
Sail (Steel Posts)
- First, determine which direction rain should run off the shade sail.
- In that direction, the shade sail hardware must be mounted 2"-3" lower than the other mounting locations.
- Once the locations are defined, attach the round clamps to the steel posts at those points.
- From this point, the installation is identical to steps 6-10, above.
Posts
- If the mounting structure does not already exist (i.e. deck, exterior, fence), install wood or metal posts.
- If mounting wood or metal posts in the ground, fill the hole with the cement during installation.
- If mounting wood or metal posts to another structure (i.e. deck or fence), using sturdy hardware, such as lag bolts, to attach the posts.
Notes
Important Note: The hardware sets only come with 2 turnbuckles. There are carabiners for the other corner(s). We chose to go buy an extra turnbuckle for the 3rd corner. This isn't necessary, but we felt it gave us more precise control to tighten the sail.
FAQs
Q: How do I care for a Shade Sail?
A: While residential shade sails are designed for outside use – including high wind gusts – they are not necessarily designed to hold weight. Therefore, since we live in an area that gets snow and ice, we remove the shade during the winter.
Q: Can I mount a Shade Sail to the exterior of a home?
A: It depends. Shade sails can be mounted to the exterior of a home, but it is dependent on the material and structure. The mounting point must be sturdy enough to handle forces from wind without damaging your home.
Therefore, materials such as gutters, siding, and stucco are NOT suitable for mounting shade sails. Materials such as brick, concrete, and cement blocks are suitable for mounting shade sails.
Q: How tall should the posts be to mount a shade sail?
A: The posts for a shade sail should be 8 ft tall or higher. Since the hardware is slightly lower than the top of the post and the sail dips slightly in the center, the true sail height is 4-6″ below the post height.
Therefore, if the posts are 8.5 to 9 feet tall, the sail will actually be over 8 ft in the center. If the posts are 8 feet, the sail will be closer to 7.5 feet in the center.
Tips and Tricks
- When planning for a sun shade, use twine or string to measure for the sail. Not only will it provide an accurate measurement, but it will also give you a visual of the shade before installation.
- Use bungee cords to temporarily hang the shade sail and get it centered. This will give you a visual for the height of the sail and take some of the weight off the sail during installation.
- While hardware kits only include 2 turnbuckles, we found that 3 turnbuckles (for a triangle sail) allowed us to more precisely tighten the shade sail.
Like this DIY project for exteriors? Pin it to save it!

Jillian
Monday 17th of April 2023
Hi, great tutorial! What did you use to attach the lights to the sail?
Lora Green
Wednesday 19th of April 2023
Hi Jillian! Great question! We used stainless steel clips like this: https://amzn.to/3MVVstK (affiliate link).
20+ Tiki Decor Ideas (inspired by Disney's Enchanted Tiki Room) – Craftivity Designs
Monday 16th of May 2022
[…] How to DIY a Shade Sail Installation […]
Cheryl W.
Tuesday 3rd of May 2022
I am unable to put in new posts, but would like to know if I can attach a sail shade to the fascia board on my home? I believe it is a 2x4...if I can, should I add a piece if 1x2 or 1x4 to the backside for additional support? Thank you for your time!
Lora Green
Thursday 5th of May 2022
Hi Cheryl! That's a great question. I'm not an expert on building materials, so I've got a few resources for you. First, the Shade Sail Installation Instructions from Cool-Off, on page 3, cover your specific question: https://www.cool-off.com/media/wysiwyg/cooloff/pdf/Shade_Sail_Instructions.pdf . Second, this trim company discusses fascia board strength (supports gutters filled with water, snow, etc.): https://belcofp.com/fascia-board-trim/ . As an additional note, with a shade sail you are likely concerned about two things: wind and snow/ice. This will depend on your climate, of course, in terms of whether you get snow/ice and whether you get a lot of wind. We live in Kentucky and have had some pretty strong winds. But, of course, they aren't hurricane force winds, since we live in the Midwest. The shade sail has been blown strongly, but it has not torn or caused any damage to our 4x4 wood posts. However, we didn't take our shade sail down for winter quick enough and snow landed on it. The snow was heavy and did bend one of our 4x4 posts slightly. After that experience, we've made it a priority to pull the shade sail down before the first snow. Hope that info helps you decide what to do!
How to Make an Easy DIY Macrame Plant Hanger for Outdoors – Craftivity Designs
Wednesday 16th of February 2022
[…] How to DIY a Shade Sail Installation […]
Peter
Friday 13th of August 2021
Great tutorial! Only question I have is when installing the wood posts in the ground how deep do I need to dig? I feel like 2 feet would be enough but have no idea really
Lora Green
Friday 13th of August 2021
That is a great question. Our posts are part of our deck's structure and are attached to the concrete that makes up the patio below. Therefore, we did not dig into the ground for our wood posts. I'd recommend checking out these two documents/sites, which might help: https://www.cool-off.com/media/wysiwyg/cooloff/pdf/Shade_Sail_Instructions.pdf & https://shadematters.com.au/blogs/news/shade-sails-brisbane-installation-tips . Their recommendations are fairly similar, and what I probably would have used as a guide if we had installed our wood posts in the ground. Hope that helps!