
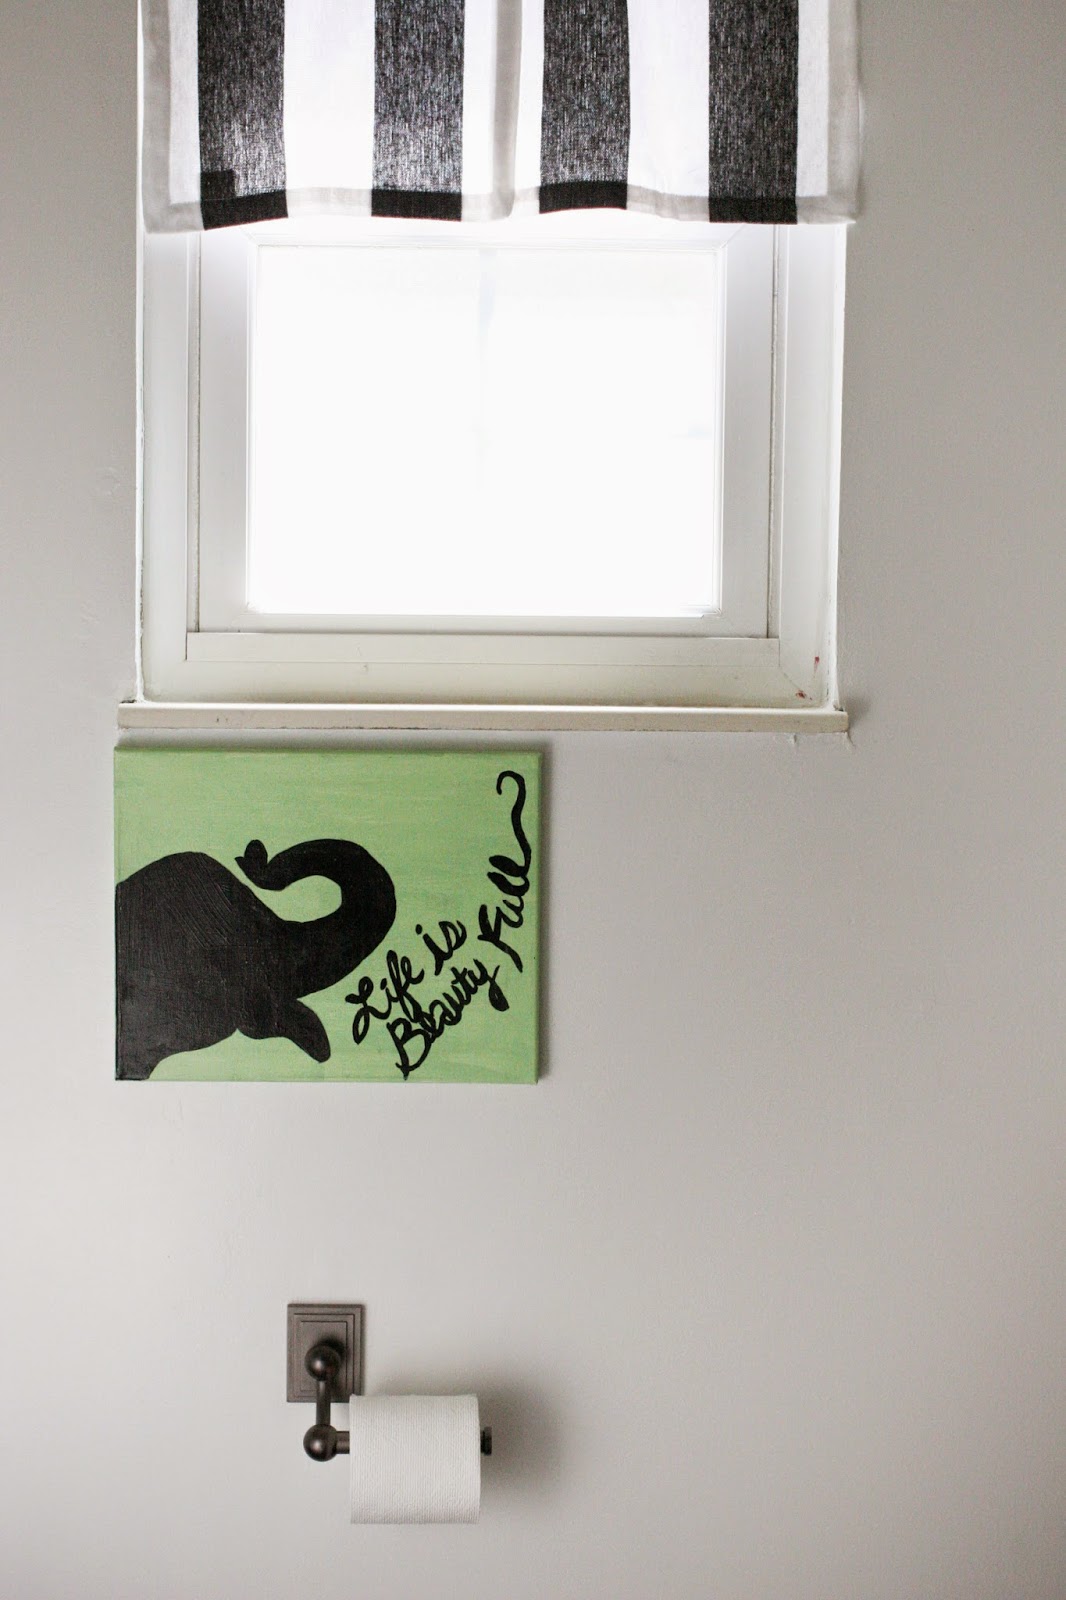
We’ve got a small window in our bathroom. I love the light it provides; but I’ve been kind of puzzled as to how to finish it off. It seems silly to cover much of it {due to the light} and it doesn’t need to be functional since the glass is frosted.
While shopping at Home Goods one day, I came across a set of four striped black and white place-mats for $8. At the time, I didn’t have the window’s measurements with me; but I was pretty confident I’d only need one or two of the mats to create a simple window shade. The black and white fit the bathroom design plan and I always love stripes.
I don’t own a sewing machine, so I decided to try a product called Heat-n-Bond {**all amazon links are affiliate links} that I’ve heard bloggers rave about for no-sew projects. Sorry about the grainy phone photos — this was a nap time project and I didn’t fool with grabbing the camera.


Step #2: Place a strip of the Heat-n-Bond along the underside edge of the place-mat. Tear it off at the appropriate length.

Step #3: Iron the Heat-n-Bond in place, causing the glue/adhesive to attach to the fabric.

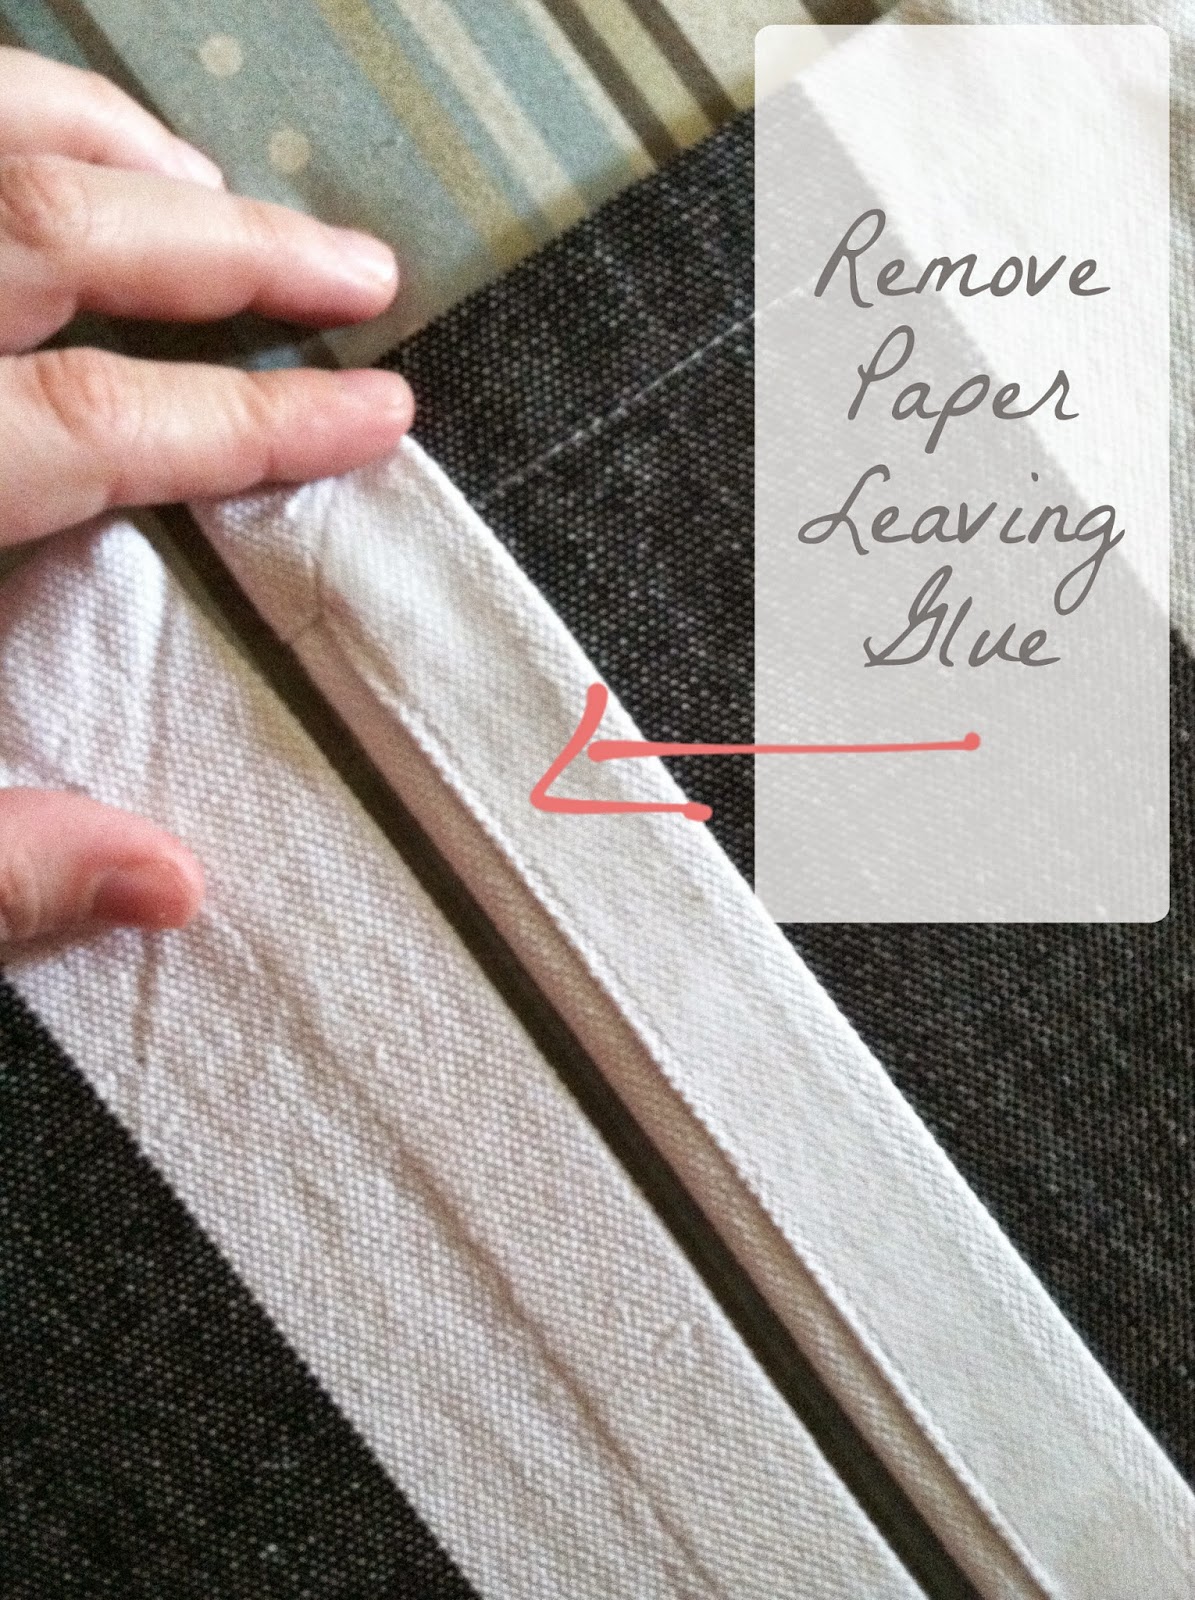
Step #4: Peel off the paper backing, revealing just the glue/adhesive on the fabric.
Step #5: Press the two place-mats together at this seam and iron until they are fully attached.

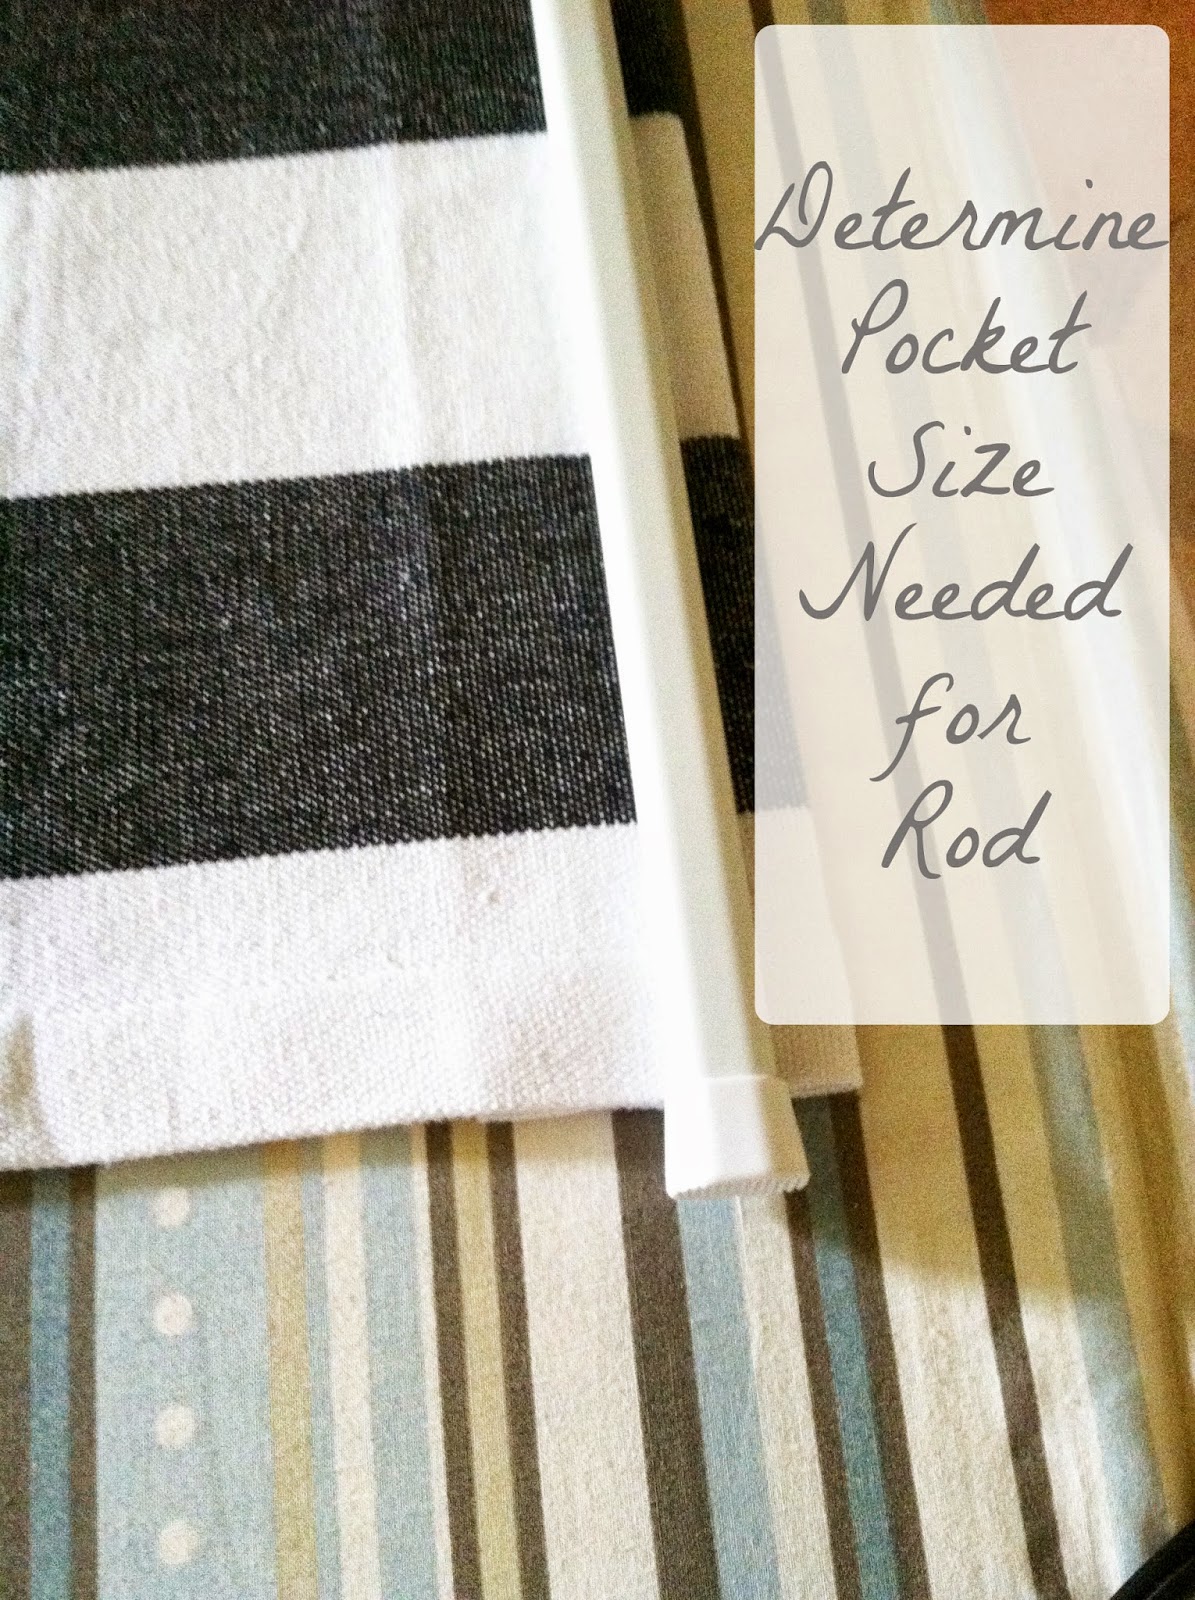
Step #6: Determine the size of the curtain rod pocket along the top of the shade.
Step #7: Complete steps 1-5 again, to hem the curtain rod pocket.
Step #8: Slide the curtain rod into the pocket.

Since I completed this window shade, I’ve used the Heat-n-Bond product for another project as well. The instructions will tell you what temperature to set the iron at, and how long to press the adhesive. I found myself pressing a little extra sometimes; but besides that, it was was very easy to use.

My other option would be a basic bamboo shade, like this Photoshop version:


What do you think?? I welcome your honest opinions!
UPDATE: Thanks so much for your opinions!! Almost everyone who participated seemed to love the black and white {including my husband!}, so that’s what we chose. The completed bathroom renovation, including this window treatment, can be seen here!
You can vote for one of the two options below and I’d love it if you would! If you are reading this in an email, you may have to open this post in a browser first here.
Create your free online surveys with SurveyMonkey, the world’s leading questionnaire tool.
Craftivity Designs
Thursday 21st of August 2014
Thanks! I have thought about trim but I keep getting stuck on a couple things
(1) I'd love a simple craftsman style trim -- however the entire house has nice trim and crown molding; but it is fairly traditional in style. Not craftsman at all. So, I feel like I ought to use that style of trim if I trim it out.
(2) Also, the trim throughout the house is cream, not white. I've left the base boards and door in the bathroom cream -- because at this point I'd rather keep the whole house cohesive. Even with all the true-white in the room, the cream trim looks fine. However, I'm not sure I'd feel the same about it in the middle of the wall around that window? So I'm stuck there, too.
I have considered trimming it in a contrasting color, like maybe grey or black. Any thoughts or suggestions -- I'll take them! :)
*colette*
Thursday 21st of August 2014
I love the black and white... so unique and creative! Have you thought about adding white trim around the window? I feel like that might make it pop even more.