Earlier this week I shared some inspiration for my entry. This is one of my favorites:

Disclosure: This page includes affiliate links.
I especially love that rug. I have always wanted to try out some of the painted rug tutorials I have seen on Pinterest & around the Blogosphere. So since I’m working on my entry, and love this photo of an old bench atop a bold-print rug… it seemed it was time to try the technique out.
And, boy, am I glad I did.
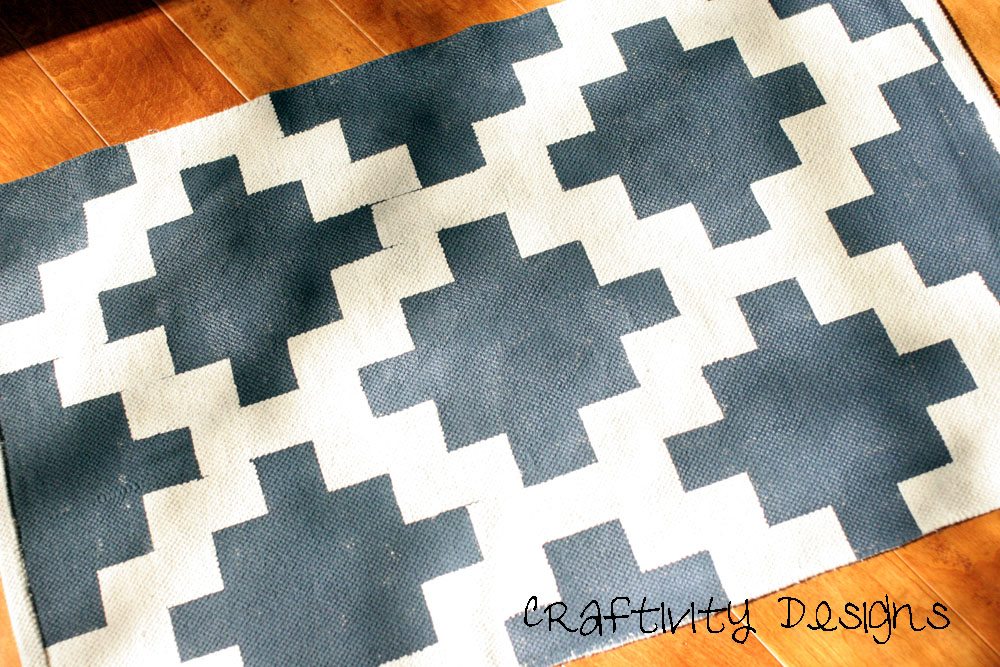
The results of this project make me so excited (I think of all the endless rug painting possibilities!!!) And it wasn’t too difficult to accomplish.
Here are some of the tutorials I used as a guide:
- Pink Geometric Rug from Adentures of an Almost 40 Year Old Intern
- How to Paint a Rug from Tatertots & Jello
- Tips for Painting Fabric from Infarrantly Creative
I didn’t follow any one tutorial exactly, and I made several mistakes, so maybe I should follow a tutorial next time 🙂
One my favorite things about this project is that I used a rug I already owned.
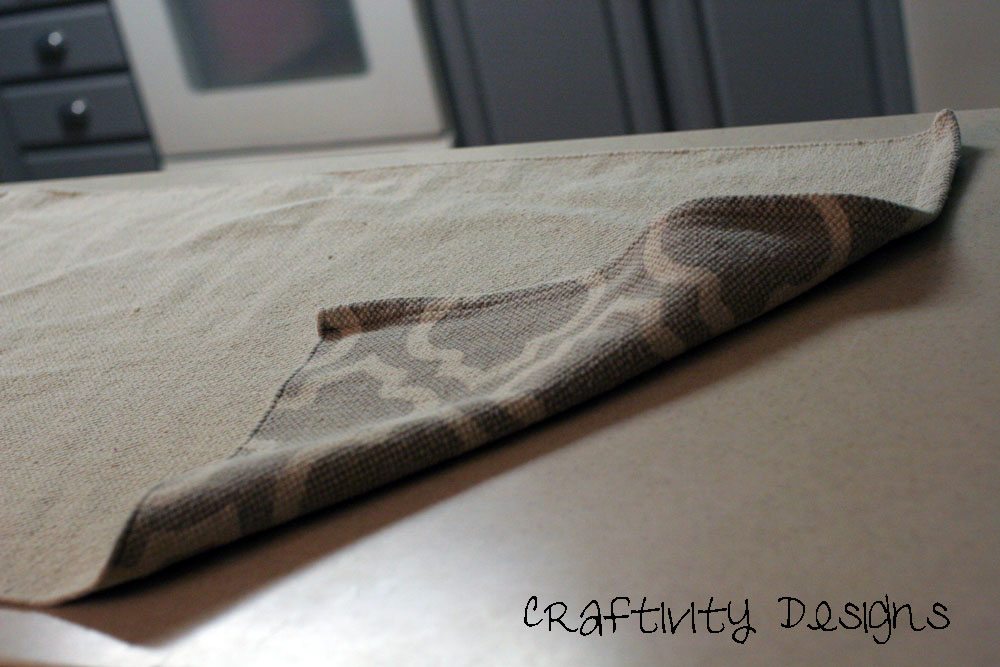
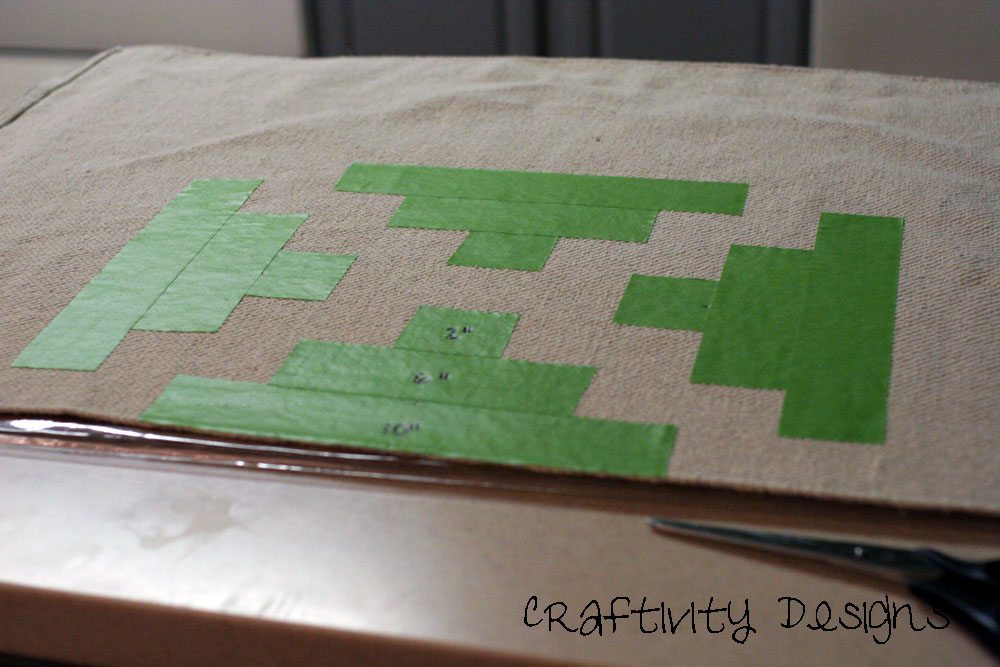
The backside of the rug is solid, so I decided to use it for my 1st painted rug project. I sketched out my design and then measured to find the center of the rug.

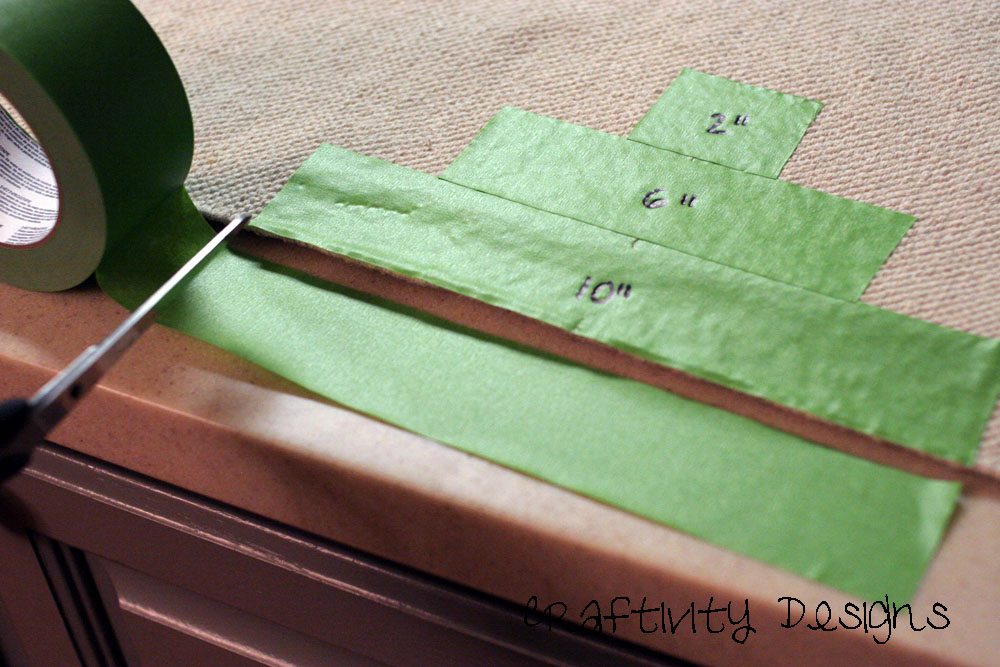
Based on my drawing I cut 3 pieces of 2″ Frog Tape at the lengths I would need for each piece of the pattern.

After cutting those 3 pieces, I cut a whole lot more, again, based on my sketch.
My kitchen looked like this:
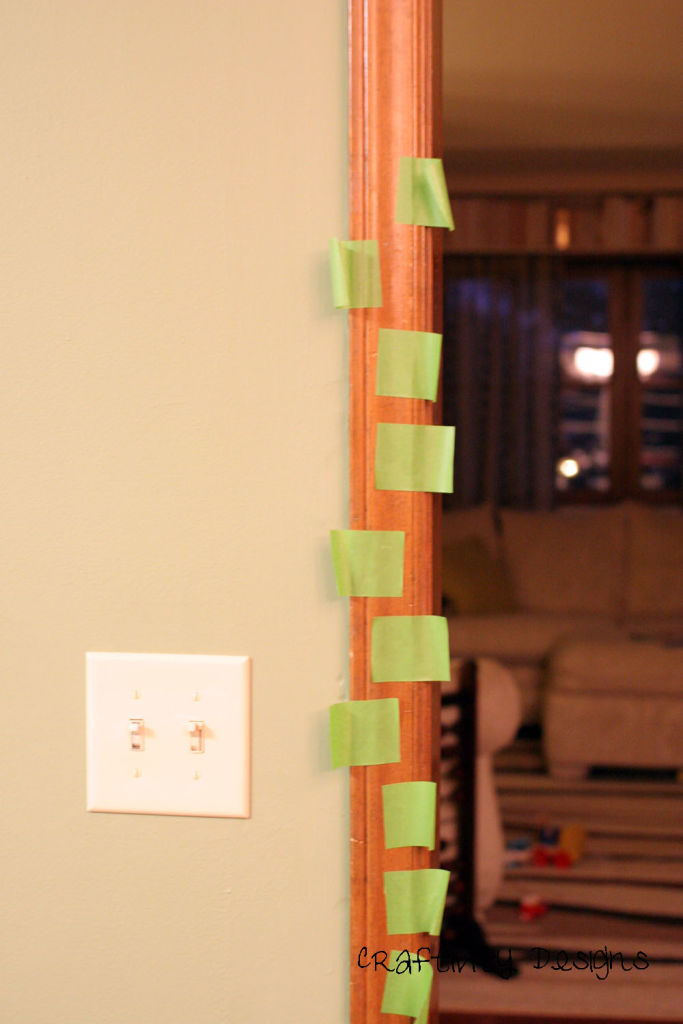
However, when I was about 75% done laying tape, I realized I had laid my tape in the spots I wanted the paint (boo hoo!).
But it turned out to be a good thing, because my second method straightened out my pattern a bit.
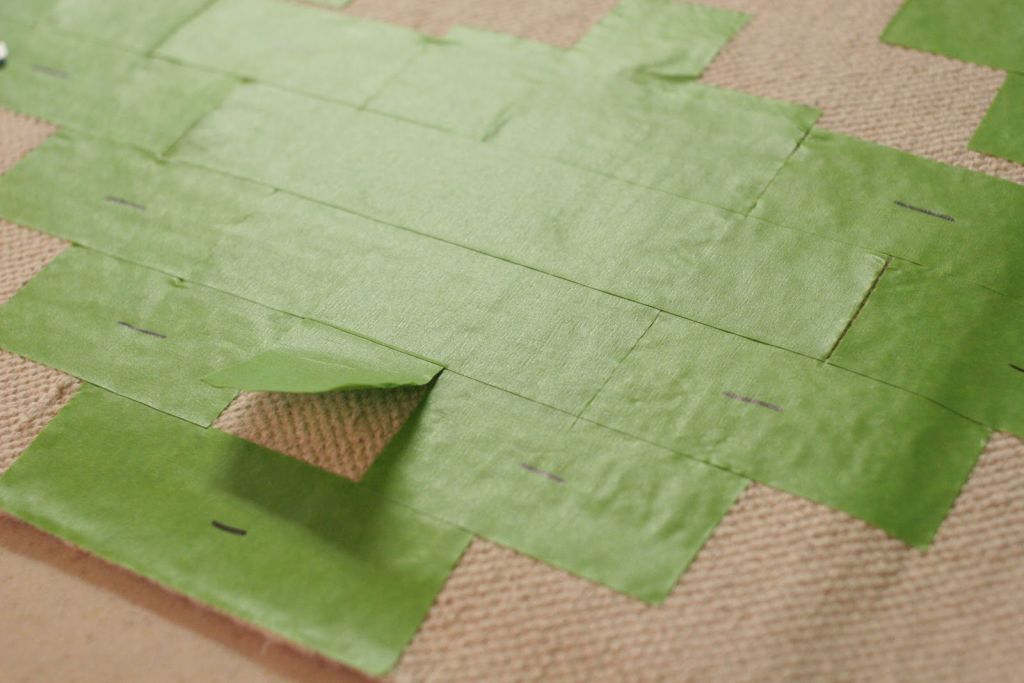
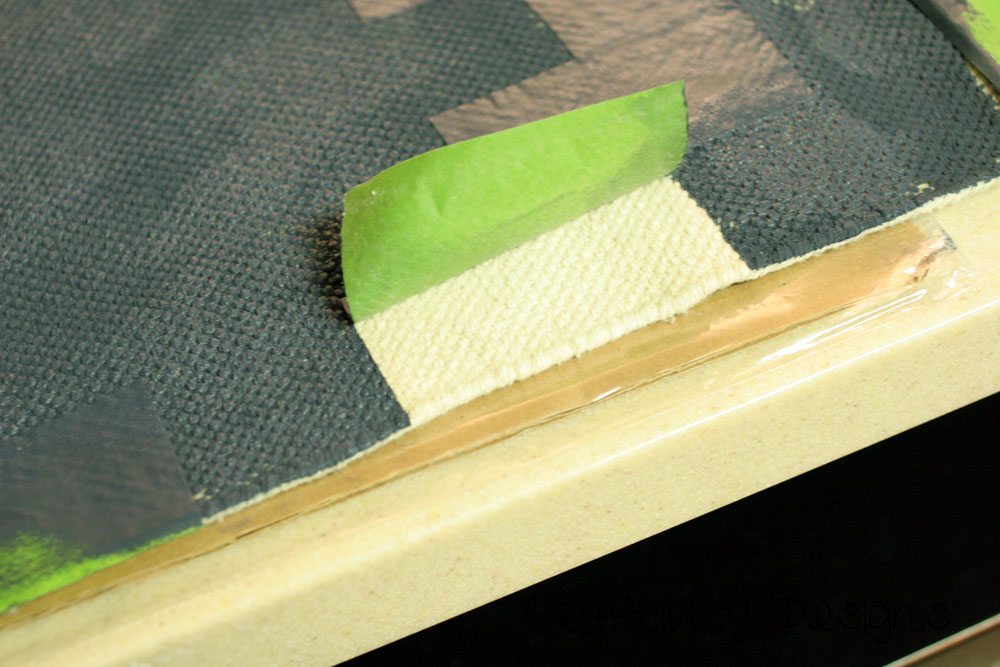
I left my 1st pattern as is, and then strung a strip of tape across the full length of the rug. Next I used an exact-o knife to cut the strips in the desired spots, and then tear it off the rug. This is how Holly explained it in the Pink Geometric Rug tutorial (see? if I only I had actually followed the tutorials I read).
Since this was a small project and not a full size rug, I used Martha Stewart Multi Surface Satin Paint in Deep Sea from Michael’s.
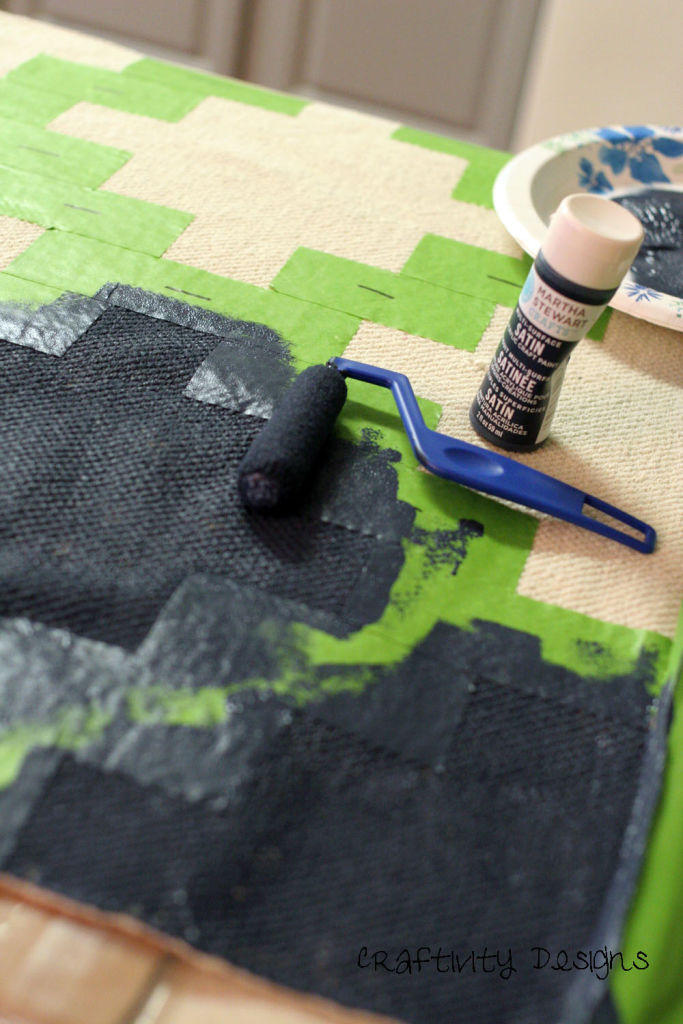
It required about 2.5 tubes worth of paint and I only did 1 coat because I felt the coverage was pretty good and the color was saturated.
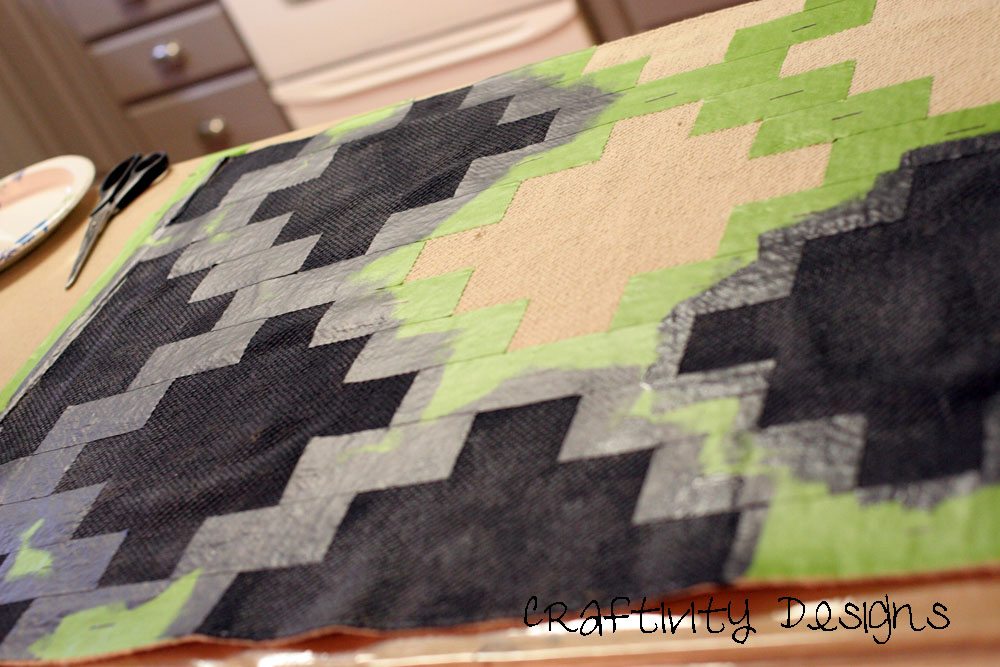
Here was my first peek:
A clean crisp line! So excited.
It’s not perfect. For example, in this pic you can see where I didn’t overlap my tape and the paint seeped through the crease.
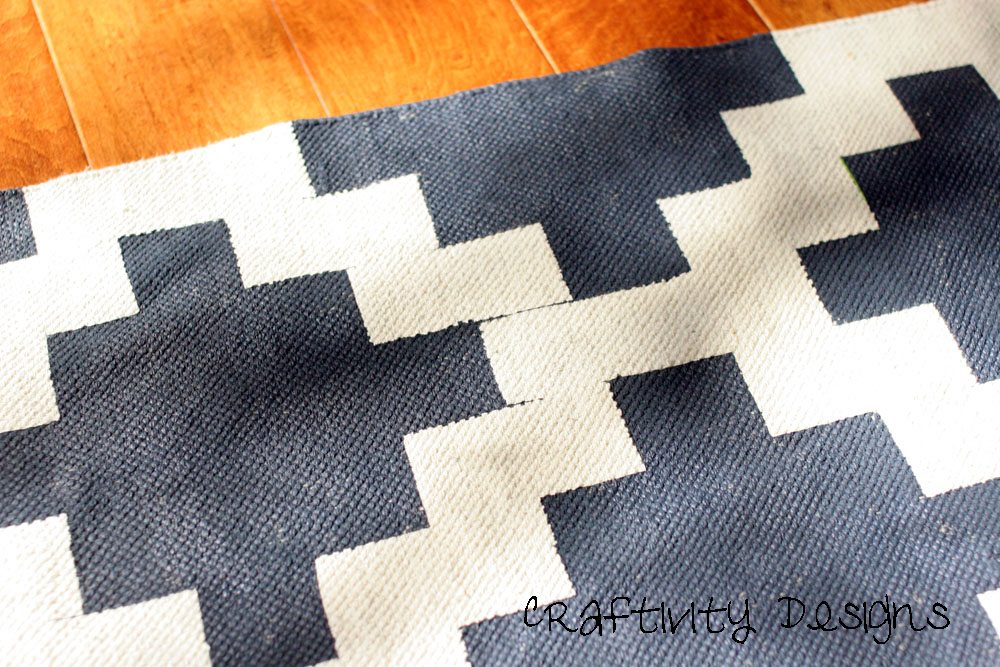
But, I’m not a perfectionist by any means. And I think the color and pattern of this rug is just beautiful. I will definitely be painting more rugs.
And one of the best parts? Now, it’s a double sided rug – for when I feel like switching things up. 🙂

What project have you been pinning, but haven’t yet tried? Go for it!
Craftivity Designs
Tuesday 18th of March 2014
Perfect timing! :) I'd love to hear how your rug turns out!
Rachel Baumann - Fifty Two Weekends
Tuesday 11th of March 2014
I was literally JUST out buying craft paint and a piece of canvas over lunch today for a painted floor mat. Then I stopped by your blog and saw this post! Life is so funny. I'm taking notes on your experience. Wish me luck!
Craftivity Designs
Wednesday 3rd of July 2013
Navy is my favorite, too! So glad you liked it and stopped by :)
Brittany Barnes
Sunday 30th of June 2013
Wow, I am in love with this. I love the design as well as your color choice... Navy is my favorite color. I feel inspired to paint!
Craftivity Designs
Friday 28th of June 2013
Thanks, Jocie! I was so pleased with how it turned out. Thanks for stopping by :)