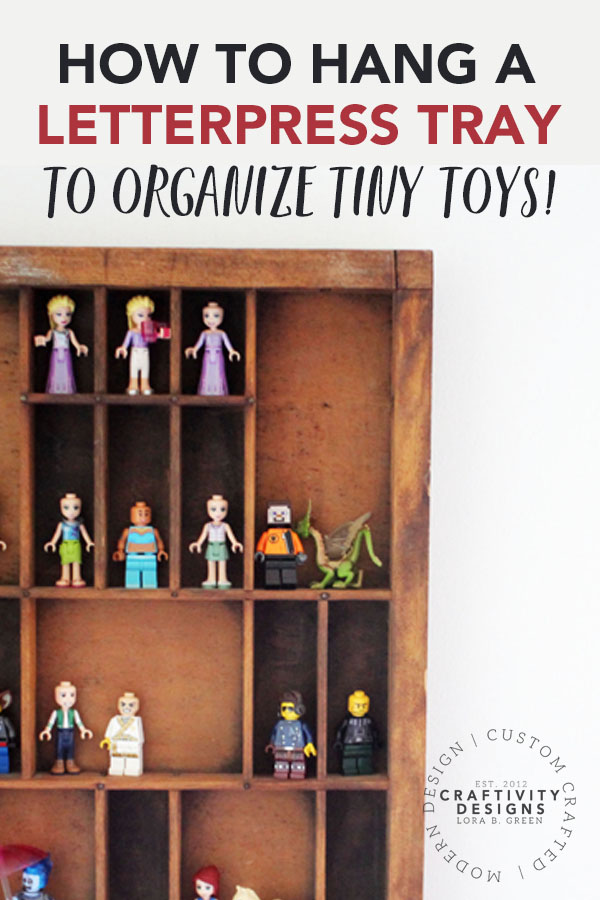
Has your child (or you?!) amassed a large collection of LEGO minifigs? You’ll love this clever way to display LEGO minifigures!
The only thing my kids love more than LEGO® Bricks… are LEGO minifigures. Tiny LEGO Friends, Disney™ minifigs, and LEGO superheroes abound in our home. Our kids are getting their own rooms this winter (previously, they shared a bedroom) and the first project in the books is a display for LEGO minifigures.

Disclaimer: LEGO is a trademark of the LEGO Group of companies which does not sponsor, authorize or endorse this site.
Disclosure: This page includes affiliate links.
Toy Organization
Do you ever feel overwhelmed, wondering what to do with all.the.toys? I’m a big believer in helping children organize their toys, for several reasons:
- picking up toys is easier because each toy has a designated home
- toy organization teaches kids the skills of keeping a tidy home
- even children find pride in a clean, organized space
- organized spaces encourage exploration and desire to play (think about how a preschool classroom is set up)
- organized toys help to keep mom happy!
There are many affordable ways to organize toys. A few of my favorites include:
You Might Also Like: 10 Simple Ways to Organize Toys
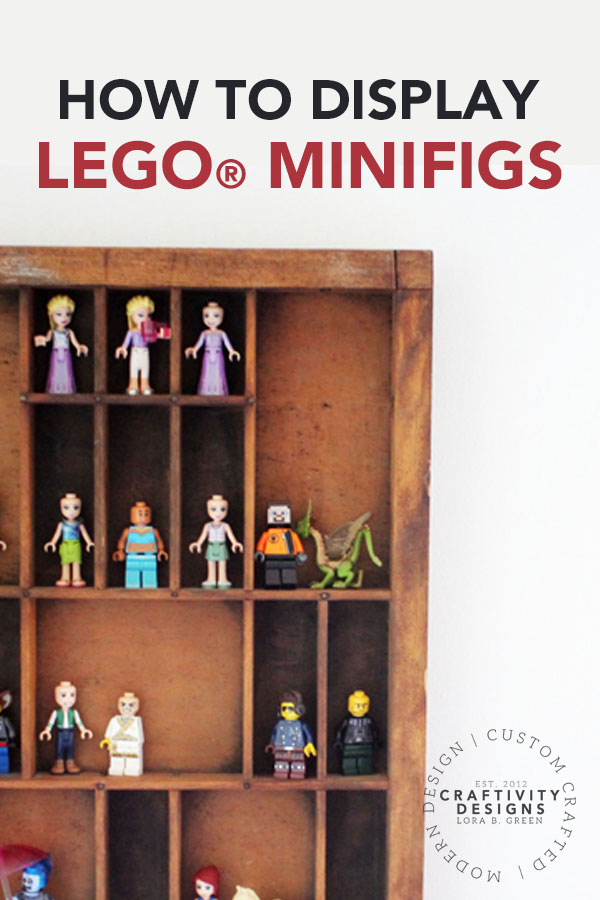
How to Display LEGO Minifigures
Disclosure: This page includes affiliate links.
TOOLS REQUIRED
- Phillips screwdriver
- pliers
SUPPLIES REQUIRED
INSTRUCTIONS
Determine where to Install Hangers
Place the printer tray facedown and determine where to install the hangers. Measure each side to ensure the hangers are located at an equal distance from the top of the letterpress tray.
TIP: Install the hangers at least 3 inches from the top. Since the wire won’t be perfectly straight, the wire can’t be installed too close to the top. Otherwise, the wire will be visible when hanging.

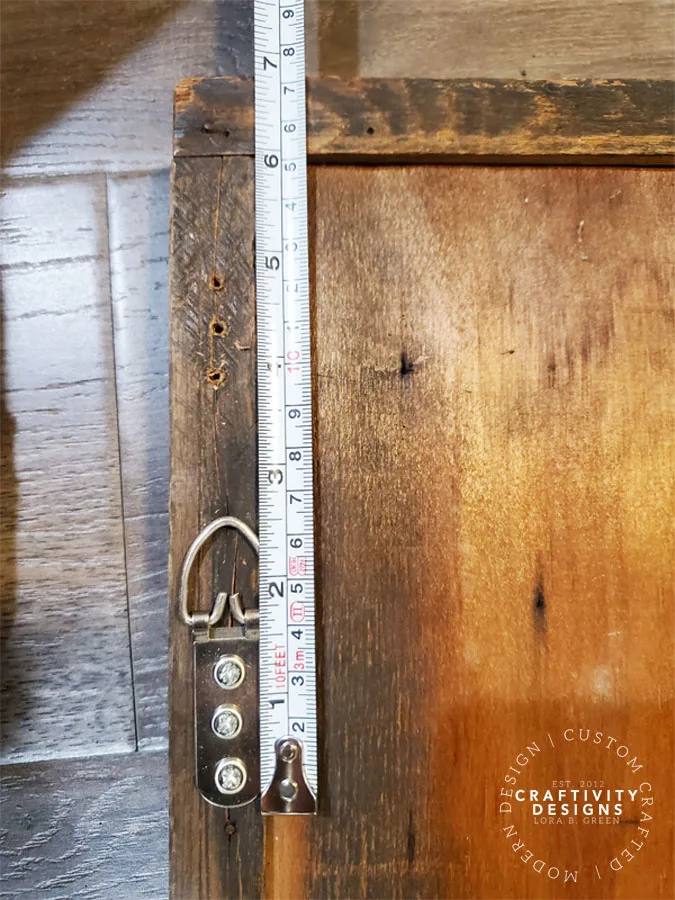
Attach the Hangers with Screws
Unlike nails, which are standard in most hanging kits, this heavy-duty wire picture hanging kit includes screws. Once measured, attach each D-ring hanger in place.
TIP: I’ve used many wire picture hanging kits, and this one is, by far, my favorite. It’s designed to hold over 100 lbs and it includes crimpers to secure the wire (so.much.easier. than twisting wire into place).
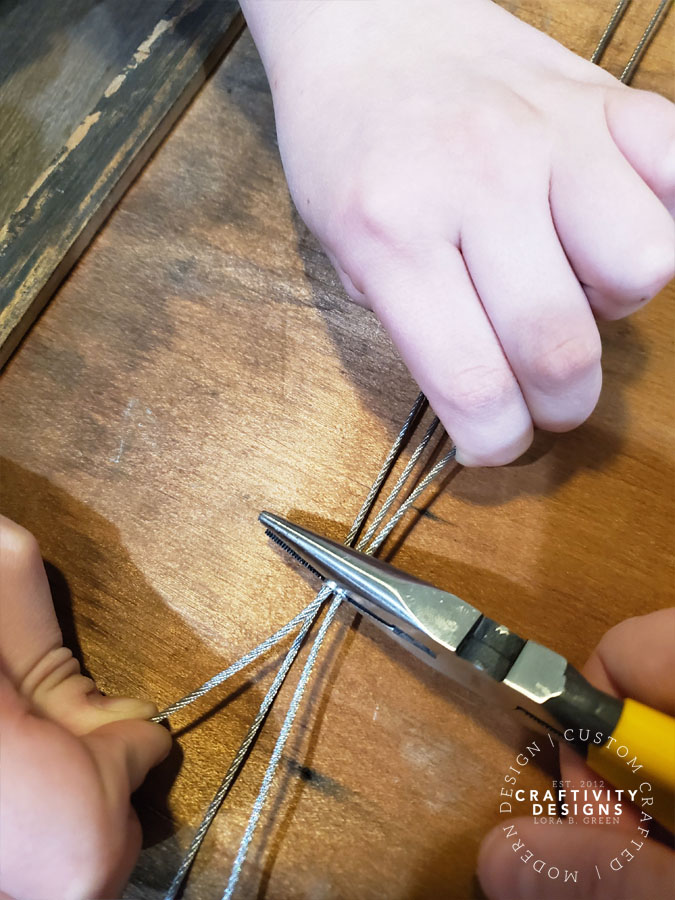
Thread the Wire through the D-Rings & Crimper
Once the D-ring hangers are in place, thread a loop of wire through each ring and into a crimper. The crimper will complete the loop of wire, by holding it in place.
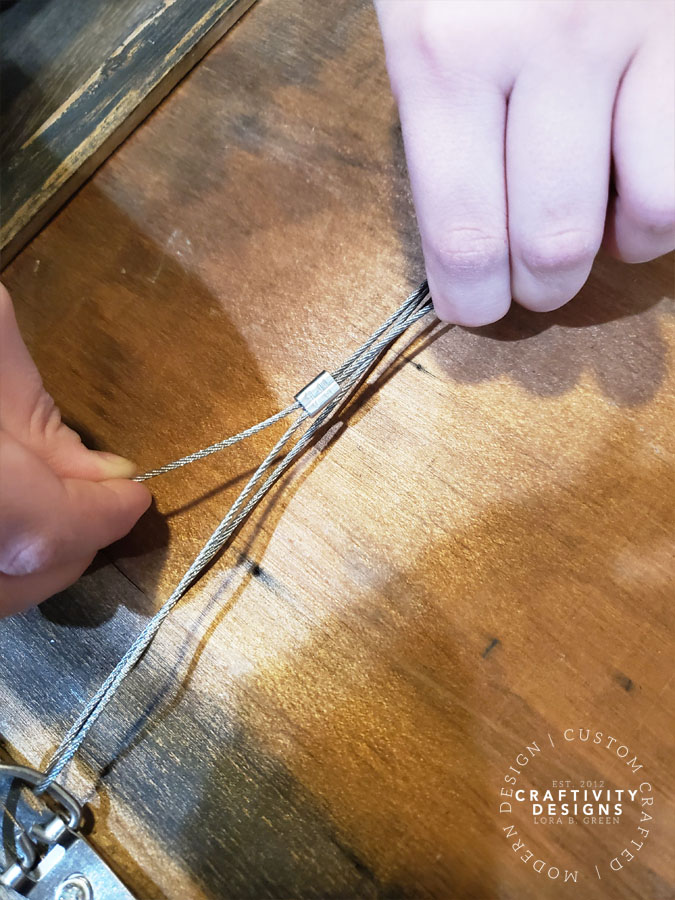

Crimp the Wire to Secure
After the wire is threaded for the crimper, it’s best to ask for a second set of hands. I grabbed my son (after all, this is their LEGO minifigure display!) to hold the wire taut. Use pliers to crimp the wire until secure.

Hang the LEGO Minifigure Display
Once the picture hanging wire is complete, hang it on the wall. Use a set of self-drilling drywall anchors if the printer tray is fairly heavy.
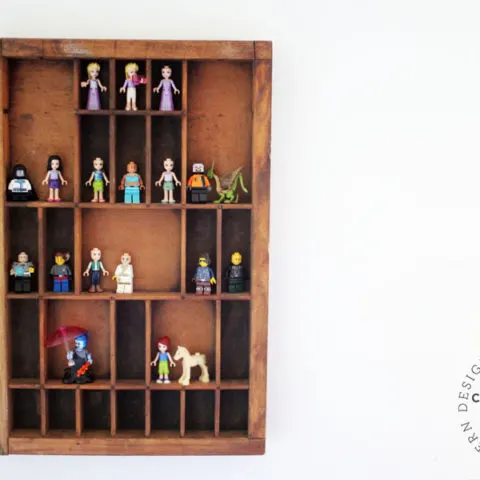
Display LEGO Minifigures in a Vintage Printer Tray
Once the project is complete, it’s time to stock the wooden letterpress tray with favorite LEGO minifigures.

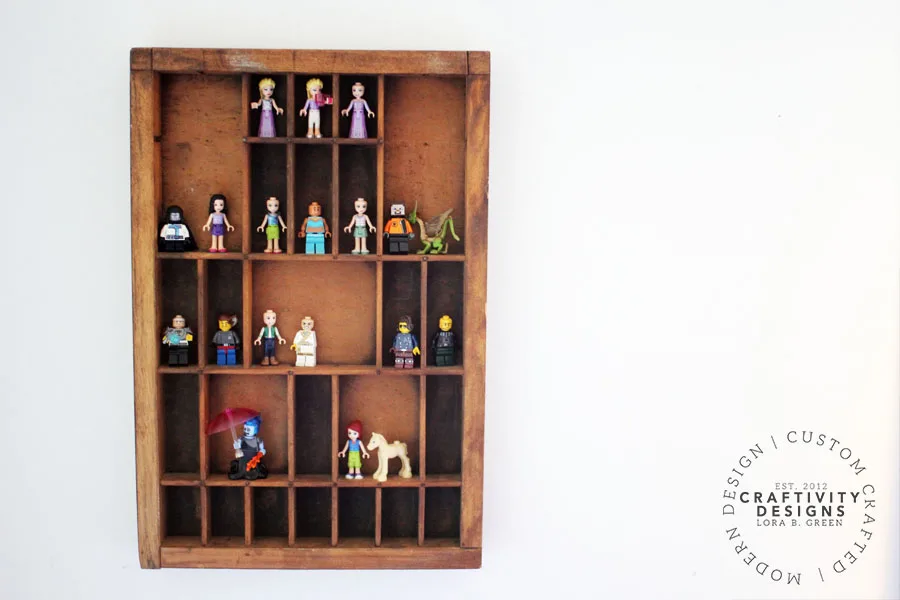
Of course, there’s no need to limit the kiddos to LEGO minifigs… the options are endless (we’ve done a rock collection, Shopkins, and miniature dolls).
Need more ideas? Check out 15 more collections to display in a letterpress drawer.

How to Display LEGO Minifigures in a Letterpress Tray
Has your child (or you?!) amassed a large collection of lego minifigs? You'll love this clever way to display lego minifigures!
Tools
- Phillips screwdriver
- Pliers
Instructions
- Place the printer tray facedown.
- Determine where to install the D-ring hangers on each side (measure from the top of the tray so that both are located equal distance* from the edge).
- Attach each D-ring hanger in place with the included screws and a Phillips screwdriver.
- Thread a loop of wire through each D-ring hanger and into a crimper.
- Pull the wire taut (you may need a second set of hands for steps 5 & 6).
- Use the pliers to crimp the wire until secure.
Notes
* Install the hangers at least 3 inches from the top.
Do you like this LEGO Minifigure Display Idea? Pin it!