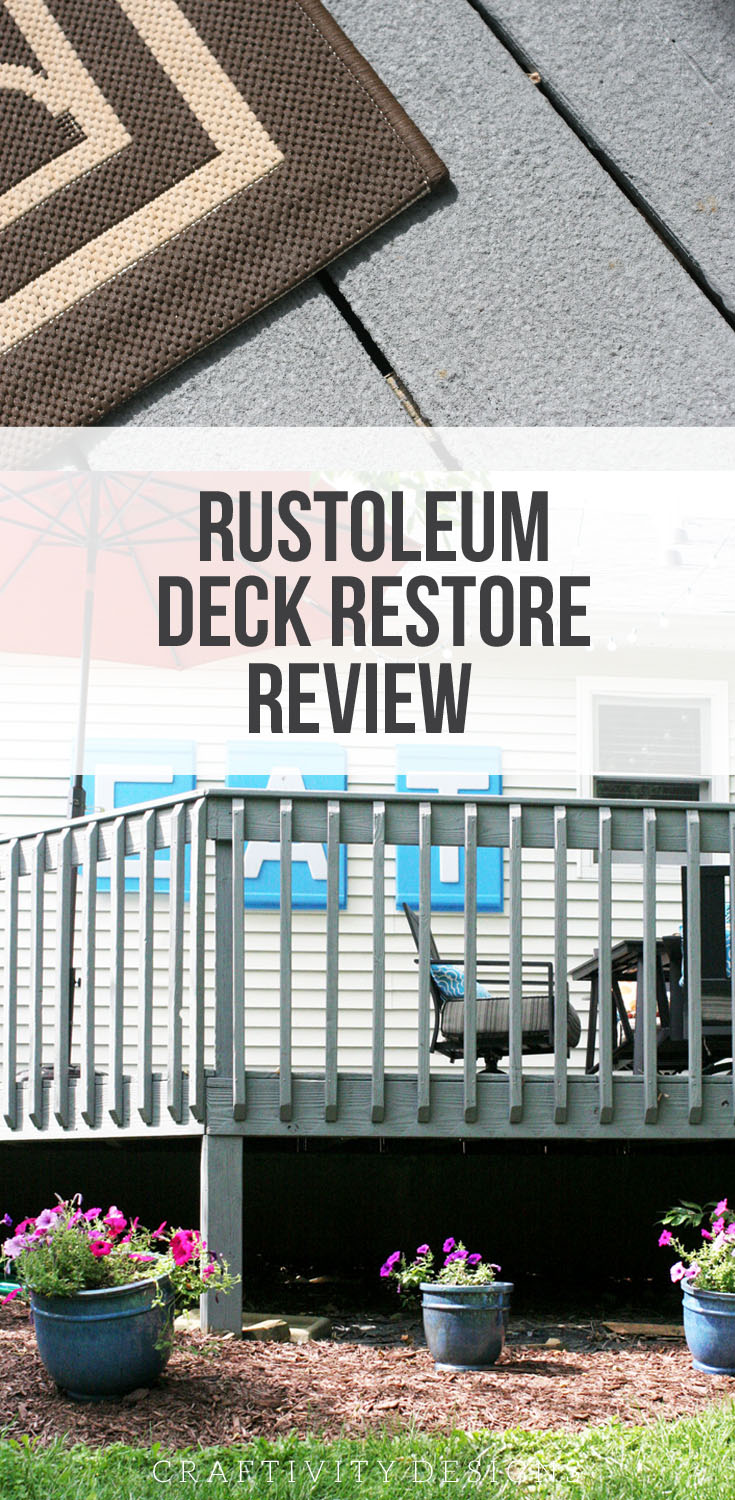
Learn how to restore a deck with Rustoleum Deck Restore. With this step-by-step tutorial and product review, you can restore a weathered deck over the weekend (and at a fraction of the price it costs to replace the deck!).
Well, I know I just shared our Patio Reveal back in June, but it’s already experienced some big changes. At the time I put together the Quick Patio Makeover Mood Board we still weren’t sure whether we were going to be able to restore the deck this year.
The structure was solid but the surface had seen better days — it was splinter-y (that’s probably not a word) and faded. After checking out several options, we chose Rustoleum Deck Restore to restore our weathered deck.
Disclosure: This page includes affiliate links.
Our deck surface was in poor condition. However, since the structure was sound, we didn’t have to replace the wood. Rustoleum Deck Restore was going to cost us $100s of dollars as opposed to a new deck which would cost $1000s of dollars.
How can you Restore a Weathered Deck?
We looked into 3 options to improve the surface of our deck.
Staining
Staining every couple of years is the traditional deck care method. However, we hadn’t stained it in the 5 years we’d lived here and the surface was already in poor condition when we purchased the home. This was definitely the cheapest option; but since it hadn’t been maintained properly over the years, we weren’t sure it would make a significant difference.
Composite Decking
Our front porch has been replaced with maintenance free composite decking and the surface is so great to walk-on and easy to clean. Unfortunately, it’s pricey at over $20 a deck board. We weren’t very excited about investing that type of cash, especially since we knew we might be moving.
Deck ReStore
Much more durable than stain, it has a lifetime of about 10 years. It would also fill in any gaps and literally cover the surface so that splinters wouldn’t be a problem. Some reviews suggested it might be rough on your feet; but we decided we prefer a rough surface over splinters in our feet. It’s not a cheap treatment at about $40 per 2-gallon bucket, but it is much more affordable than Composite Decking.

How to Apply Rustoleum Deck Restore
Supplies
Tools
- Pump Sprayer
- Hammer
- Paint Brush
- 3-Inch Paint Roller and Roller Frame
- Deck Restore Roller and Roller Frame
- Measuring Cup
- Paint Roller Extension Pole
Instructions
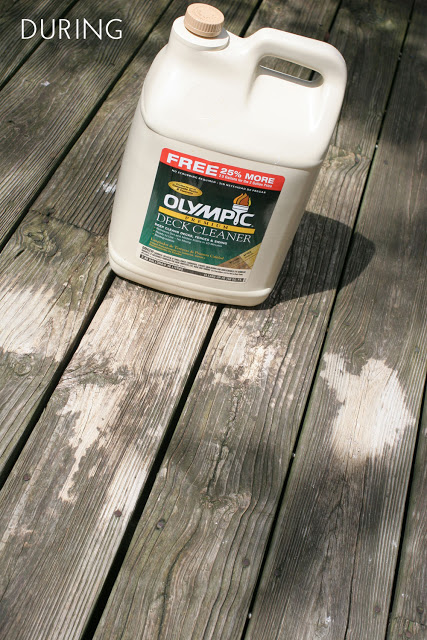
1. Clean and Prep the Deck
Before we started painting, we sprayed the surface with deck cleaner. We also hammered back into place any screws or nails that had popped up over the years.

Cleaning the deck made a huge difference, actually. It returned it to a natural wood tone as opposed to a mildew-y greenish gray.

2. Research Tutorials and Video
This is a pretty big project, and we wanted to make sure we were prepared. We read a ton of reviews and referred to this video about applying Rustoleum Restore several times. We followed the instructions in the video pretty closely and picked up some tips from the reviews.
The color we chose was simply called Gray. Our shutters, garage and exterior doors are painted in a medium gray, which seemed to be similar to the Restore Gray.

We also considered Cape Cod Gray, but were concerned it might be too light and just blend in with our siding. Another option was Pewter, but we didn’t want to go so dark that it got hot in the summer heat.
After applying the Gray, I love the color and know we made the right choice. It blends perfectly with our home.

3. Purchase the Paint
Our deck is 24’L x 11.5’W, or 276 sq. ft., not including the steps. A 2-Gallon bucket of paint is supposed to cover 50 Sq Ft with 2 coats. We found this to be pretty accurate, since we used 6 2-Gallon buckets to complete the deck.
4. Check the Weather
You do need dry weather to take on this project. The product suggests 24-48 hours before you begin applying the product and 24-48 hours after you finish.
Of course, we cleared off our deck to start this project and then had the rainiest two weeks ever. Our yard looked like this for nearly a month. Don’t you want to Pin this inspiration photo?

5. Tape and Prep around the Deck
The paint is thick and will splatter so it’s a good idea to tape or tarp where paint might come into contact with your house. If you do end up with any splatters, check out this tutorial for how to remove paint from aluminum or vinyl.

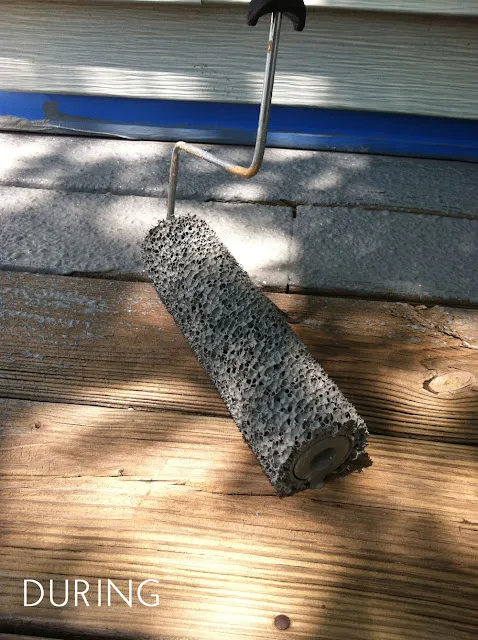
Note: The roller is not a typical nap roller. We did buy the Deck Restore roller and liked how it worked. Some reviewers said they switched to using a typical nap roller, but we thought this honeycomb roller created the texture we hoped to have after applying Restore to our deck.
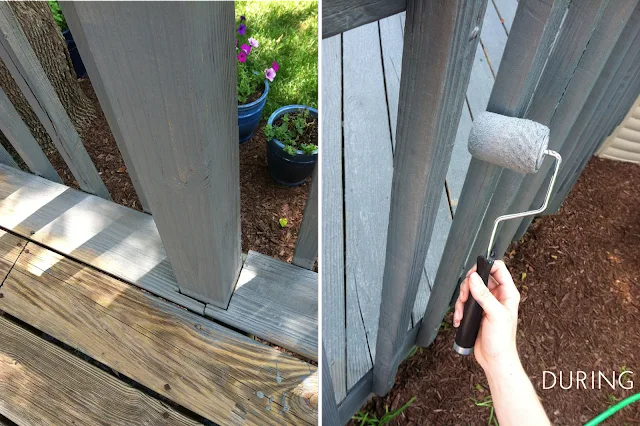
6. Stain the Balusters, Posts, and Vertical Surfaces
Now I know you are thinking, why stain? I thought this was paint!
Well, it is, but you use a matching Deck Restore solid stain on the spindles and any other vertical surface. This was tedious, because there were just so many balusters and so many other vertical surfaces on the sides of the deck that we had just not really thought much about.

The stain itself was easy to work with and covered pretty well. It took 1-2 coats (i.e. one coat with a whole lot of touching up) and 2 gallons of stain.
We began with a brush initially, but added in a roller as we went. I’d trim all the edges with the brush, someone else would roll the spindles and then I’d come back with the brush for touch-ups.


See all those spindles? It felt like we stained for days and days. In reality, we probably did spend at least two 8 hour days, with 2 people, working on the spindles and vertical surfaces. However, the first day was using the brush only, which was much slower.
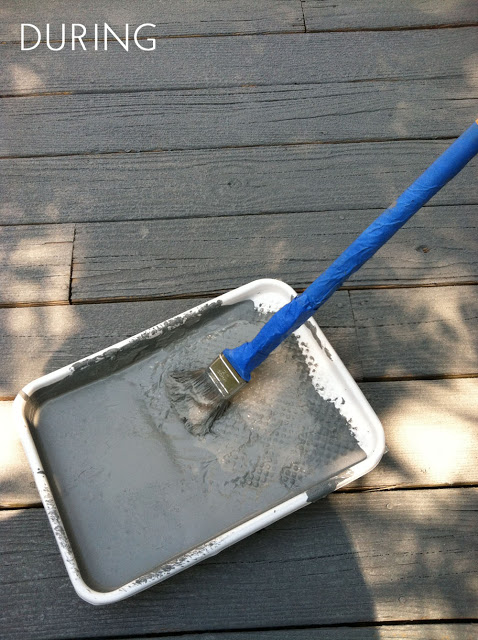
7. Stain Between the Deck Boards
Use a brush to stain in-between the deck boards. Brush along the edges of the boards, trying to get in-between the boards a bit.
The purpose of this step is to conceal any difference in color between the natural wood tone and paint. We rigged up a brush with a paint extension pole to make it easier to stained between the gaps (no bending on our knees!).

8. Mix the Paint
A tip we had read in the reviews was to add about 1 cup of water per gallon. This seemed to work really well. It thinned out the paint enough to make it easy to apply but didn’t remove the texture in the application or the ability for the paint to fill in gaps and cover splinters.

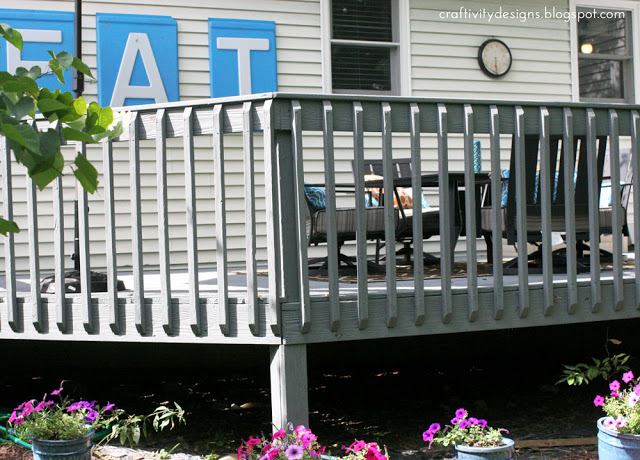
By the way, that photo above is of the railing. We did apply 1 coat of paint over the stain on the railing. Even though this isn’t a surface you walk on, it is where we rest our hands, lean, etc. So it made sense to give it a coat of the paint to remove any splinters here too.

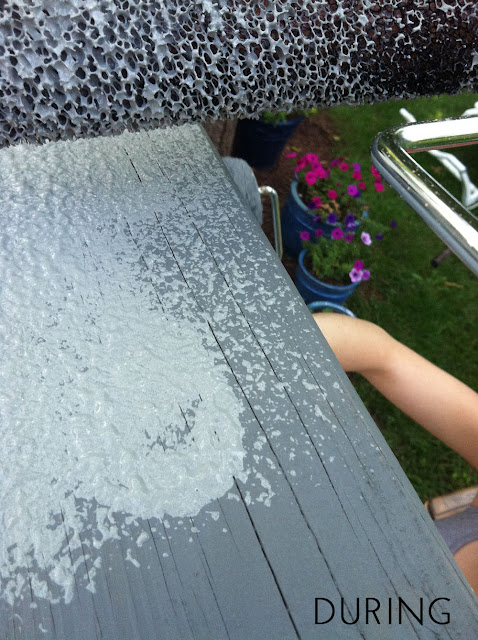
9. Roll the Deck Boards
The rolling went pretty quickly, it took 2 days, but that was just because we wanted to give the first coat time to dry before applying the second coat.

Note: The photo above shows the completed first coat. We had accidentally skipped step 8, which is why the edges of the boards seem brown still. We did step 8 between our 1st and 2nd coat of step 9.
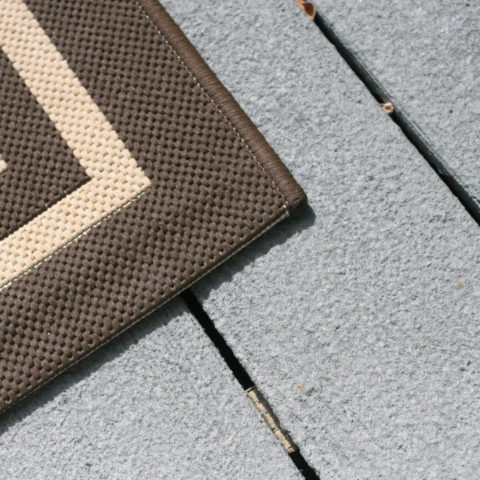
Once the second coat was applied, the coverage was great. We love how it looks and feels!

The texture doesn’t bother our bare feet at all. It feels about a millon times better than walking on this splintery mess:

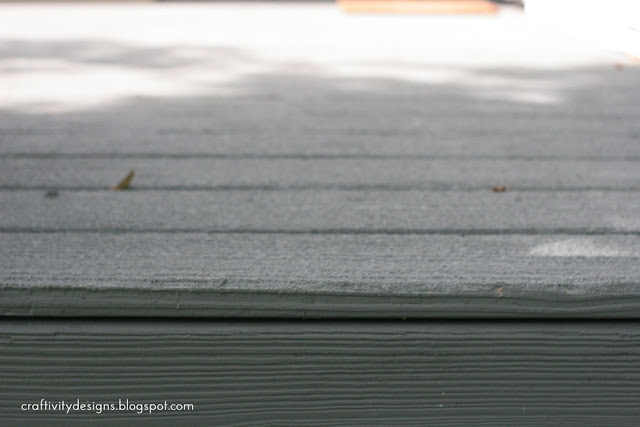
I don’t think it would even bother someone with really sensitive feet, because the texture just isn’t that thick. Here is a side-view to give you an idea of how thick it applied.

10. Enjoy your New Deck
Since the deck surface is essentially brand new, it feels like we got composite decking for a fraction of the cost! If our next home has an old deck, you can bet this project will be on our to-do list.
UPDATE May 2014: We’ve received many comments asking how the deck looks now. Unfortunately, we had to move in December so I can’t provide an update. As of December 2013 (approximately 6 months post-application since we applied it in July 2013) it was still in perfect condition. We live in Central Kentucky and had already experienced several snowfalls; but Kentucky’s winters are not as harsh as in comparison to the Northeast United States.
UPDATE Sept 2015: Check out Carrie’s Deck Restore Makeover, which has been in place for 2 years.

Final Thoughts on Restoring a Weathered Deck
I want to reiterate that our deck was in poor condition. We read both negative and positive reviews on Restore from Amazon/Home Depot/etc. Specifically, this post and comment thread from One Project Closer was extremely helpful.
After researching Restore, even though we read some negative comments, we felt it was worth the risk. Restore was going to cost us $100s of dollars as opposed to a new deck which would be $1000s of dollars.
So, as a fellow consumer, I encourage you to research the product as well. Read both the good and the bad experiences in order to make the best decision for your home!


Thanks for sticking through this long post and please comment or email if I left any of your questions unanswered. Also if you’ve used this product, I’d love to hear what your experience was with it.
Do you have a deck? If so, what kind of condition is it in? Would you tackle a project like this — or do you stain it faithfully every few years?

How to Restore a Deck with Rustoleum
Learn how to restore a deck with Rustoleum Deck Restore. With this step-by-step tutorial and product review, you can restore a weathered deck over the weekend (and at a fraction of the price it costs to replace the deck!).
Materials
Tools
- Pump Sprayer
- Hammer
- Paint Brush
- 3-Inch Paint Roller and Roller Frame
- Deck Restore Roller and Roller Frame
- Measuring Cup
- Paint Roller Extension Pole
Instructions
- Spray deck with deck cleaner.

- Hammer in any screws or nails that have popped up over time.


- Before applying Restore, tape or cover with tarp any areas around the deck should not get paint. The paint is thick and will splatter, so it is important to protect siding, brick, etc.

- Stain the balusters, posts, and any vertical surfaces in a matching color. Use a brush and 3" roller to apply.

- Brush stain along the edges of and in-between the boards.

- Mix the Deck Restore paint. If it is too thick, add 1 cup of water to each 2-gallon buck to make it slightly thinner and easier to apply.
- Paint railings with stain or paint, whichever you prefer. We chose to do stain and 1 coat of pant.

- Apply 2 coats of paint to the deck boards with a Deck Restore roller.

- Let dry per product instructions and enjoy your deck.

Notes
Weather must be dry 24-48 hours before and after application of paint and stain.
10+ Spring Project Ideas for the Exterior of your Home – Craftivity Designs
Thursday 29th of April 2021
[…] was in pretty poor shape. It was structurally sound but the wood was splintered, cracked and faded. We painted it with Deck ReStore and loved the finished product. The deck in this home is in much better shape {woohoo!} so […]
Craftivity Designs
Tuesday 2nd of December 2014
Thanks for the recommendation!
Ms.McCallisters
Tuesday 2nd of December 2014
Just reading some of these posts, I can't help but to recommend FlexDuraCote from Liquiguard Technologies. It does all this and much more. It last longer, covers more area, has UV protection, which makes it a joy to walk on in the hot summer sun, seals, water proofs, prevents mold and has anti slip properties. It might cost a little more, but it's worth every penny. Who wants to re-due there deck every few years? There's no chemicals, fumes and it's Eco-Friendly. All you do is paint it on.. It's well worth it.
Craftivity Designs
Monday 10th of November 2014
Good luck -- gray is a great neutral!
Craftivity Designs
Monday 10th of November 2014
That is interesting, thanks for sharing with our readers. Hope you can find a fix!!