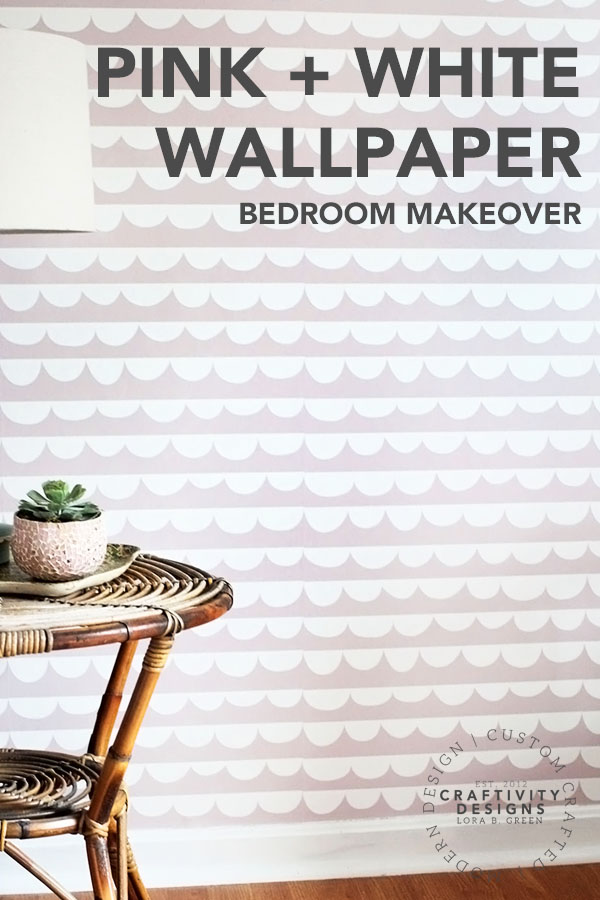
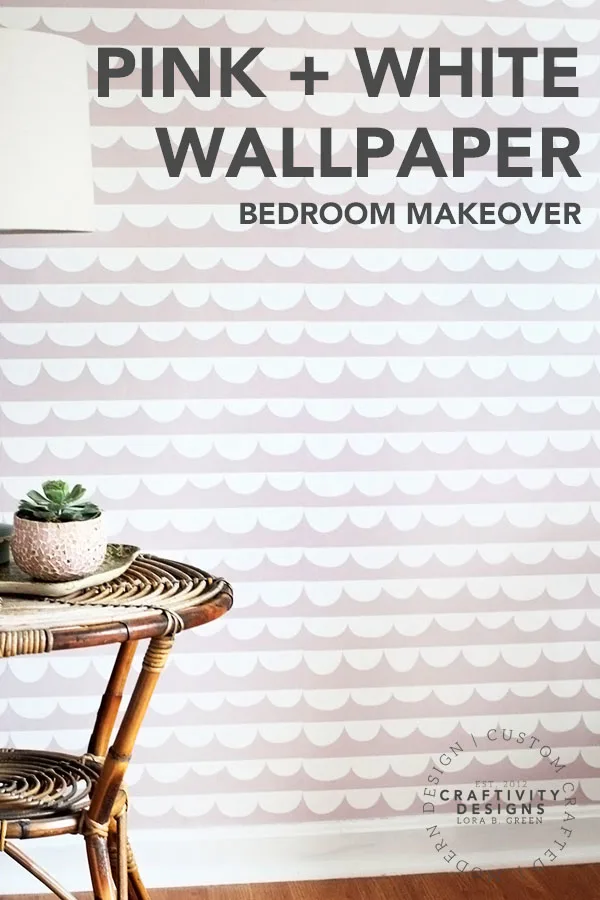
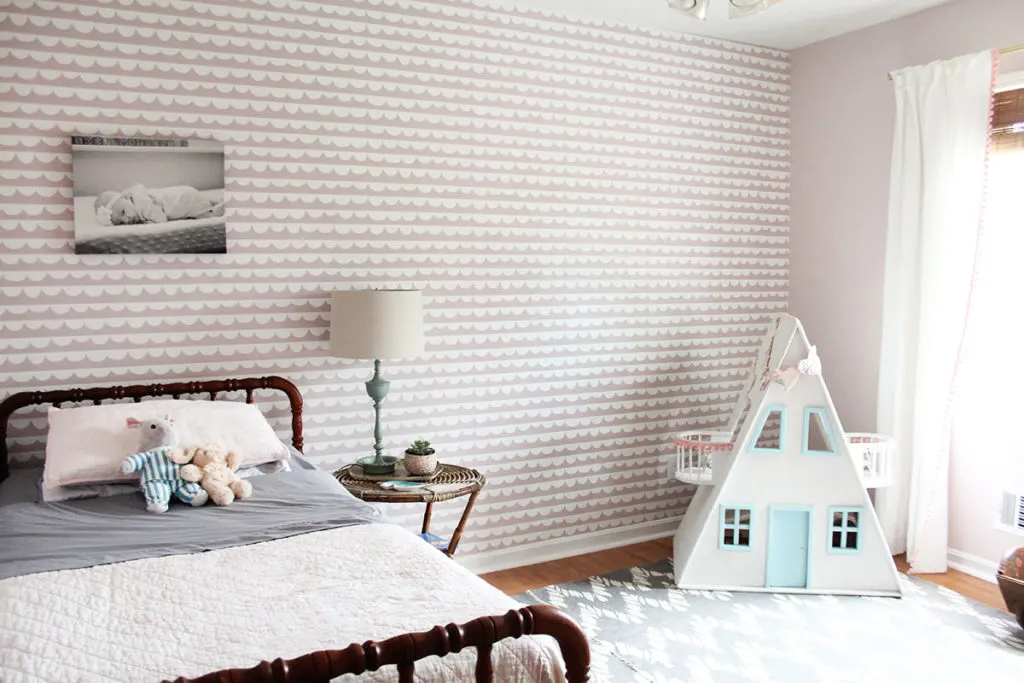
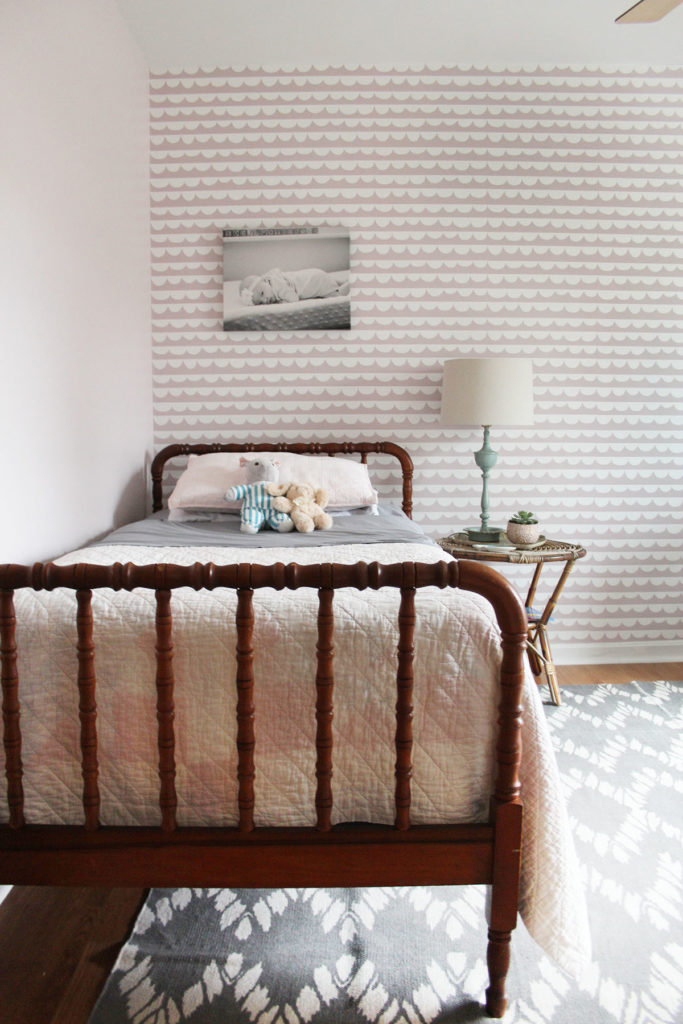
Looking for pink wallpaper for a girl’s room? This pink and white wallpaper from PhotoWall will grow with your daughter from nursery to teen years.
Ya’ll – I am so excited to show you a glimpse of my daughter’s bedroom! Plus, I’ll share the details of my first experience hanging wallpaper (spoiler: it’s not so bad!). If you are considering pink wallpaper for a girl’s room (or any room, for that matter), make sure to check out the beginner tips.
Disclosure: This post has been partially sponsored by PhotoWall. All opinions are mine.
Pink Wallpaper for a Girl’s Room
Since I removed lots of wallpaper in our last home, I’ve been hesitant to jump on the recent wallpaper trend. Over the last several months, I’ve pinned many pretty photos of wallpaper in girls’ rooms. Still, I’ve been afraid to take the leap.
Several concerns kept playing through my mind:
- Is it hard to hang wallpaper?
- Will my daughter outgrow the design/color palette?
- Does wallpaper make a room look smaller?
The safe decision? Just paint the room pink. My daughter would be happy, and the paint would be risk-free. I had just about settled on that decision when…
…PhotoWall reached out and asked if I’d like to try one of their wallpapers. Well, shucks. I guess it is time to take the leap… and I’m so pleased with the results.

But, taking a risk is easier said than done. So, let’s talk through each concern.
Is it hard to hang wallpaper?
No… and yes. I’ll explain in more detail, below, but hanging wallpaper is an intermediate DIY Project. It’s definitely not the simplest project I’ve ever undertaken, but it was not as difficult as expected.
Often, it is assumed that peel-and-stick wallpaper is simpler to install than traditional wallpaper. However, that is not necessarily true, as explained in this post about installing a blue grasscloth peel-and-stick accent wall.
Will my child outgrow the design/color palette?
It’s possible. A child may outgrow a wallpaper design/color just as they might outgrow a paint color or a decorating theme. With that in mind, choose a design that is less age-specific and color that is timeless.
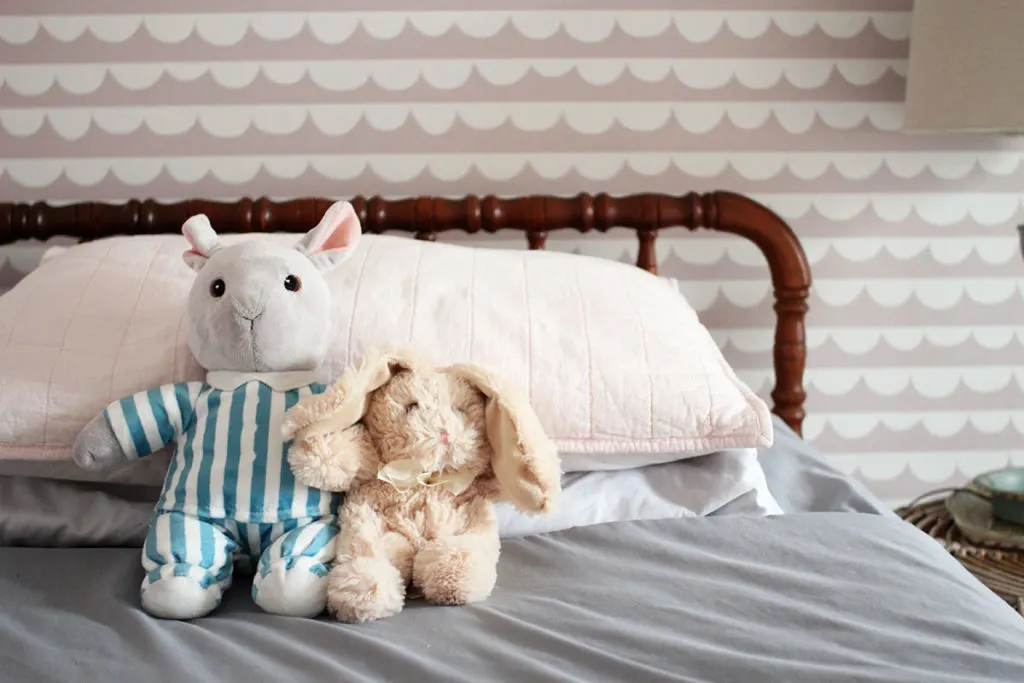
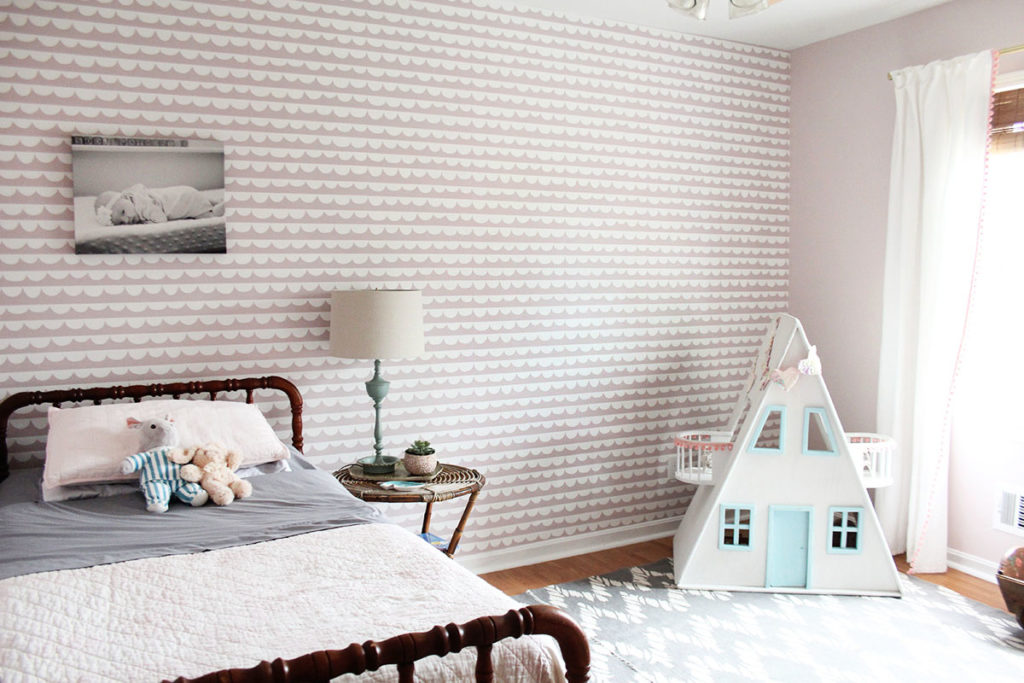
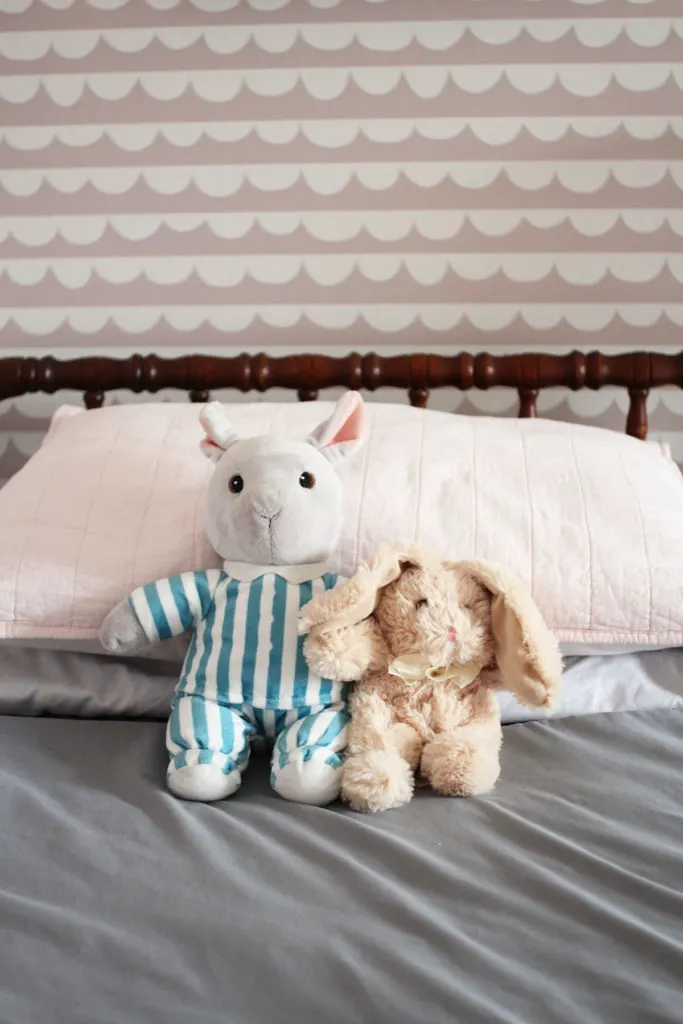
For the wallpaper in my daughter’s room, we chose a pink wallpaper with warmer and deeper undertones. She gets her pink room, but it’s not a “baby” pastel that she’ll outgrow in a few years.
Does wallpaper make a room look smaller?
Typically, no. Though it is often quoted, wallpaper – or dark paint – does not necessarily make a room feel smaller.
For example, a room with high ceilings and big windows can feel especially large and grand when painted in a deep dark tone. In fact, if you paint the ceiling dark, too, it can look even bigger. This is due to the fact that dark colors have more depth and recede visually (in other words, your eyes perceive dark colors as further away).
Similarly, wallpaper with deep tones or large patterns, won’t necessarily make a room look small.
Instead of focusing on whether a room will look large or small, decide how a room should feel. Here are a few examples:
| Mood | Elements to Include |
|---|---|
| Cozy | Dark tones, calming palettes, monochromatic prints |
| Light and Bright | Light tones, plenty of white, florals and playful prints |
| Energetic | Bright and bold color palettes, large patterns, graphic prints |
| Timeless | Nature color palette, botanical prints, textured grasscloth paper |
That being said, if you are interested in how to make rooms feel larger, this post about brightening dark rooms would be a great place to start.
How to Hang PhotoWall Wallpaper
Before you begin any wallpaper installation, make sure the walls are smooth. Visit this post on drywall repair for tips on how to fix damaged walls.
Also, I’ve included beginner wallpaper tips and tricks, plus a video tutorial, at the end of this post.
SUPPLIES REQUIRED
- Wallpaper
- Wallpaper Glue (+ Brush)
- Scissors
- Level
- Utility Knife (+ Straight Edge)
INSTRUCTIONS
1. Unroll the Wallpaper
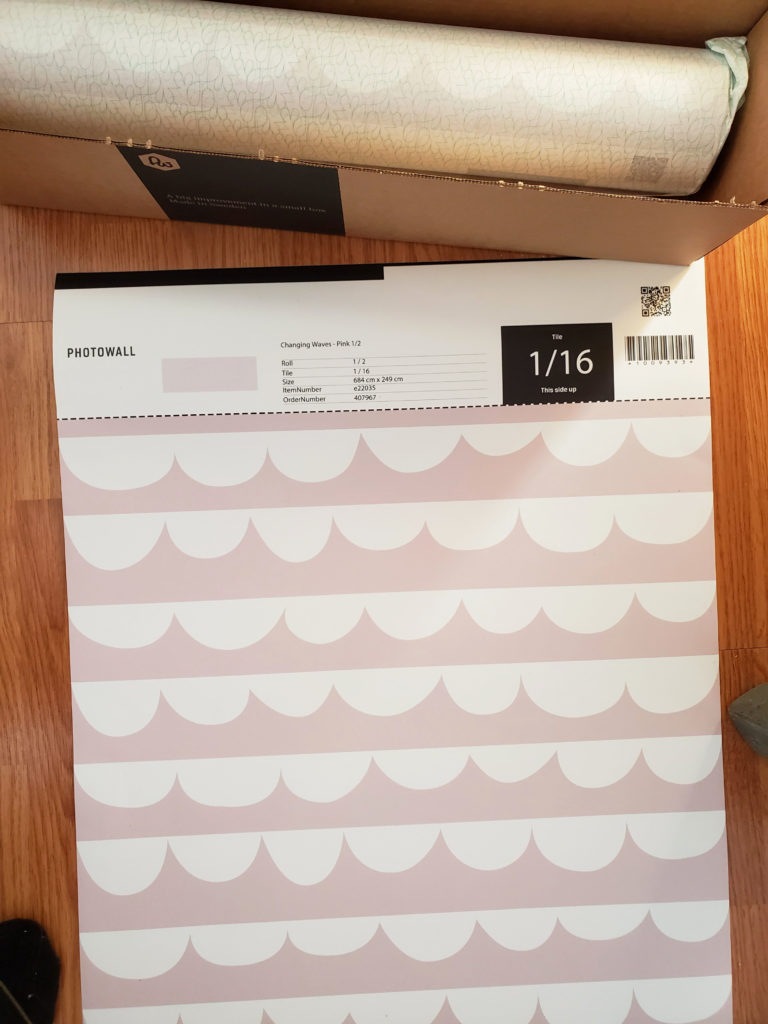
First, unpackage and begin unrolling the wallpaper. PhotoWall wraps the wallpaper in tissue paper to protect the finish. Similarly, as you unroll the paper be careful not to crease it severely.
As you unroll the wallpaper, you’ll see that PhotoWall labels the paper in the order it should be hung. The photo below shows panel 1 of 16 total pink wallpaper pieces.

2. Cut the Wallpaper into Panels
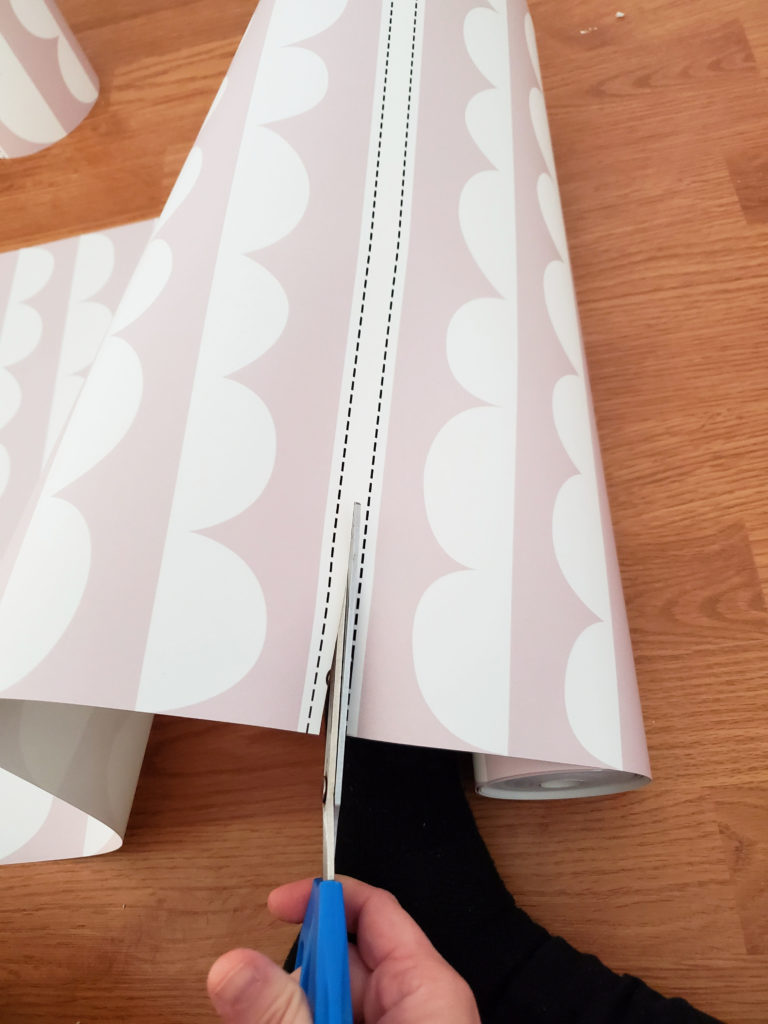
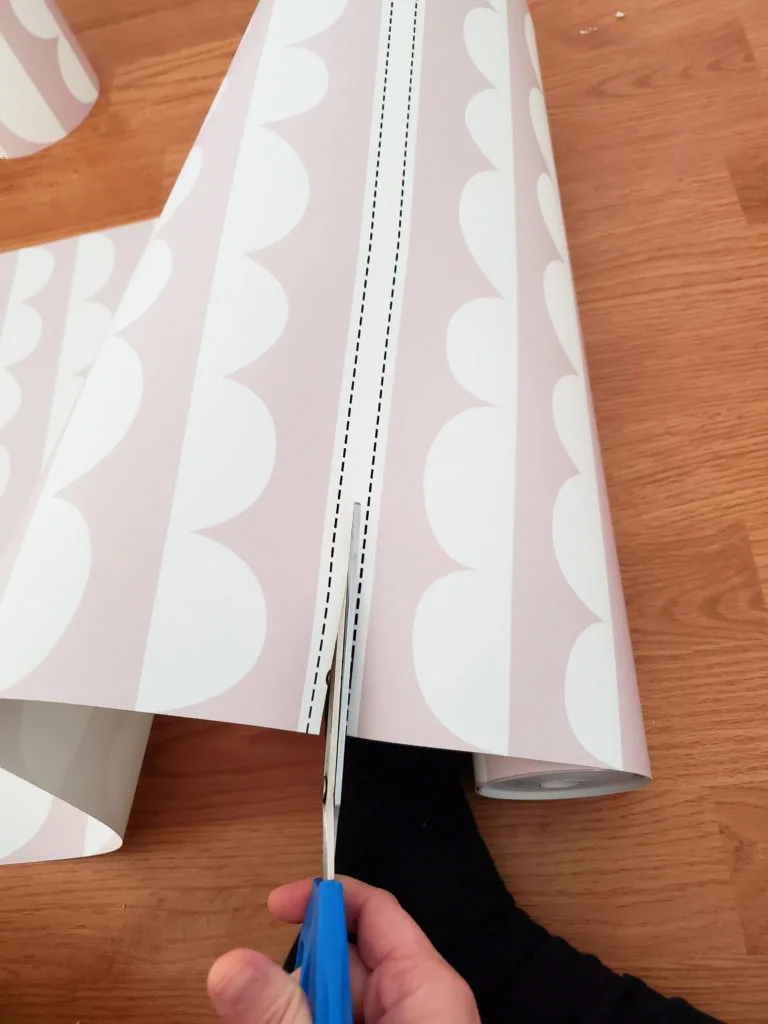
As you start unrolling the paper, cut the wallpaper into strips. There are two cut points – top and bottom. On one end, the top of a wallpaper panel meets the top of the next wallpaper panel. Each panel has a title section noting the number (ex: 1/16).
In the photo of my daughter’s pink wallpaper below, the title section of panel #2 and the title section of panel #3 are shown. The title section is labeled “this side up”. Therefore, make sure to cut in between the two title sections, as shown. Don’t cut off the title section.
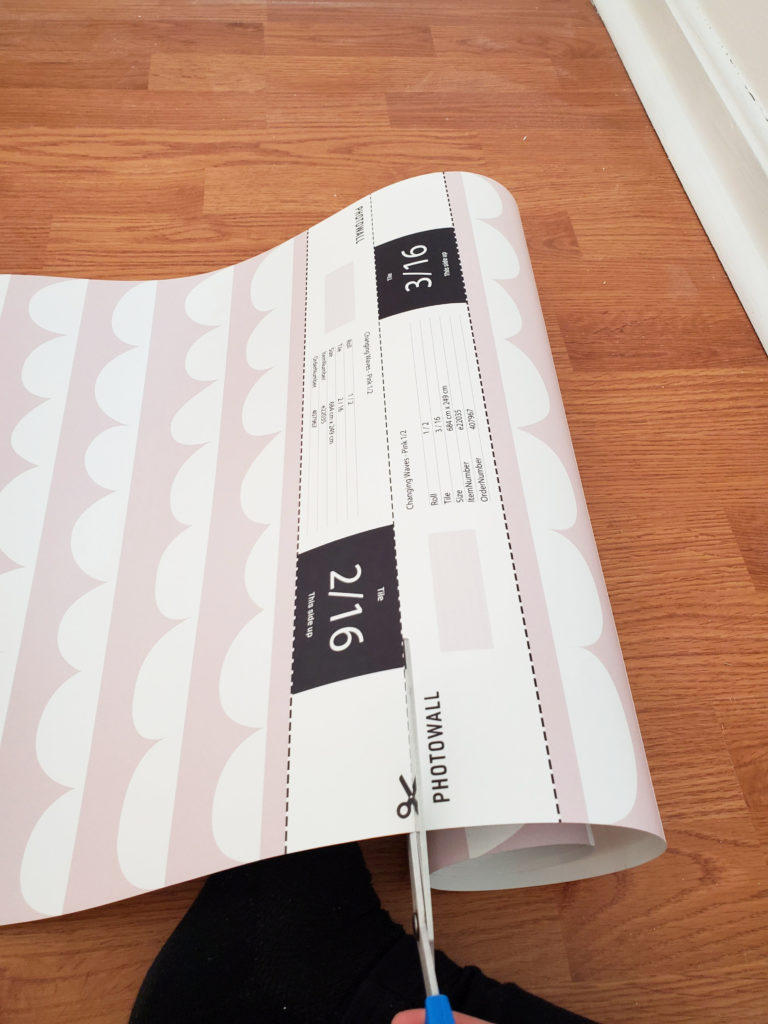

Next, cut in-between the bottom of each wallpaper panel. There is no title section at the bottom of the panel. Simply cut between the dotted lines.
3. Set the Wallpaper in Order
As you cut out the wallpaper, place each panel in the correct order to prep for hanging.
4. Measure the First Panel
Once all of the wallpaper is cut, measure the first panel. In order to ensure the wallpaper is hung level, the first panel must be hung straight.
Unfortunately, most walls and corners aren’t perfectly square.
- Measure the width of the panel (ex. 18″).
- Start at the left corner, measure and mark that distance (e.g. 18″) from the corner.
- Then draw a line along the markers which are the left-most on the wall. (Note: If the corner is perfectly straight, the line will hit all of the marks. If not, some marks will be to the right of the line.)
- Hang the paper using the line as a guide, not the corner. (Note: some of the paper may wrap into/around the corner to the next wall. This is okay as it can be trimmed.)
5. Hang the First Panel
Once the line is marked, mix the wallpaper glue according to the package instructions. Apply the glue over the entire wall surface where the first panel will hang (i.e. floor to ceiling, corner to an inch or 2 past the marked line).
Next, press panel #1 in place. Starting from the top, rub down and towards the right to get it to adhere.
Remember to use the pencil line as the guide for straightening the panel, not the corner.
Once in place, hold a level up to the pattern to double-check that it is straight.
If you made a mistake, simply pull the paper away from the wall to realign or adjust it.
The good news? The first panel is the most difficult. After that, everything is straight as long as the pattern is aligned edge to edge.
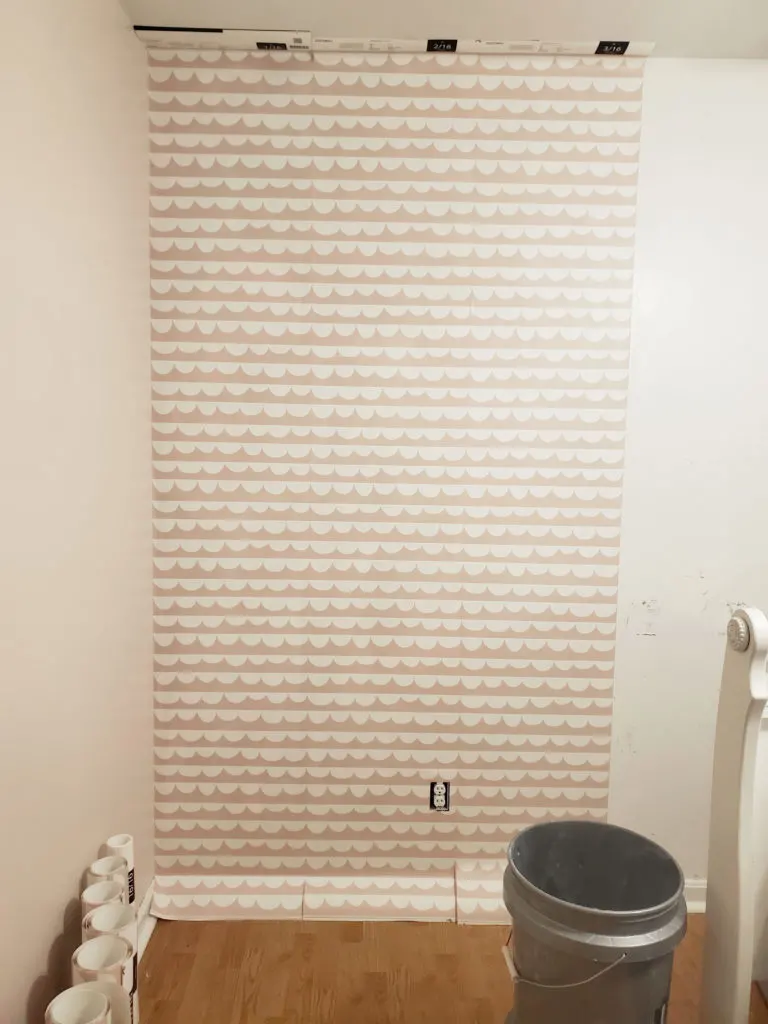
In the photo below, you can see three of the pink wallpaper panels aligned and hung, but not yet trimmed at the top and bottom.

6. Trim the Wallpaper
Finally, trim the wallpaper at the corners, baseboards, and around outlets.
Along the corners and baseboards, use a straightedge to press the paper into the corner and cut it with a utility knife.
Around the outlets, press the wallpaper to determine where the outlet edges are located. Cut it out conservatively with a utility knife. Remember, you can always cut more, if needed (but you can’t cut less…).
Are you looking for more details such as applying glue, wiping away excess glue, preparing the walls, etc.? Check out this video tutorial.
Pink Wallpaper for a Girl’s Room
All in all, I spent about 10 hours hanging wallpaper on one wall. While that’s not quick, it’s important to note that 60-70% of that time was spent on the first and last panels.
Plus, this was my first attempt at hanging wallpaper. I’d estimate that it would take me half the time to do the same project again.
Would I do wallpaper again? Resoundingly, yes. I mean, the results speak for themselves… I. love. her. room.

That being said, when I use wallpaper again, I’ll implement the tips and tricks I learned along the way.
Wallpaper Tips and Tricks
Overestimate the amount of paper you’ll need.
PhotoWall recommends adding a few inches to your wall measurements. Add 1-2″ of additional height and width to your wall measurements, which will give provide room for error and accommodate walls that aren’t square.
Measure the height of the left corner and right corner of the wall.
In the event that the right corner is taller than the left corner (again, walls aren’t always square!), accommodate for that height change when you start the wallpaper in the left corner. In other words, if it is .25″ taller, have at least .5″ of paper (or more) to trim off the top of the first panel.
Pink Wallpaper for a Girl’s Room – Source List

- Pink Wallpaper – Changing Waves in Premium Quality
- $20 PhotoWall Wallpaper Kit – Includes the Brush, Seam Roller, Straight Edge, etc.
You can check out the rest of her room in this post.