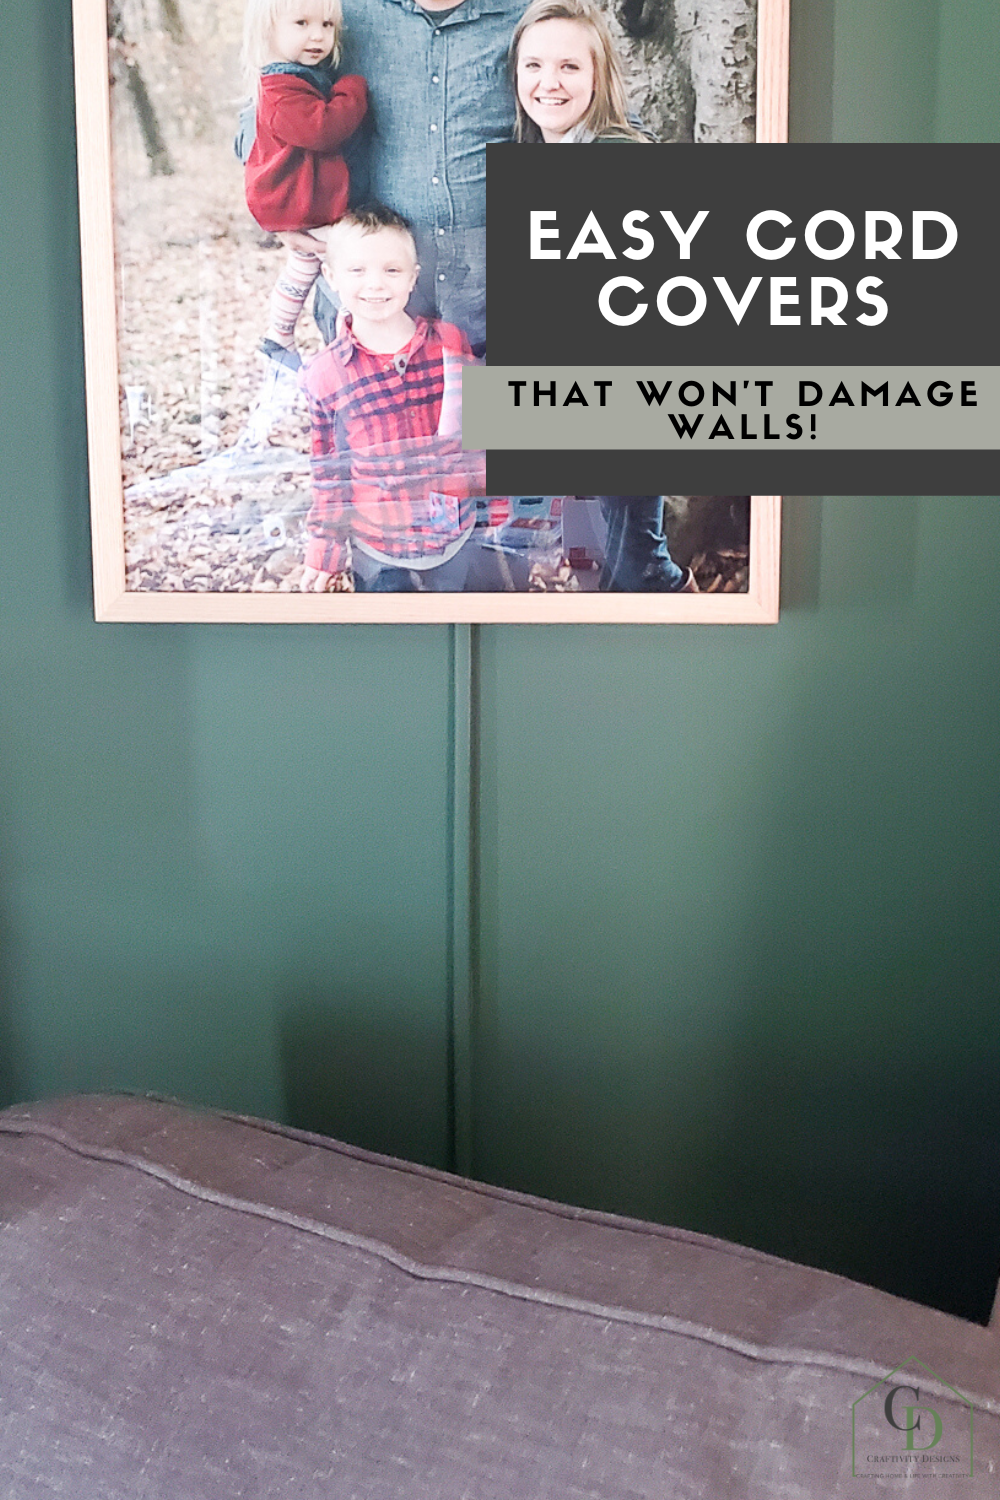
Learn how to install cord covers for wall lights and sconces – without damaging your walls. These easy to install cord covers are a quick home upgrade in under 15 minutes!
Not every home upgrade has to be expensive or time-consuming. Cord covers for wall sconces are an affordable, quick project that makes a big (but understated) difference. It’s the type of project you didn’t realize you needed to do – but, afterward, are so glad that you did it!
Disclosure: This page includes affiliate links.
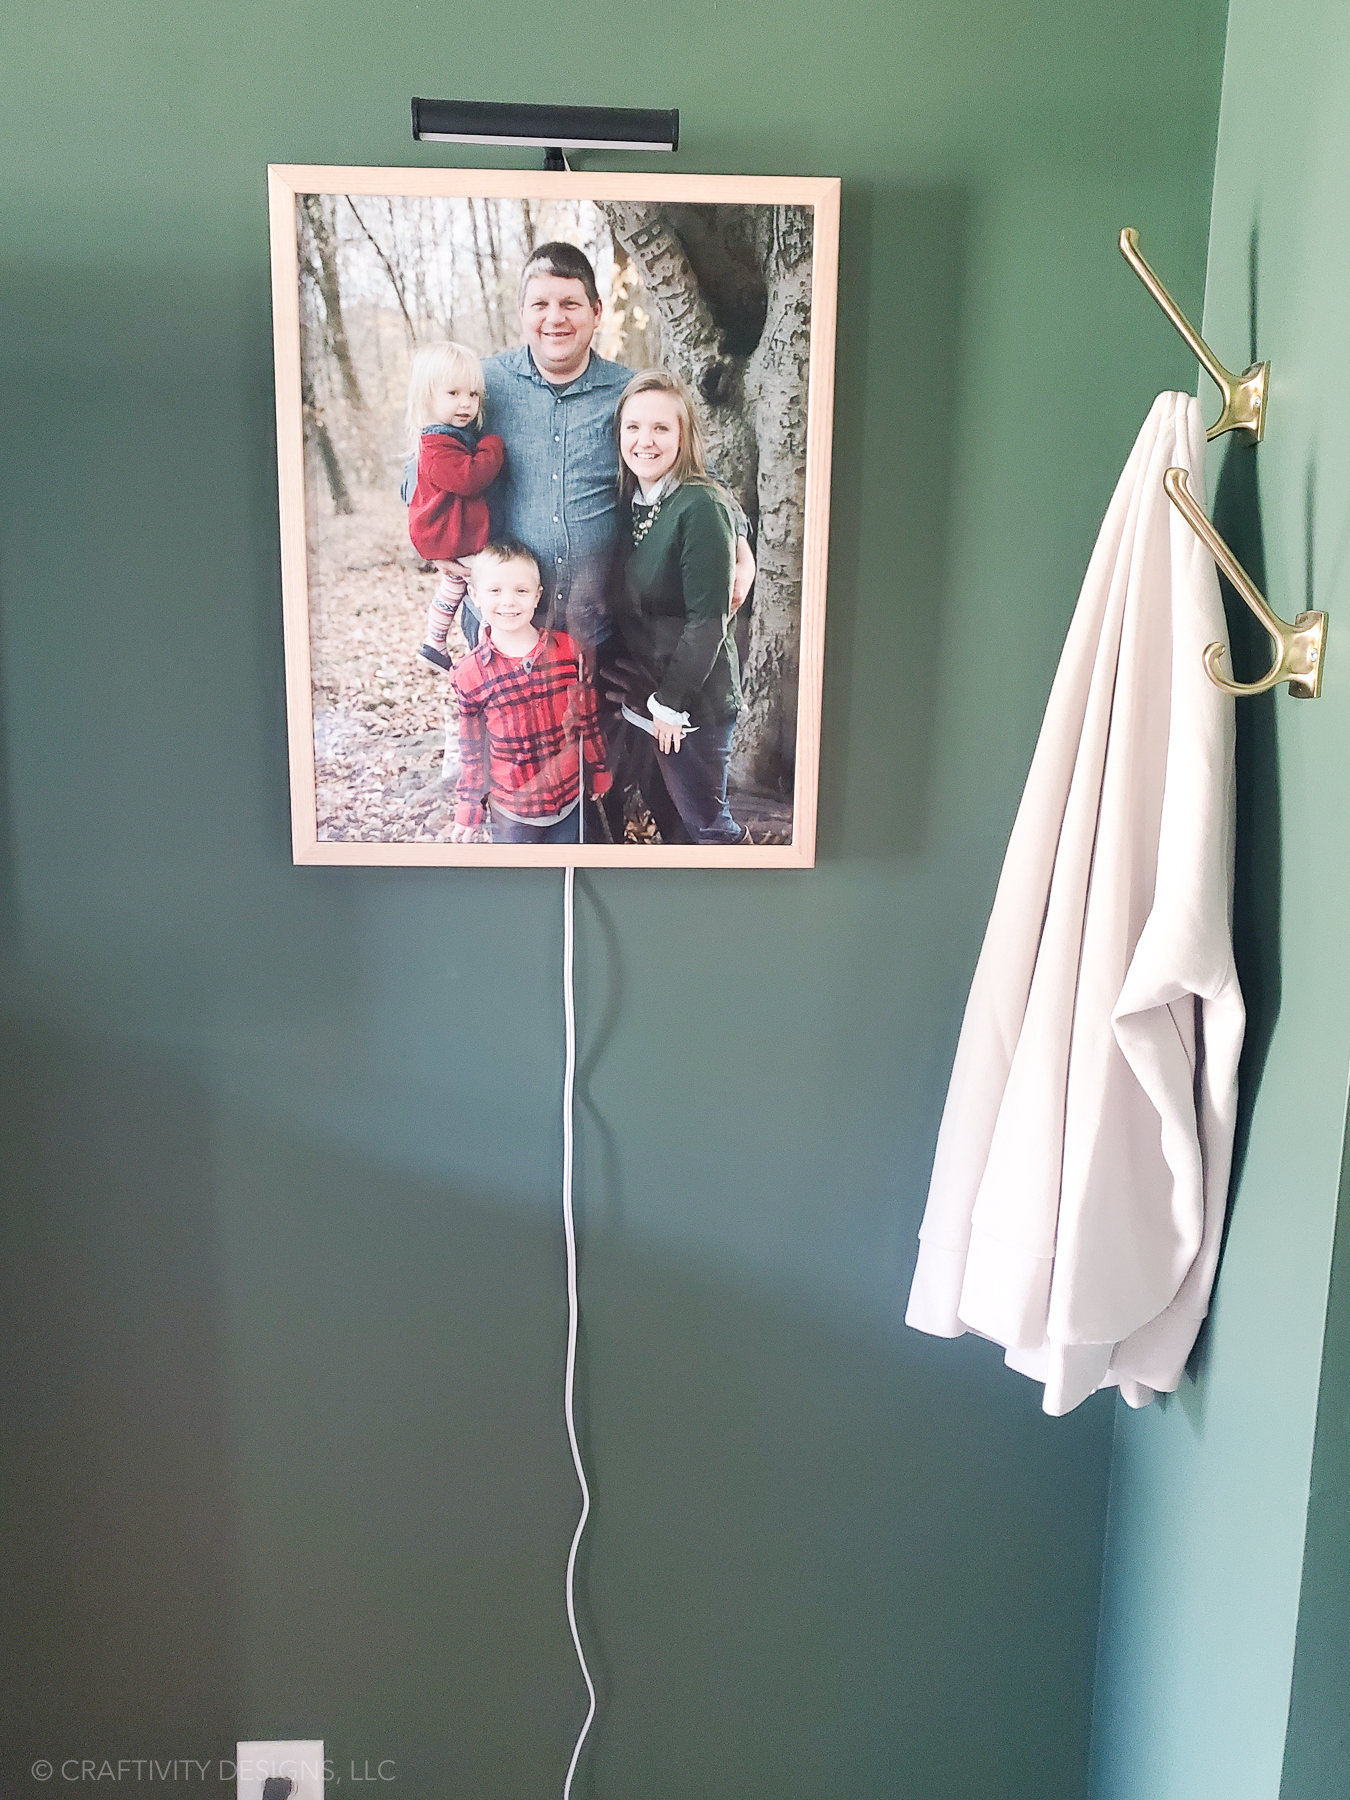
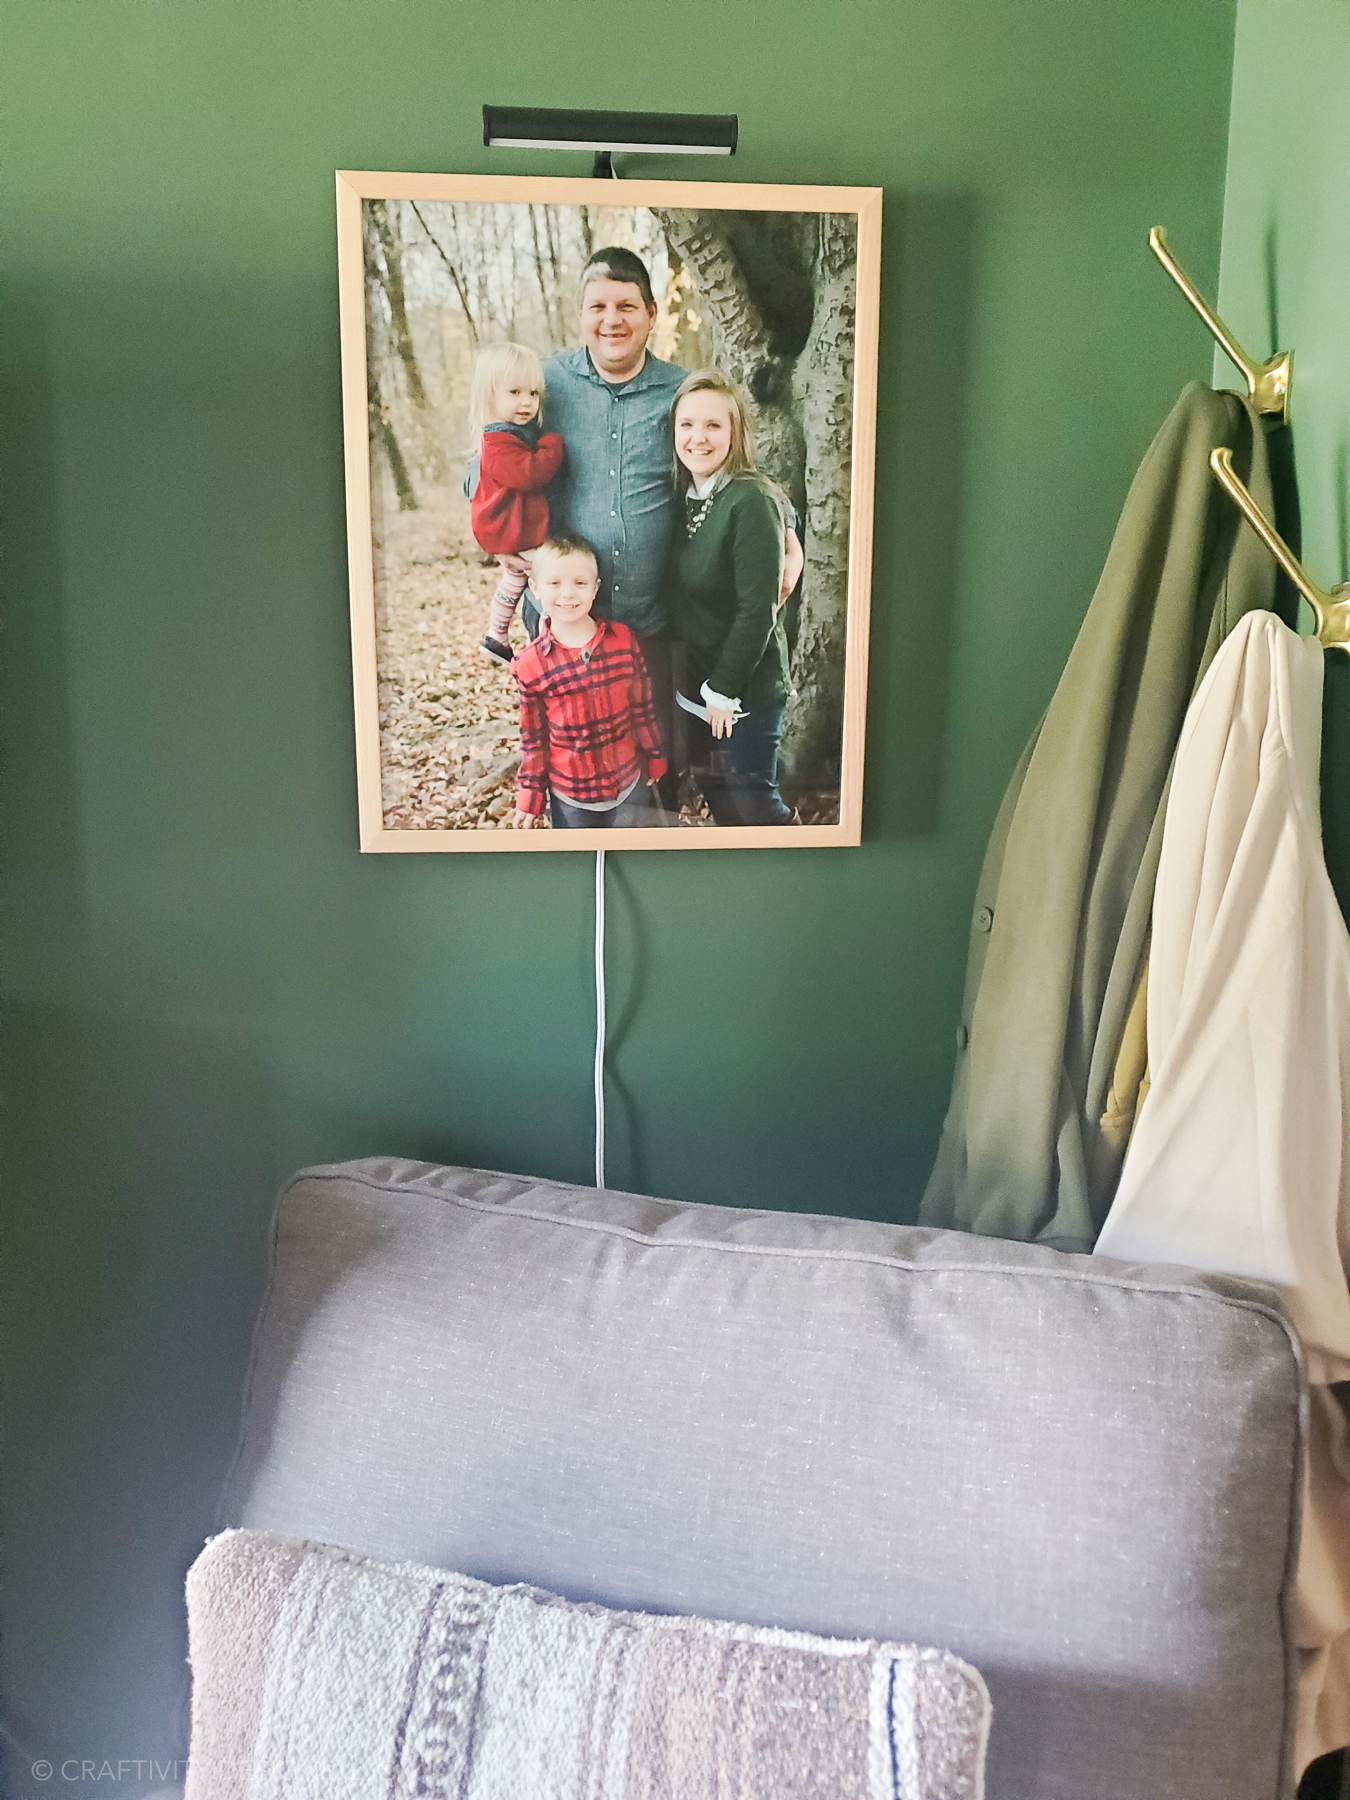
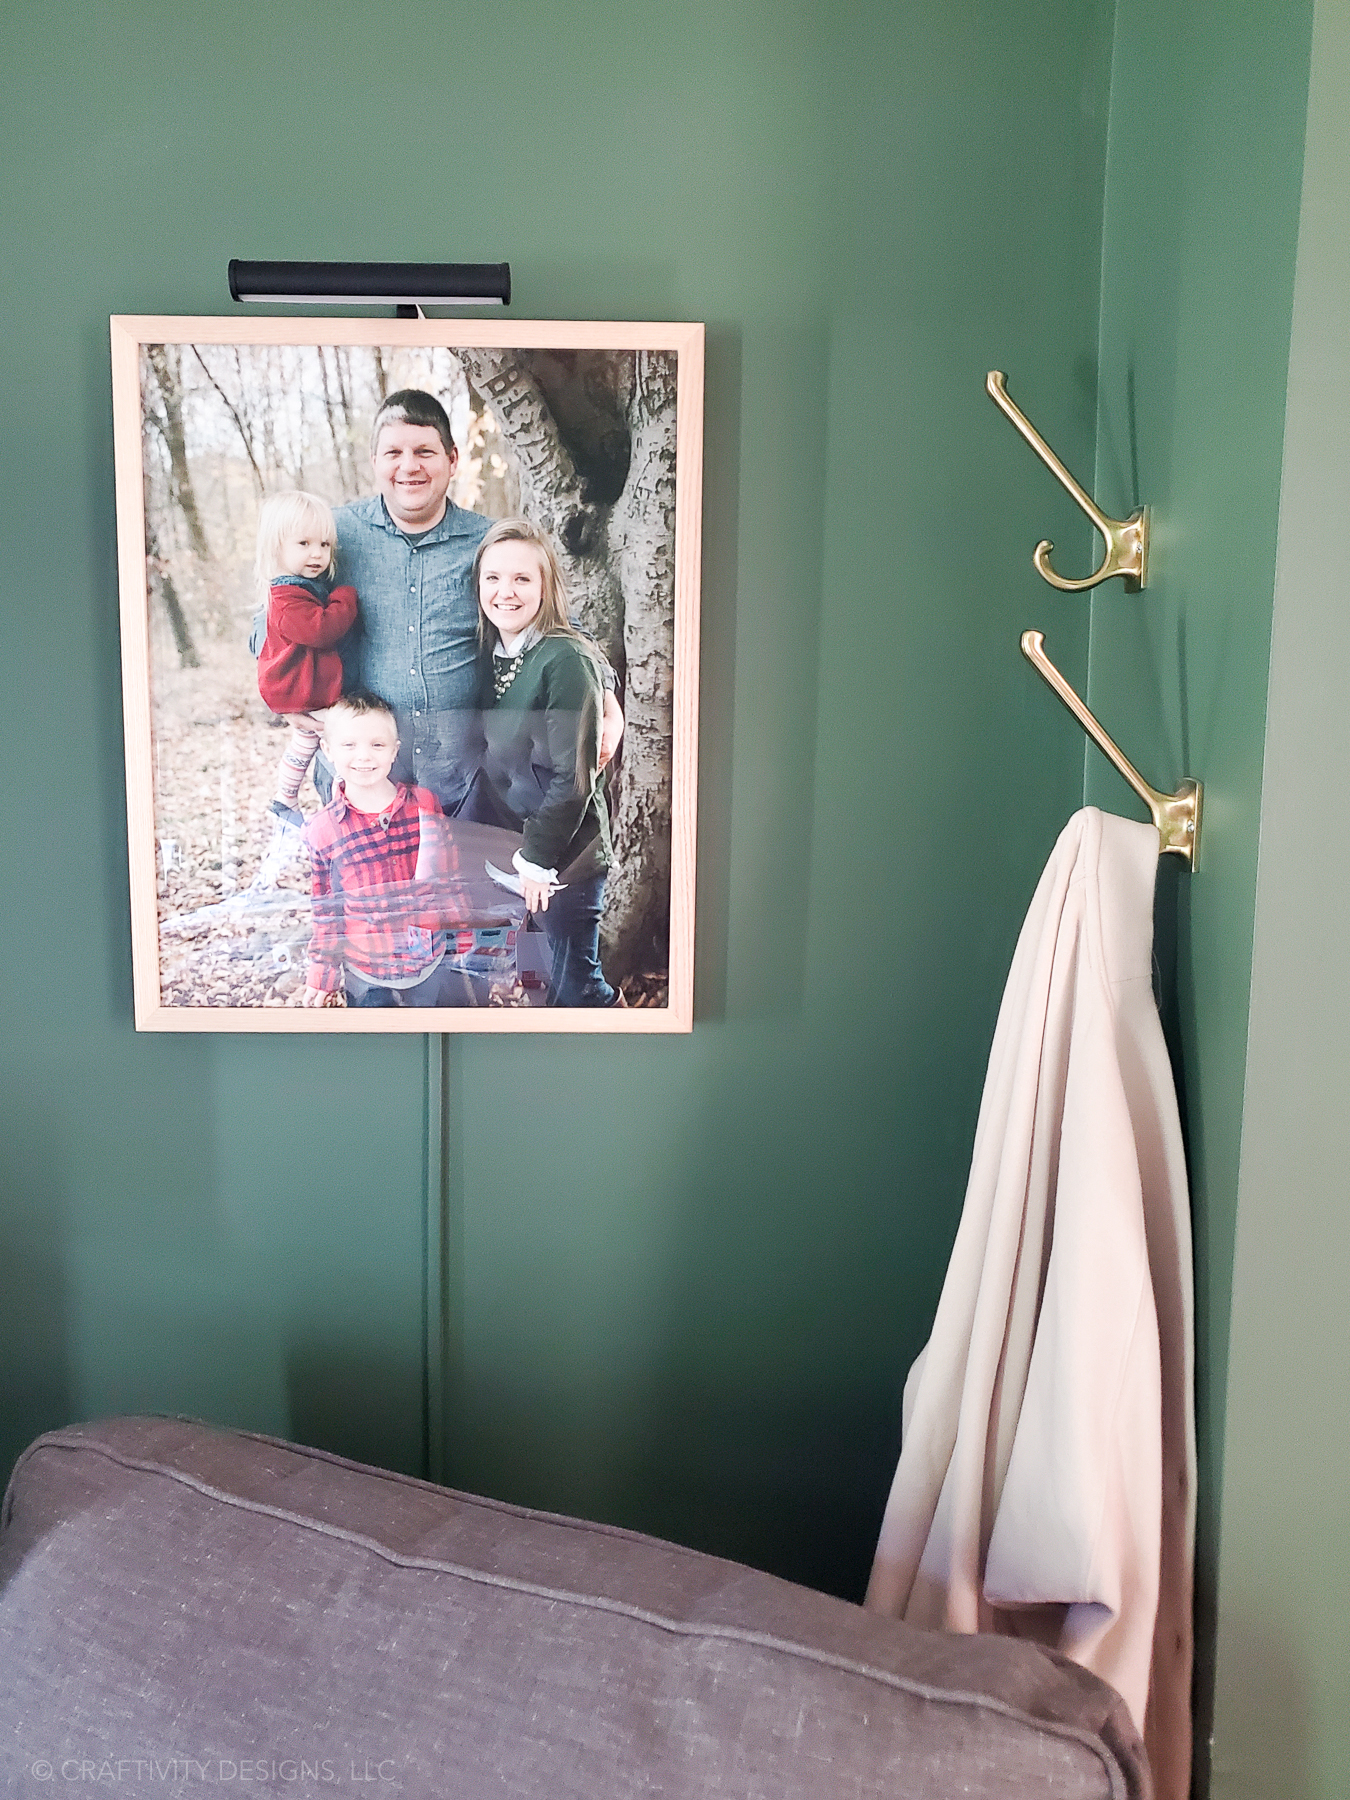
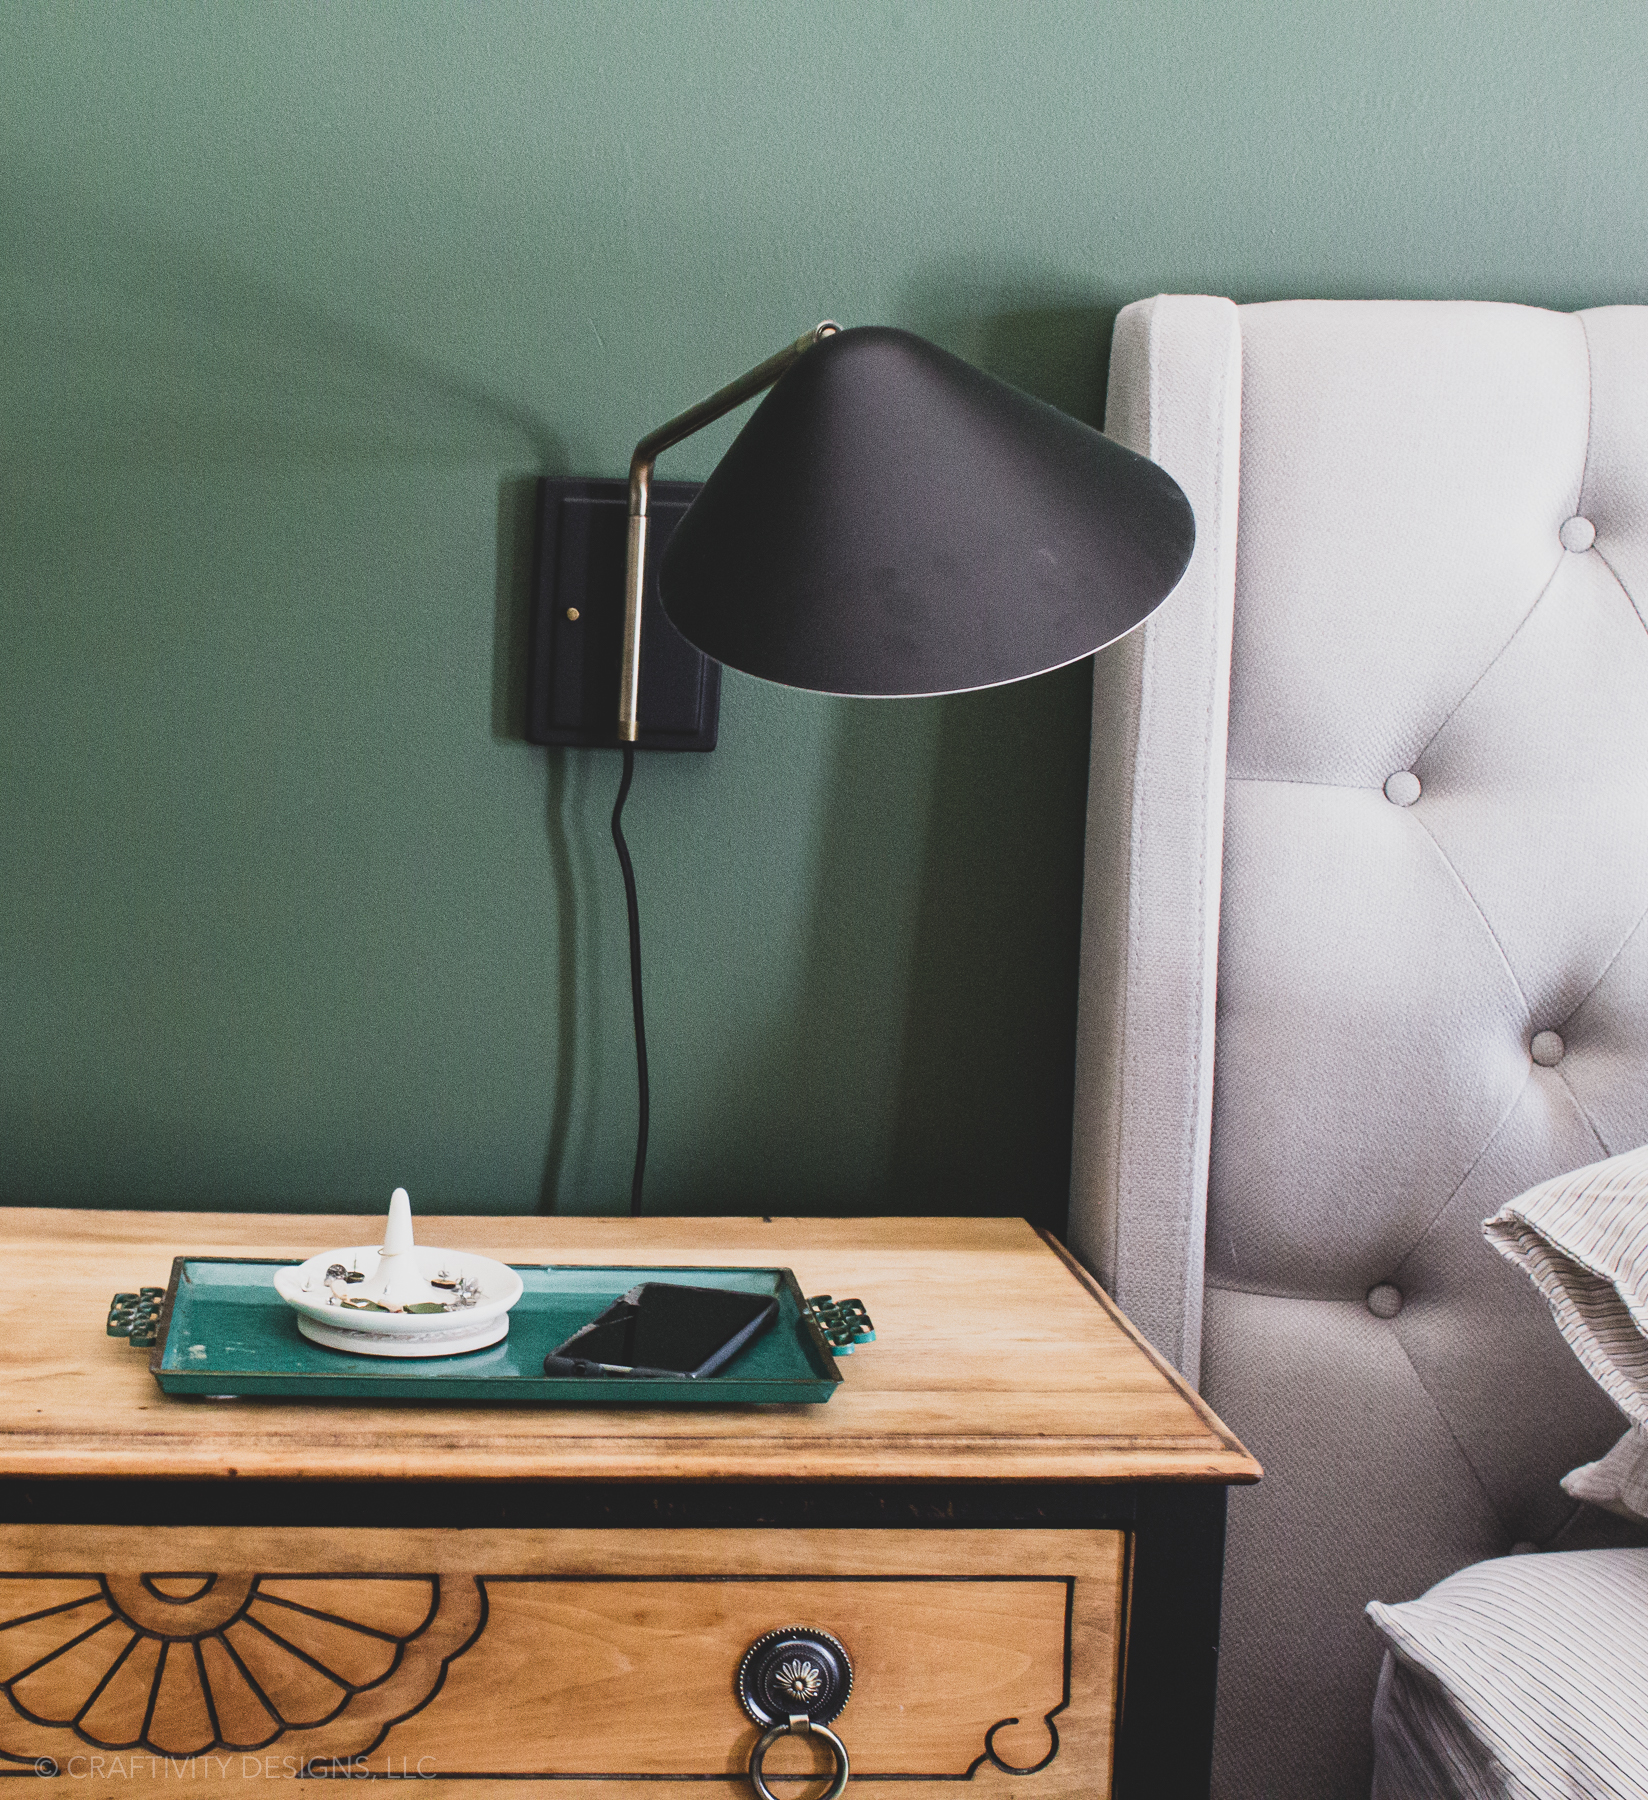
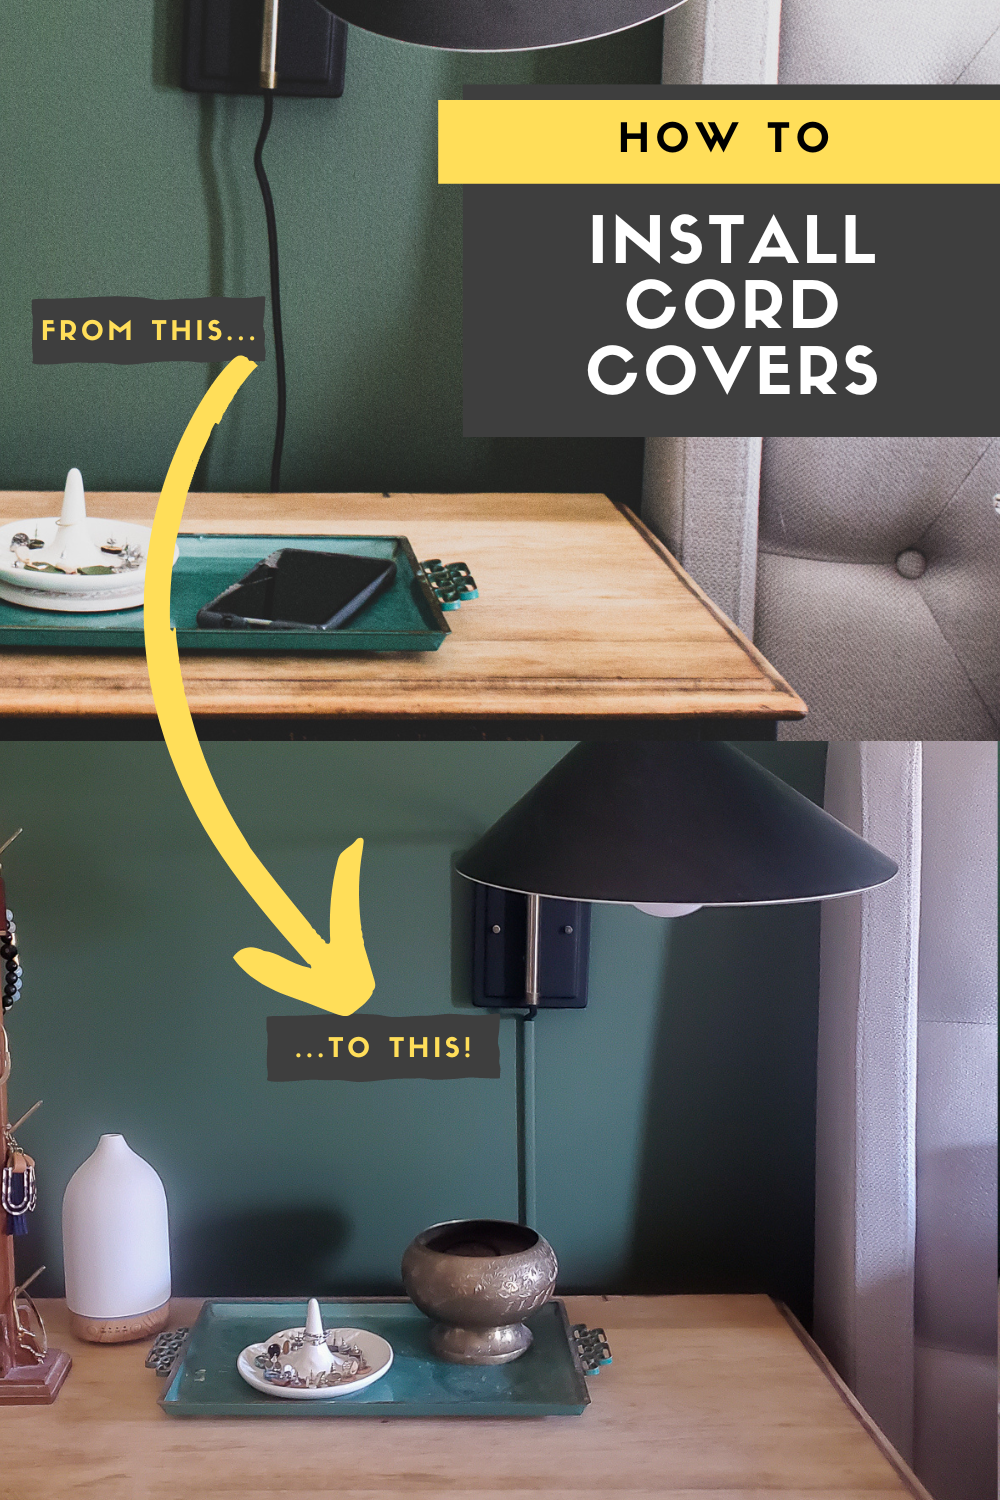
We bought these mid-century swiveling sconces with a fabric-wrapped black cord for our dark green master bedroom. For a sconce with an exposed cord, the lights looked quite nice. At least, that is what I thought… I didn’t even realize how good they could look with a painted cord cover for walls!
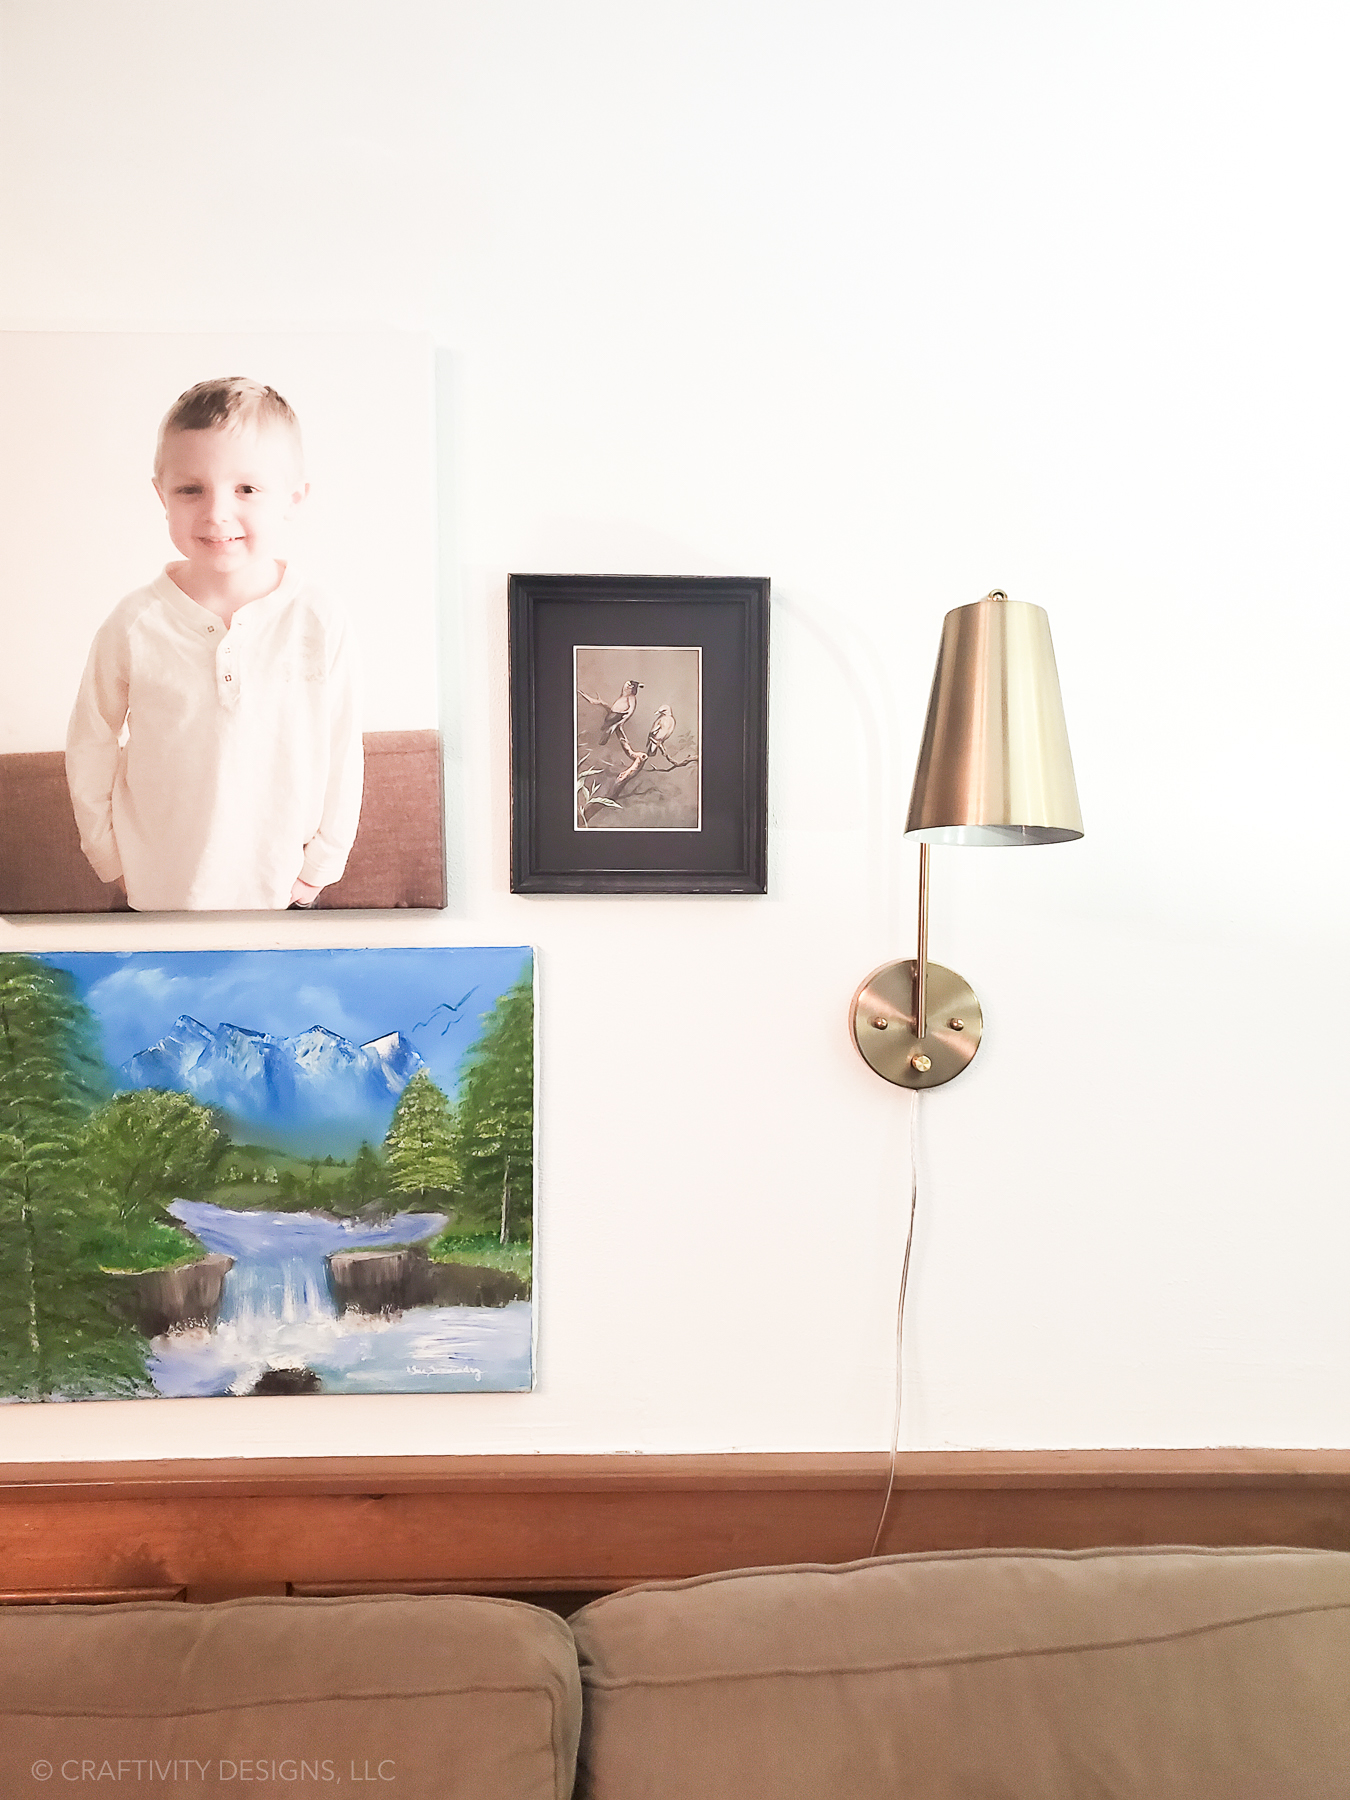
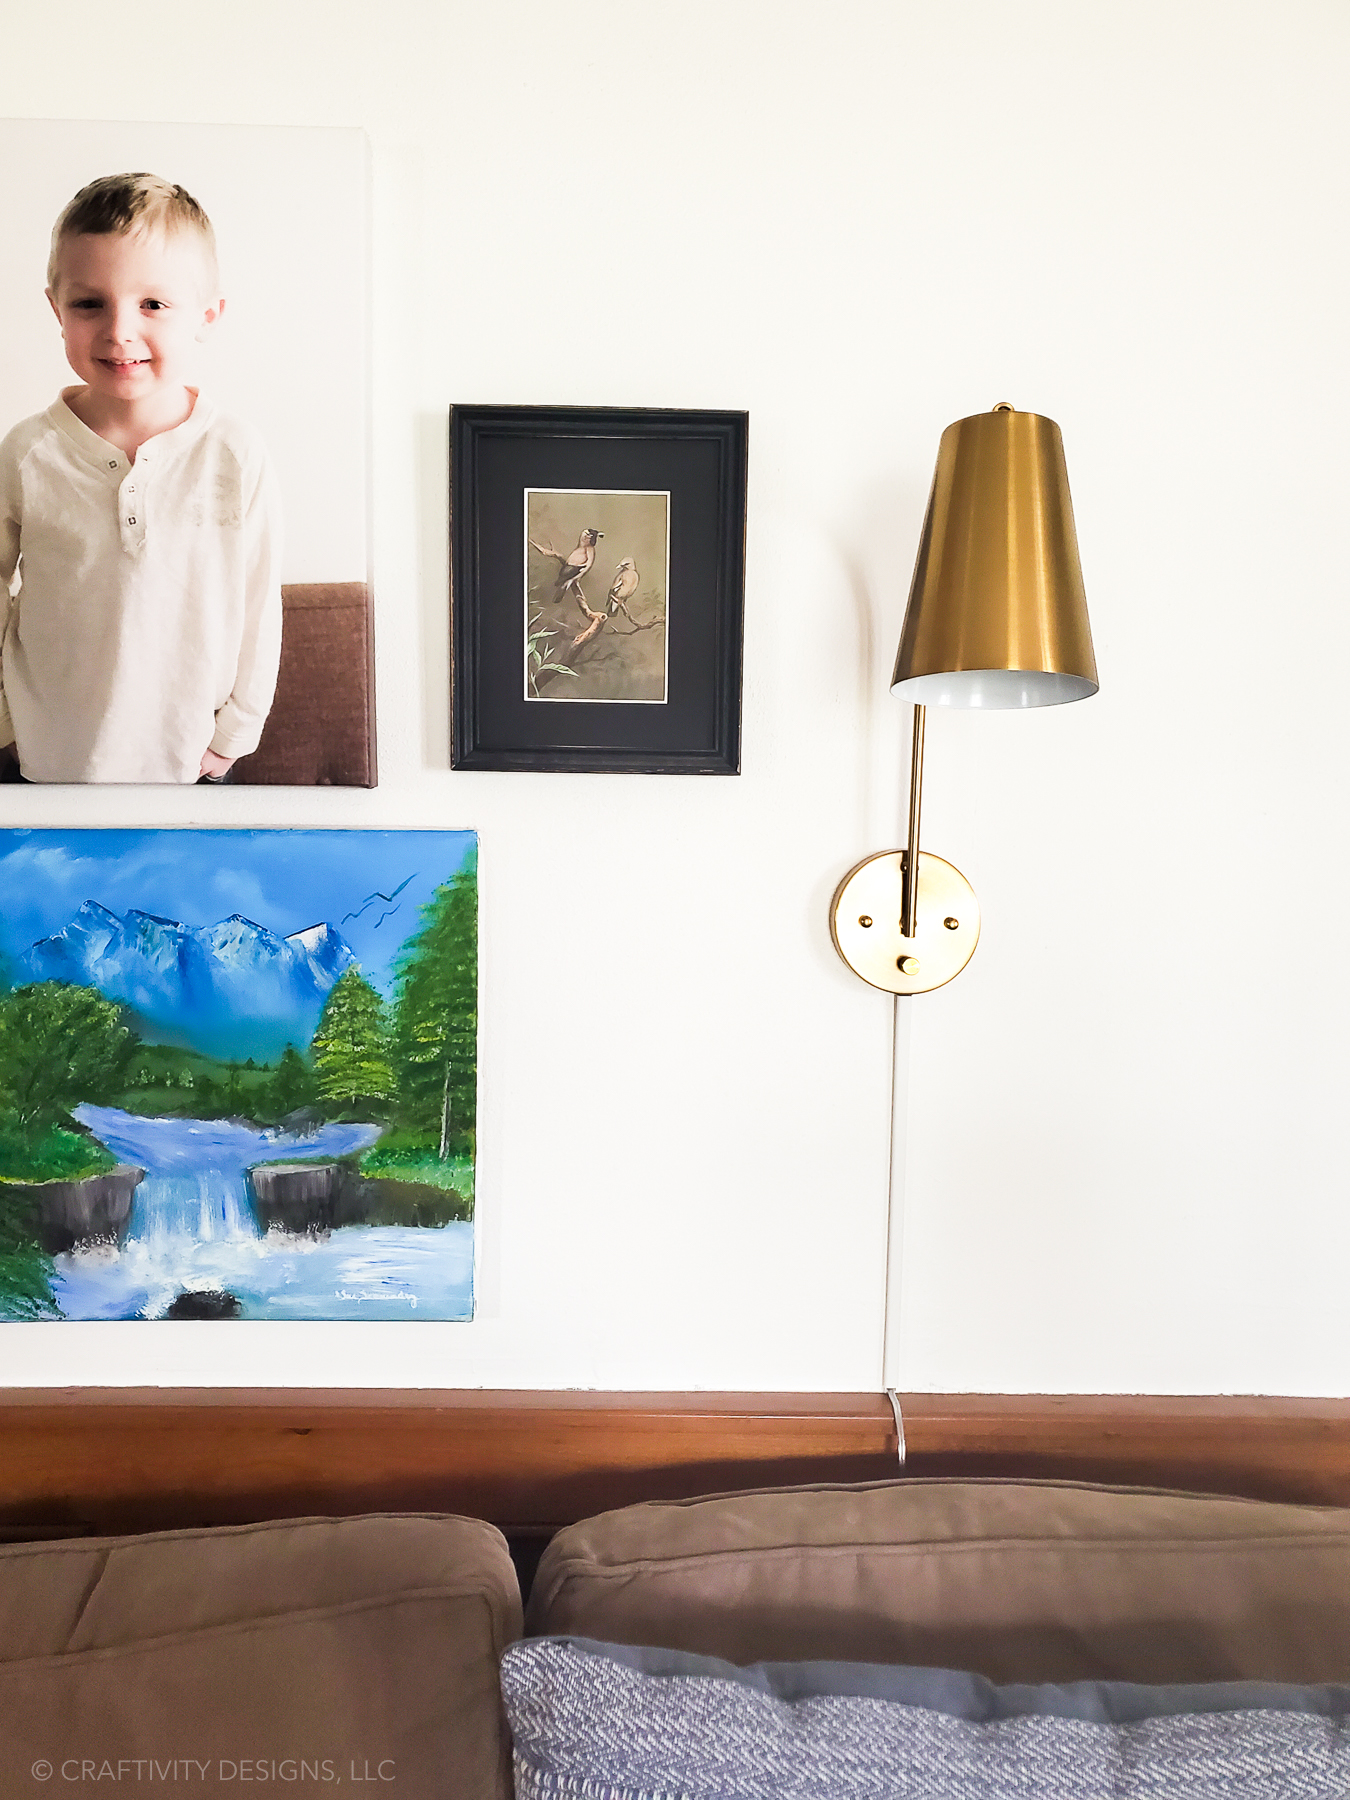
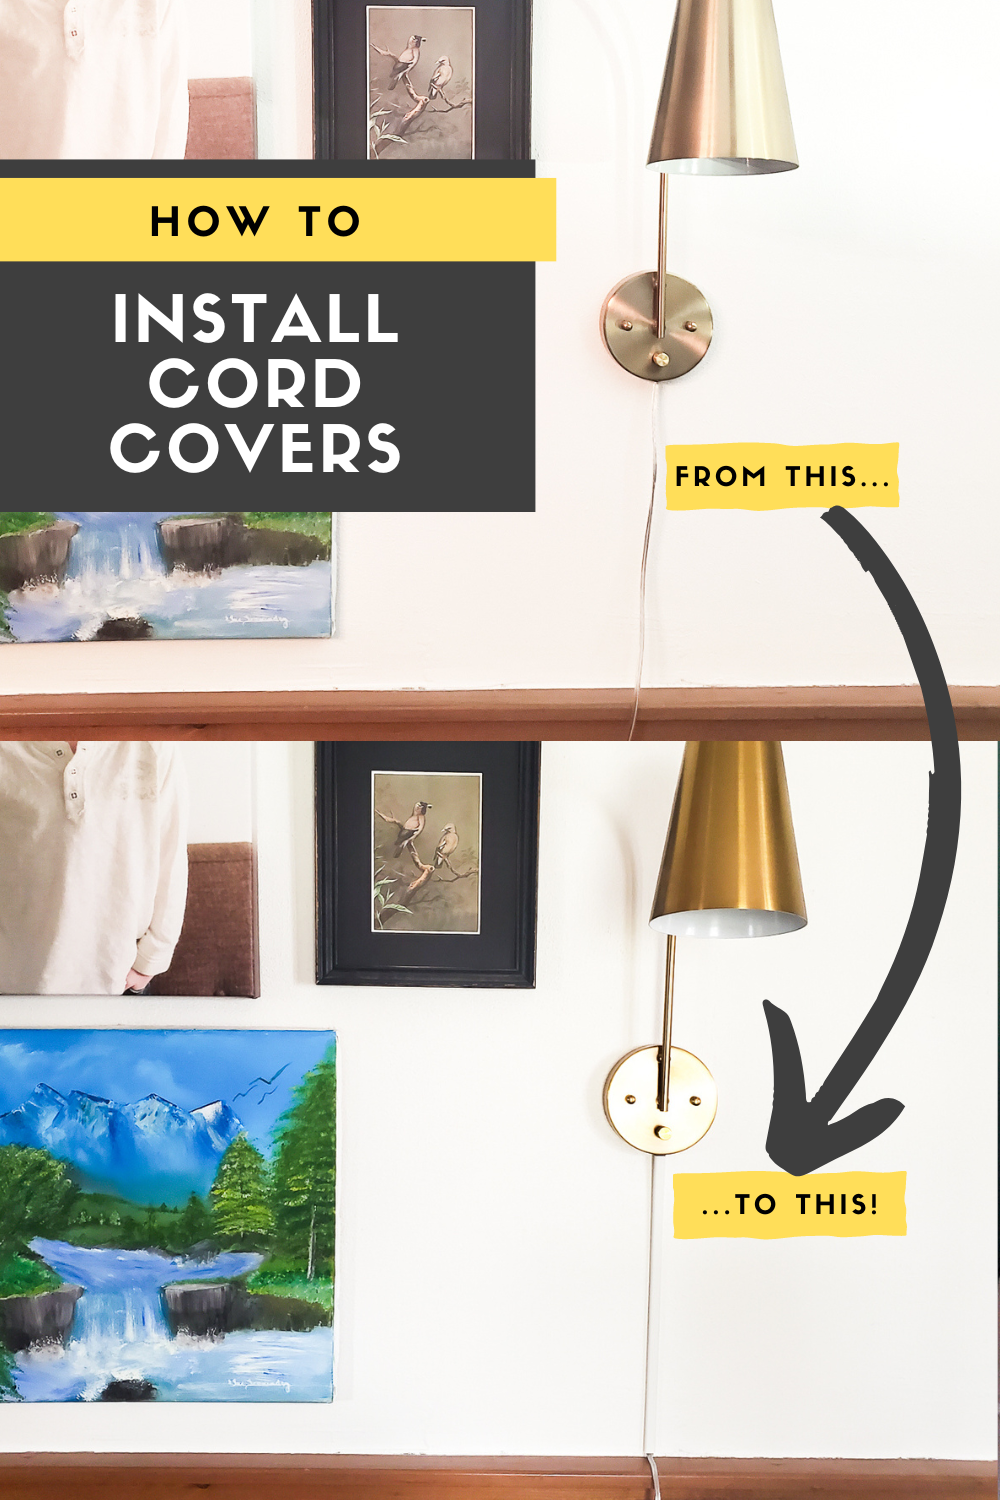
It wasn’t until I bought this art lamp, that I started researching cord covers for walls. I love these simple lamps (available in various sizes and finishes) for hanging above family photos or artwork (like our large-scale Hawaiian beach print). Unfortunately, the white cord is an eye sore!
Cord Covers that Won’t Damage the Wall
Many cord covers for walls have a major downside: the cord cover requires adhesive. I do NOT like using adhesive on my walls.
Adhesive is too permanent and will damage walls when removed. Take a quick look at the reviews, and you’ll see that this cord cover is no exception. However, I installed it differently, so that I didn’t have to worry about damaged walls.
This tutorial will explain how to install a cord cover for wall sconces without using adhesive!
You might also like: How to make a DIY rope cord cover in 30 minutes!
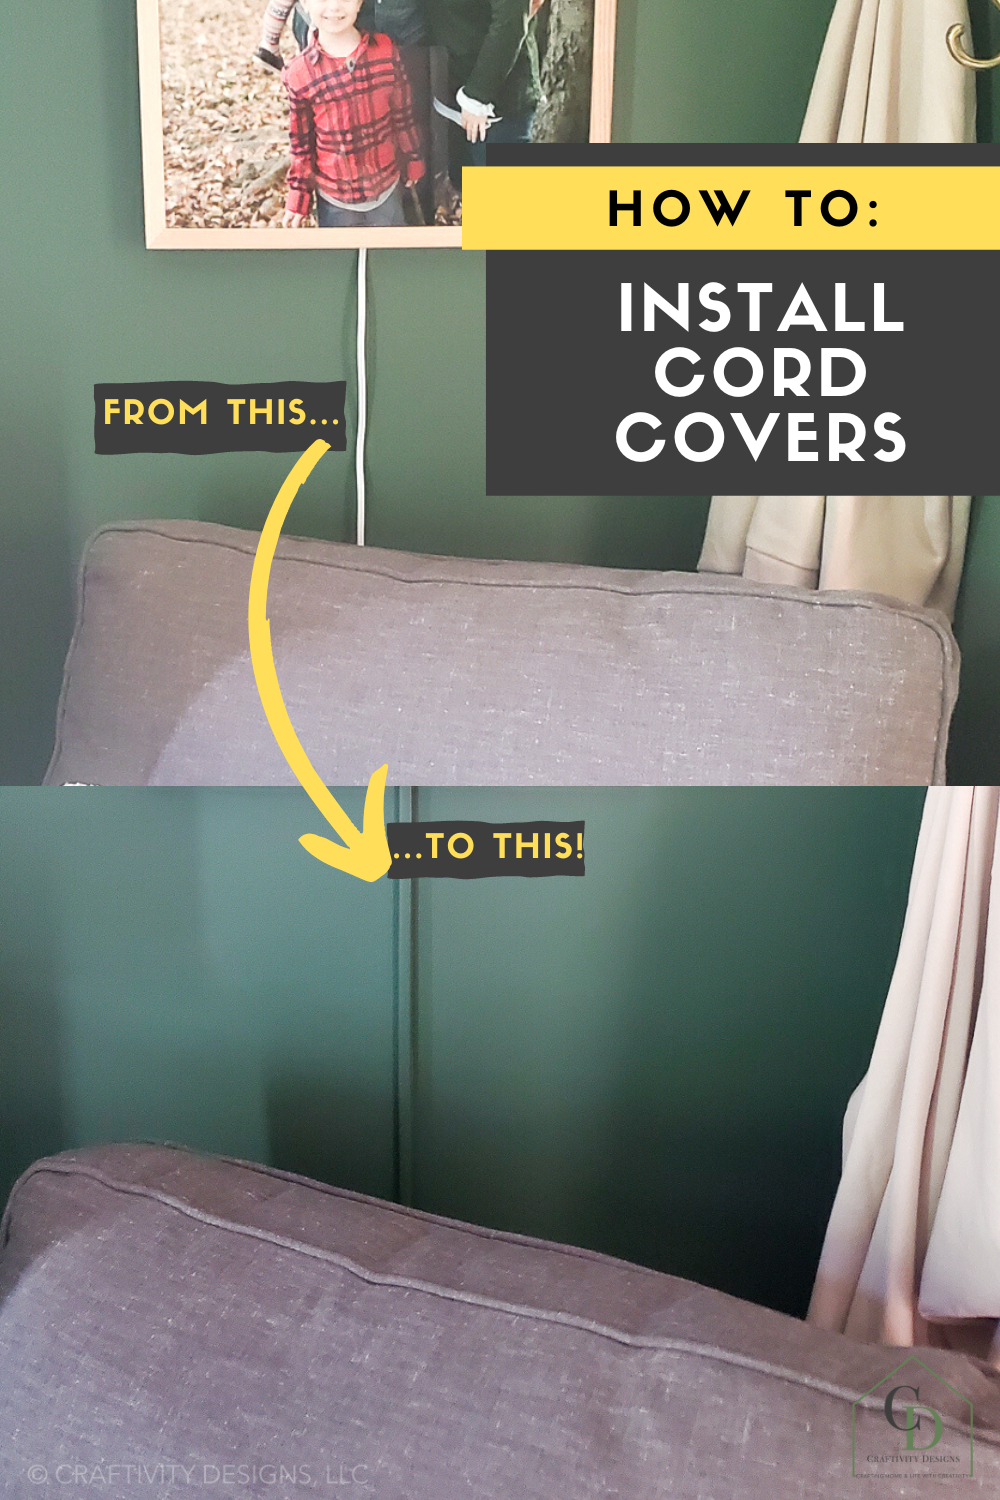
Before and After: Cord Covers for Wall Sconces
Installing cord covers for wall light cords is an understated – but impactful – home update. It’s the type of project that is incredibly affordable and easy to execute; but elevates the look of your space.
Let’s take a look at several before and afters around my home, where we’ve installed cord covers.
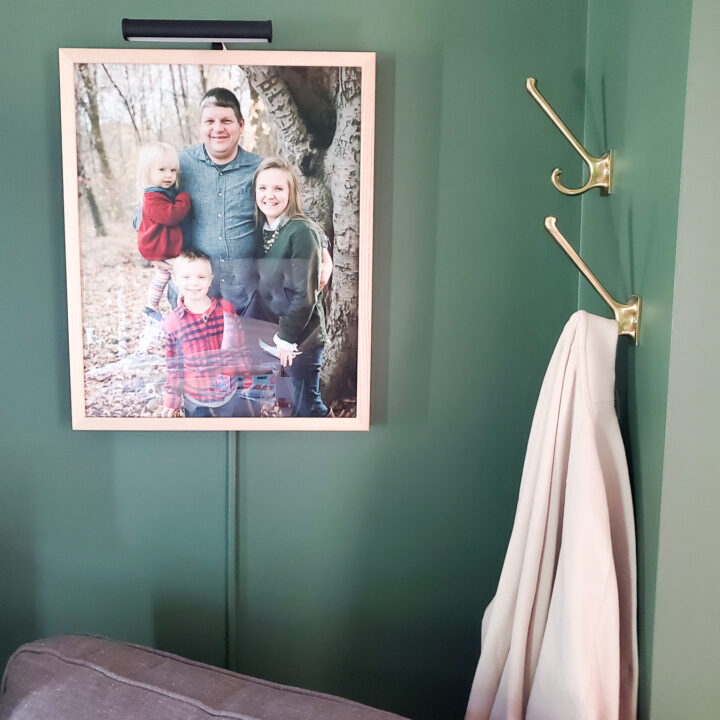
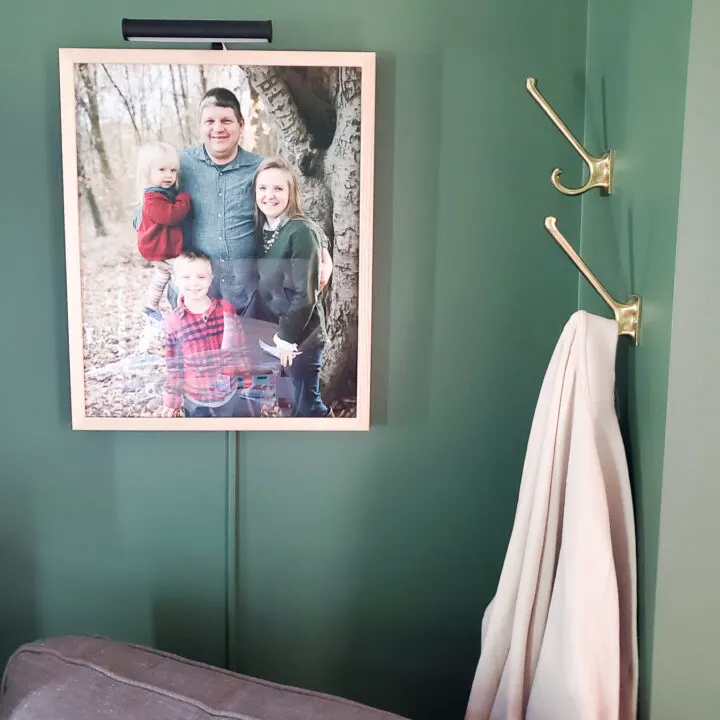
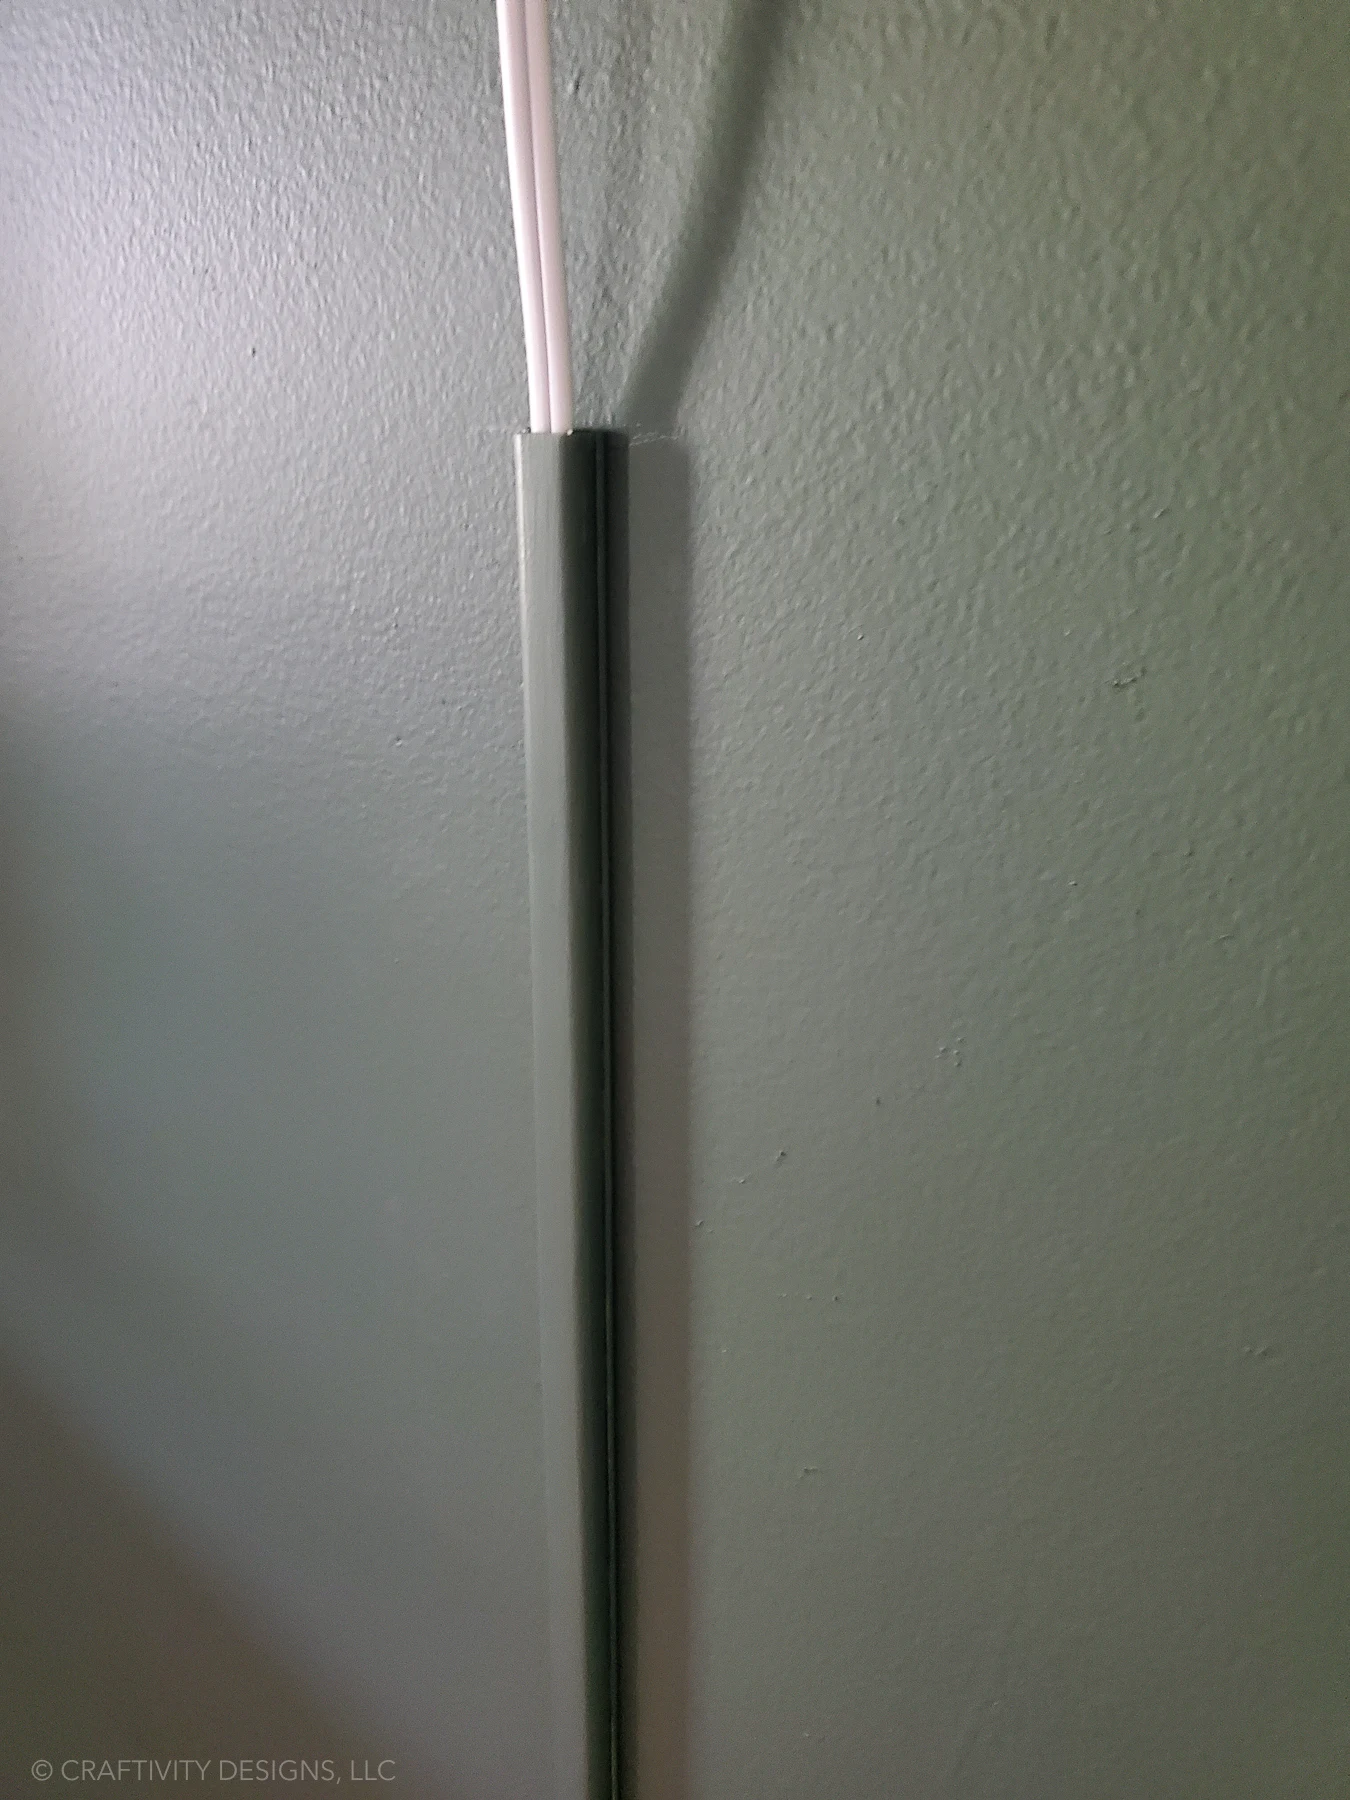
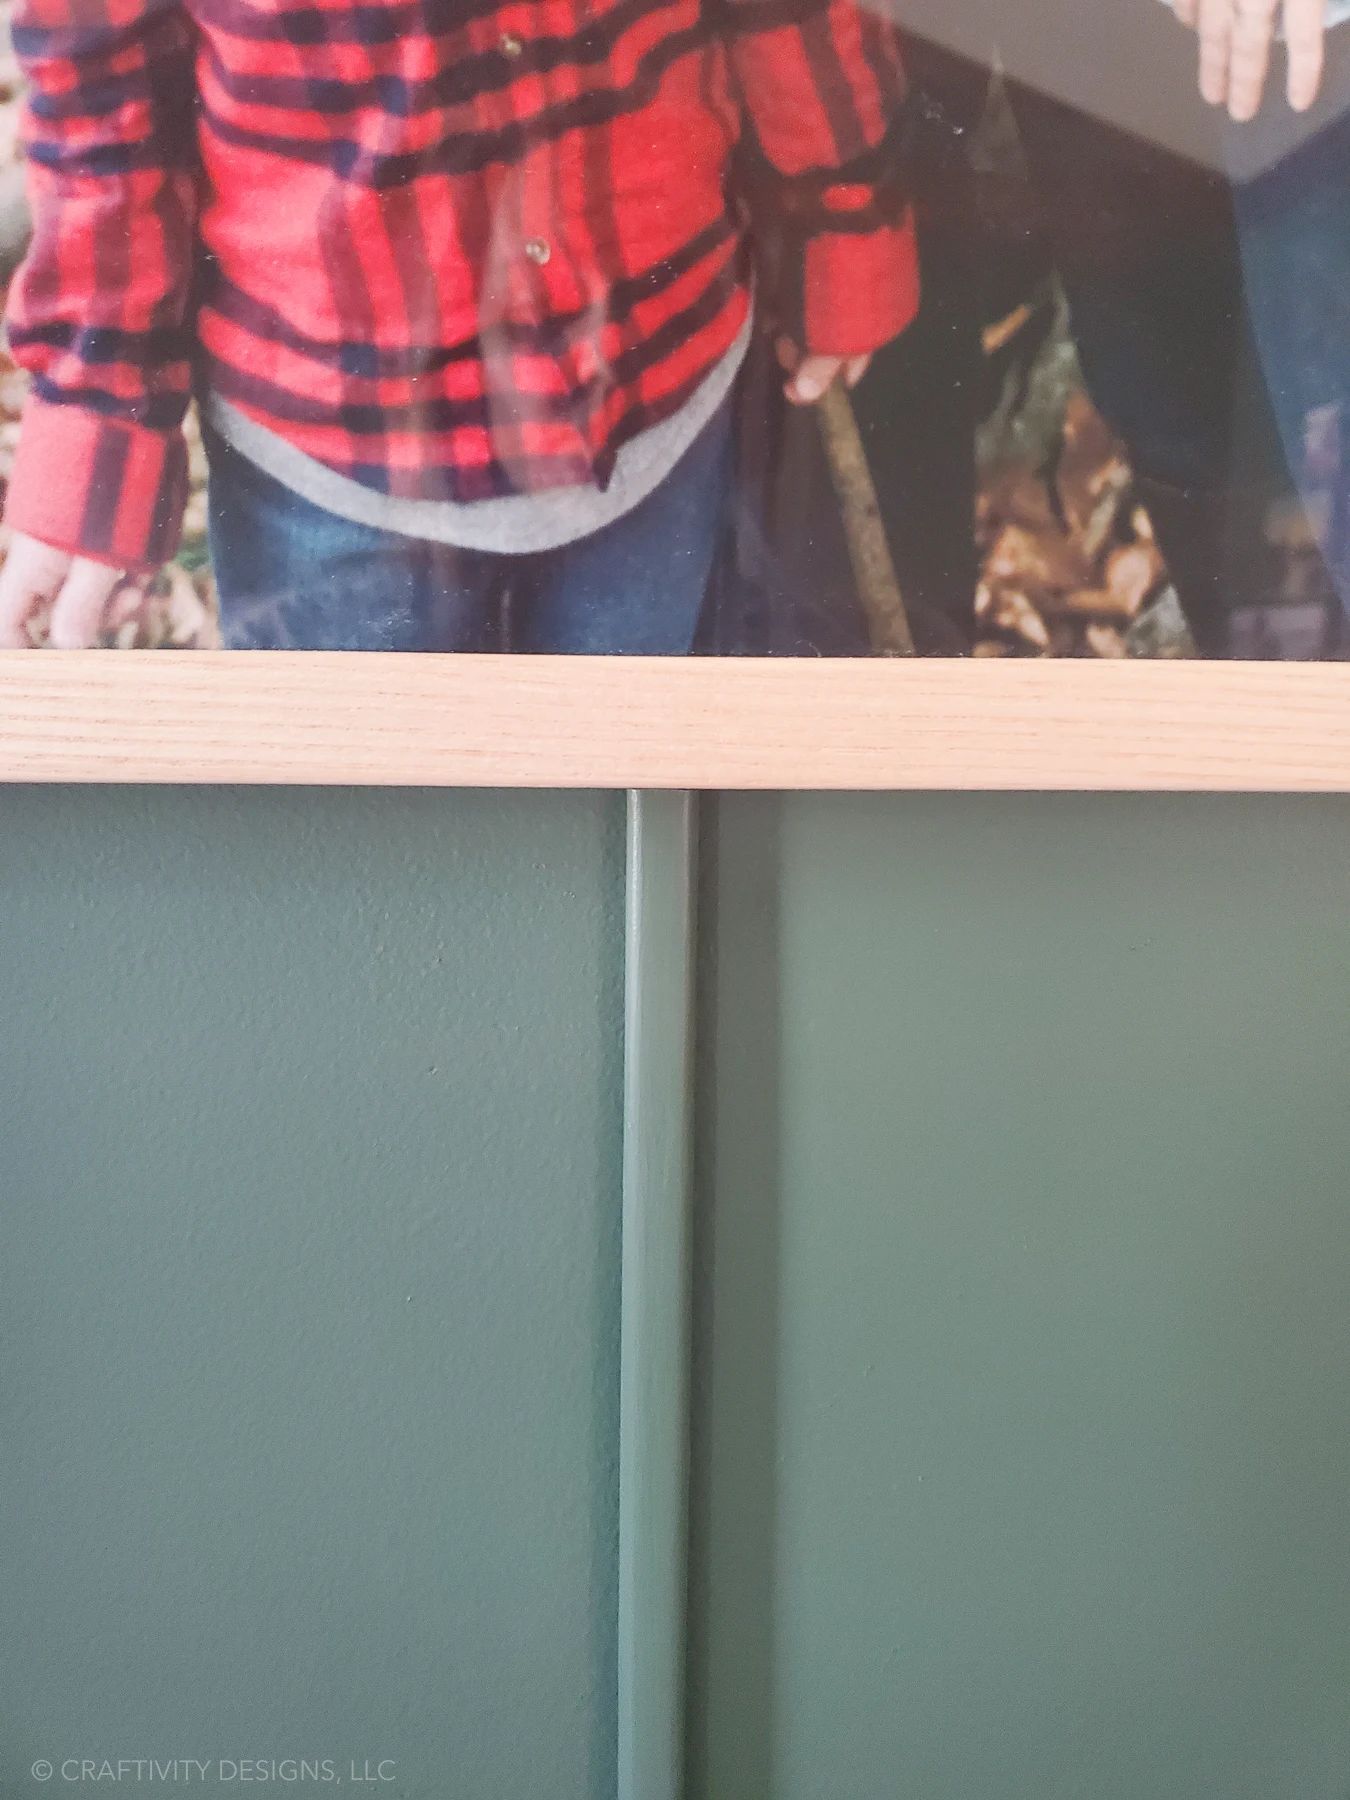
The first, in our dark green master bedroom, covers the cord hanging below a family photo. Painting the cover the same green as the walls causes it to blend right into the background.
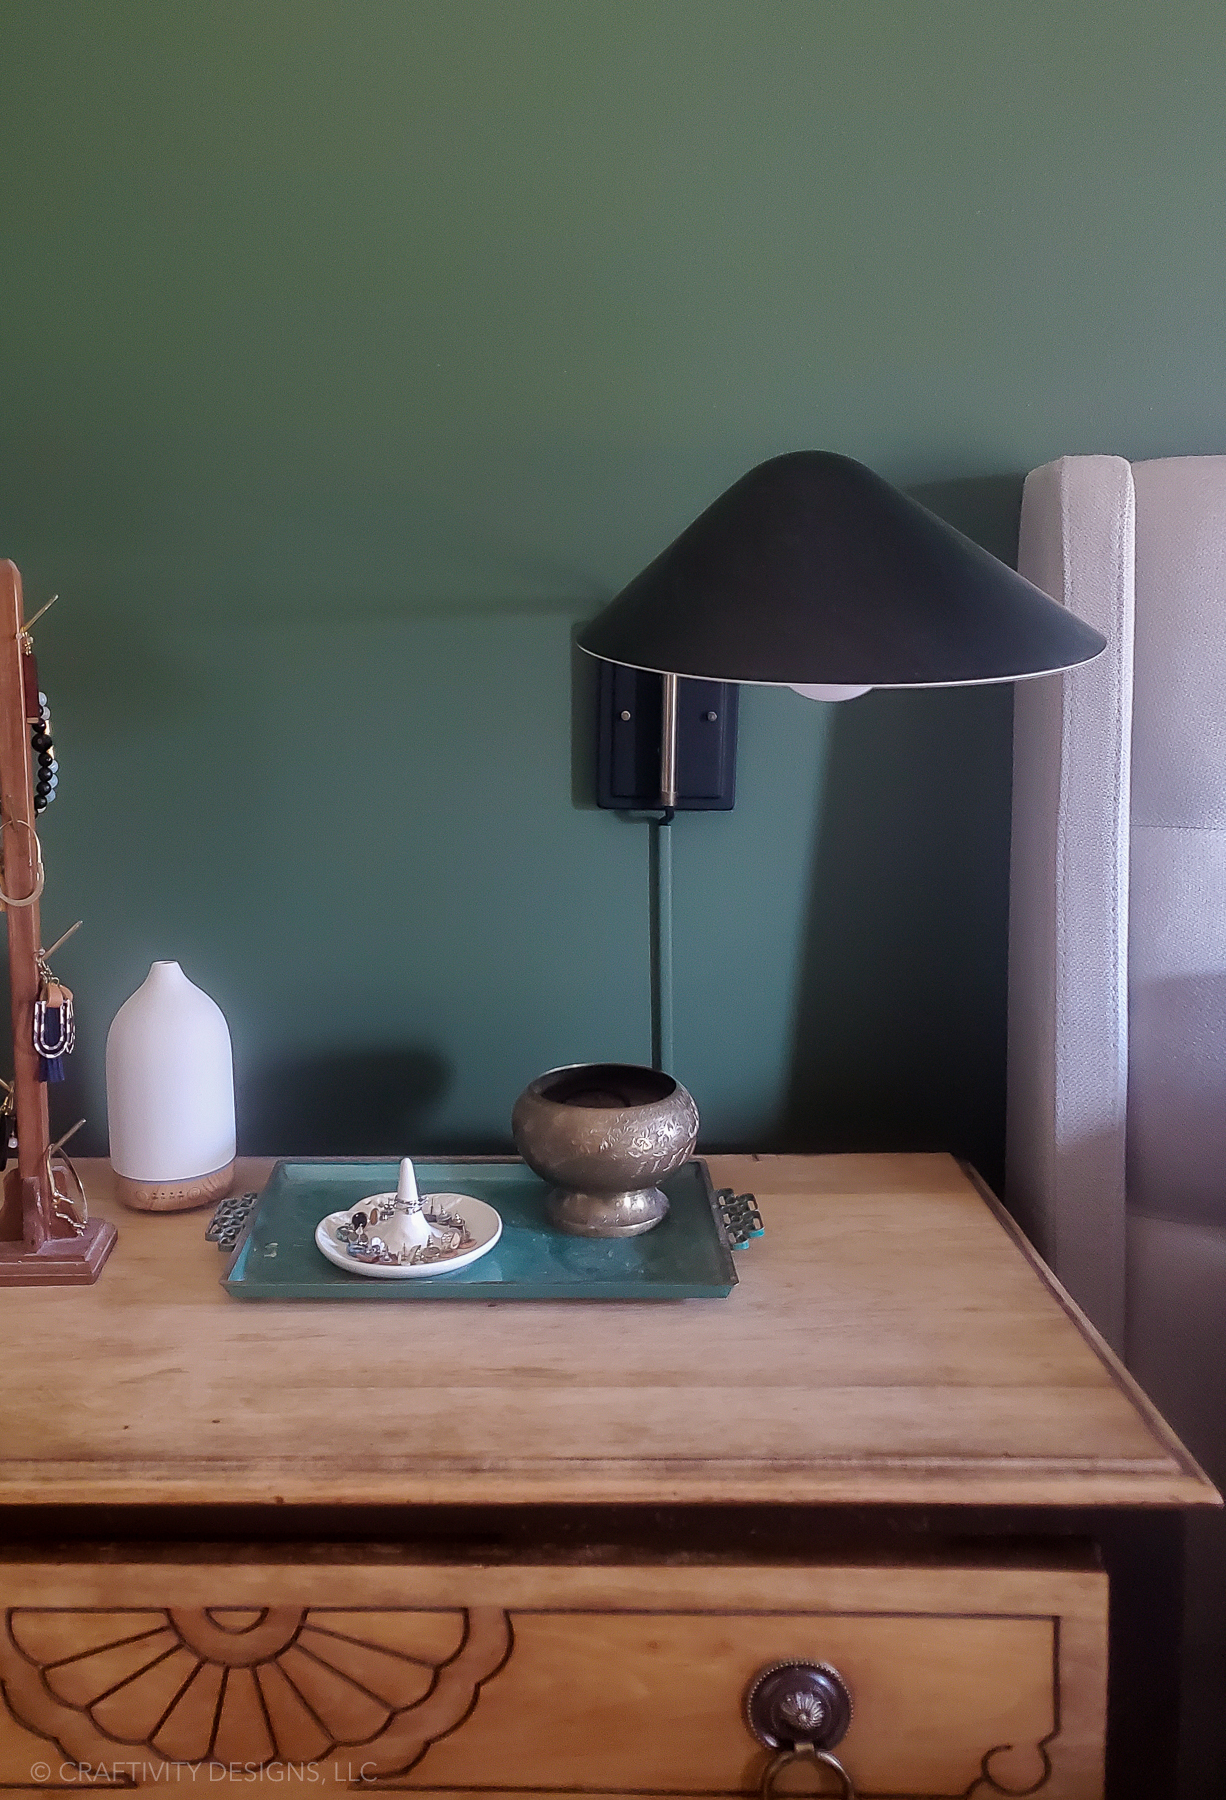
Similarly, above our nightstands, the black fabric cord hides behind a painted cord cover. At first glance, it gives the illusion that the sconces are hard-wired, rather than plug-in.
In our living room, the brass sconces have attractive clear cords. Still, the fact that the cords are easily moved – and often crooked – results in regular adjustments.
So, it only made sense to use these inexpensive cord covers above our couch, too. Again, I’m so pleased with how this project instantly results in a cleaner, orderly feel to the space.
Psst: If you are interested in brightening up a dark living room, I have tons of tips plus one of my favorite semi-flush fixtures that still offers a ton of light.
FAQs
You’ll have to plan for this detail. In some case, wall sconces or wall lights will have switches near the plug. In that case, you should have plenty of space to install a cord cover.
In other cases, the switch will be located midway down the cord. In those cases, the cover will have to end prior to the switch location.
We like using smart plugs to turn wall sconces and wall lights on and off. With a smart plug, you never have to reach behind furniture or down near an outlet to turn lights on and off.
How to Install Cord Covers for Wall Sconces
Learn how to install cord covers for wall lights and sconces - without damaging your walls. These easy to install cord covers are a quick home upgrade in under 15 minutes!
Materials
- Paintable Wall Cord Cover
- Extra Wall Paint
- Sticky Tack or Painters Tape
- Picture-Hanging Nails
Tools
- Paint Brush
- Pencil
- Level
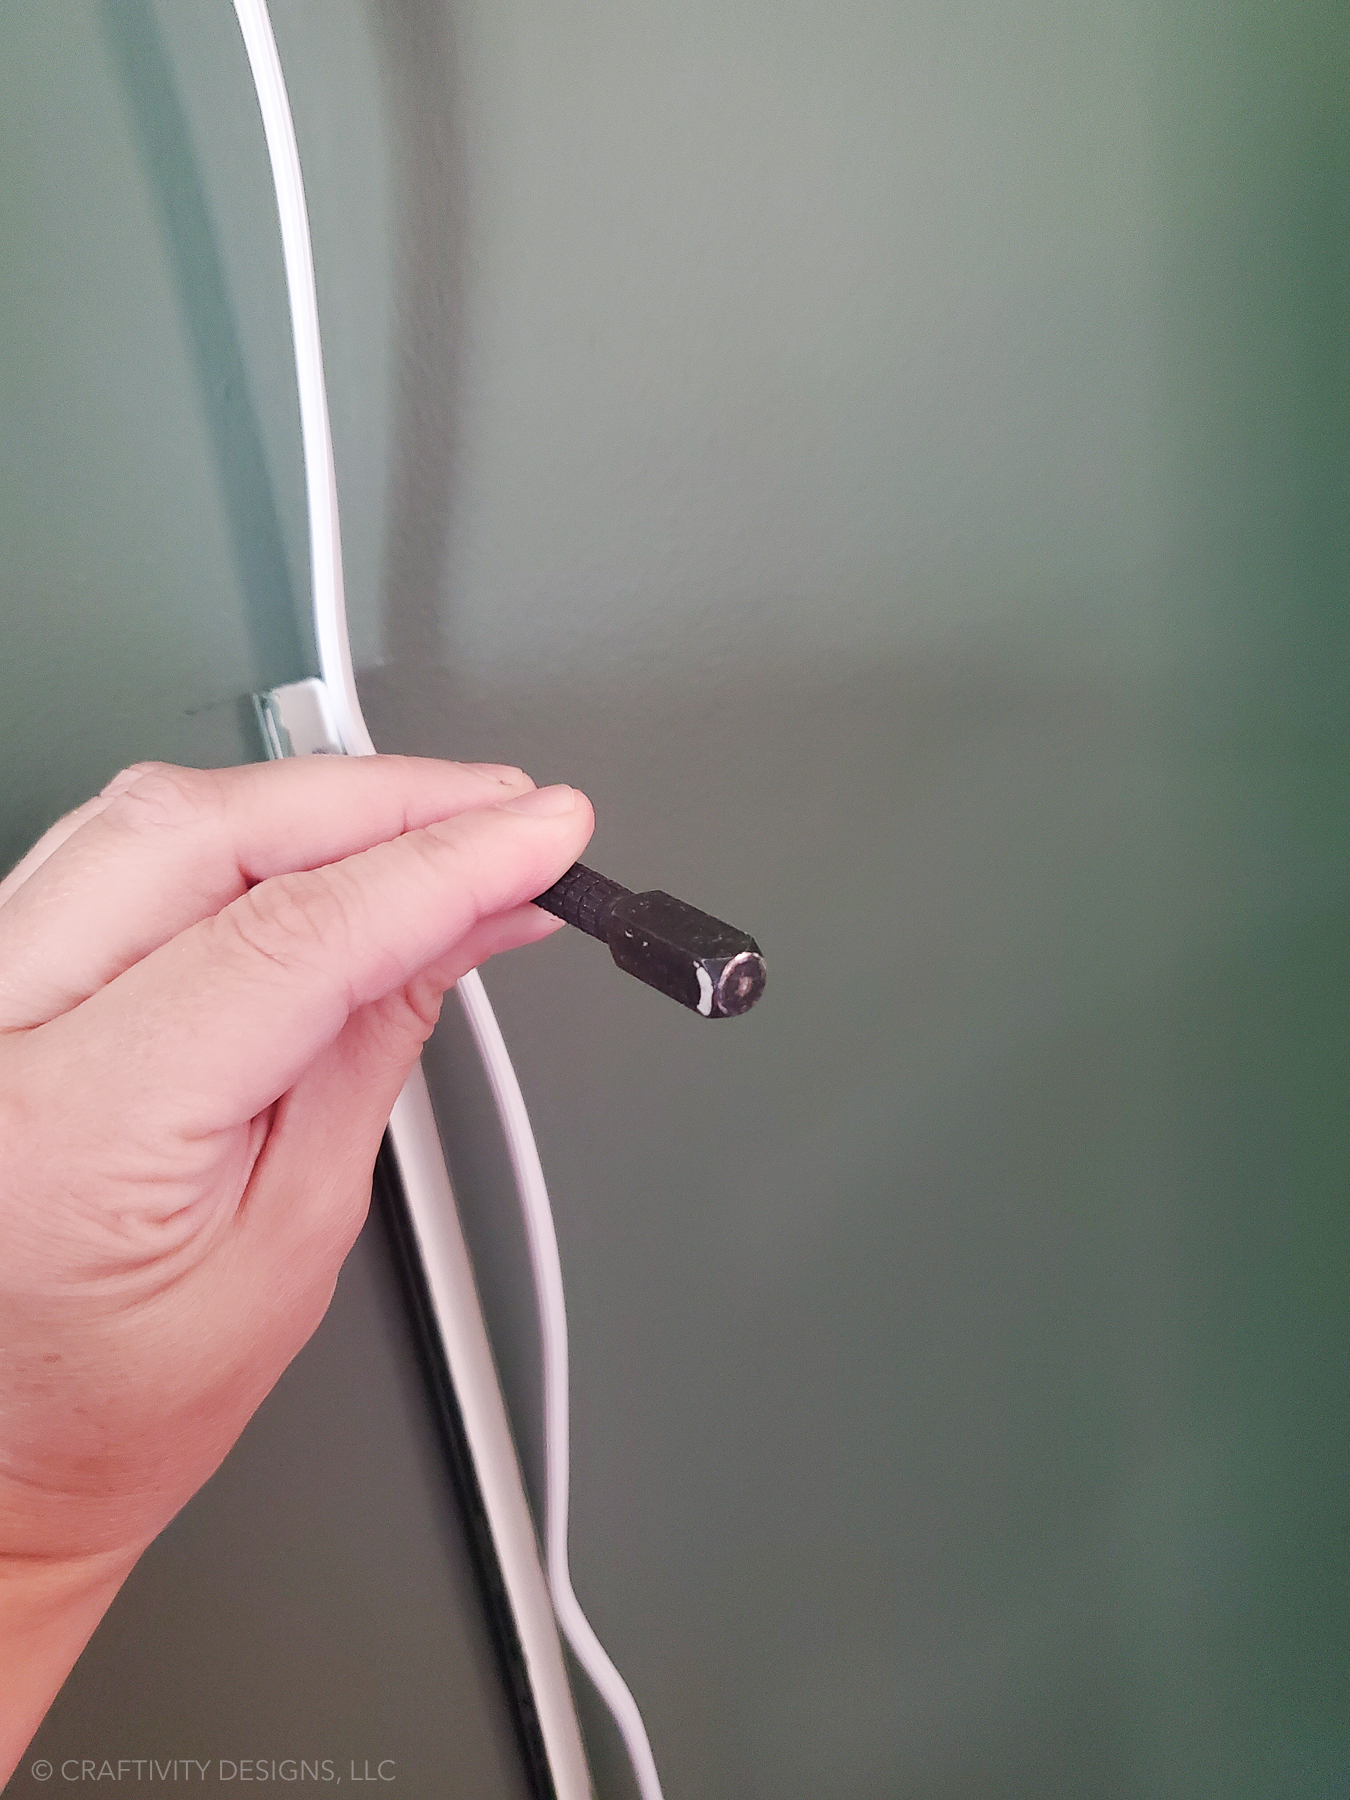
- Nail Punch
- Hammer
- Mallet
- Cloth
Instructions
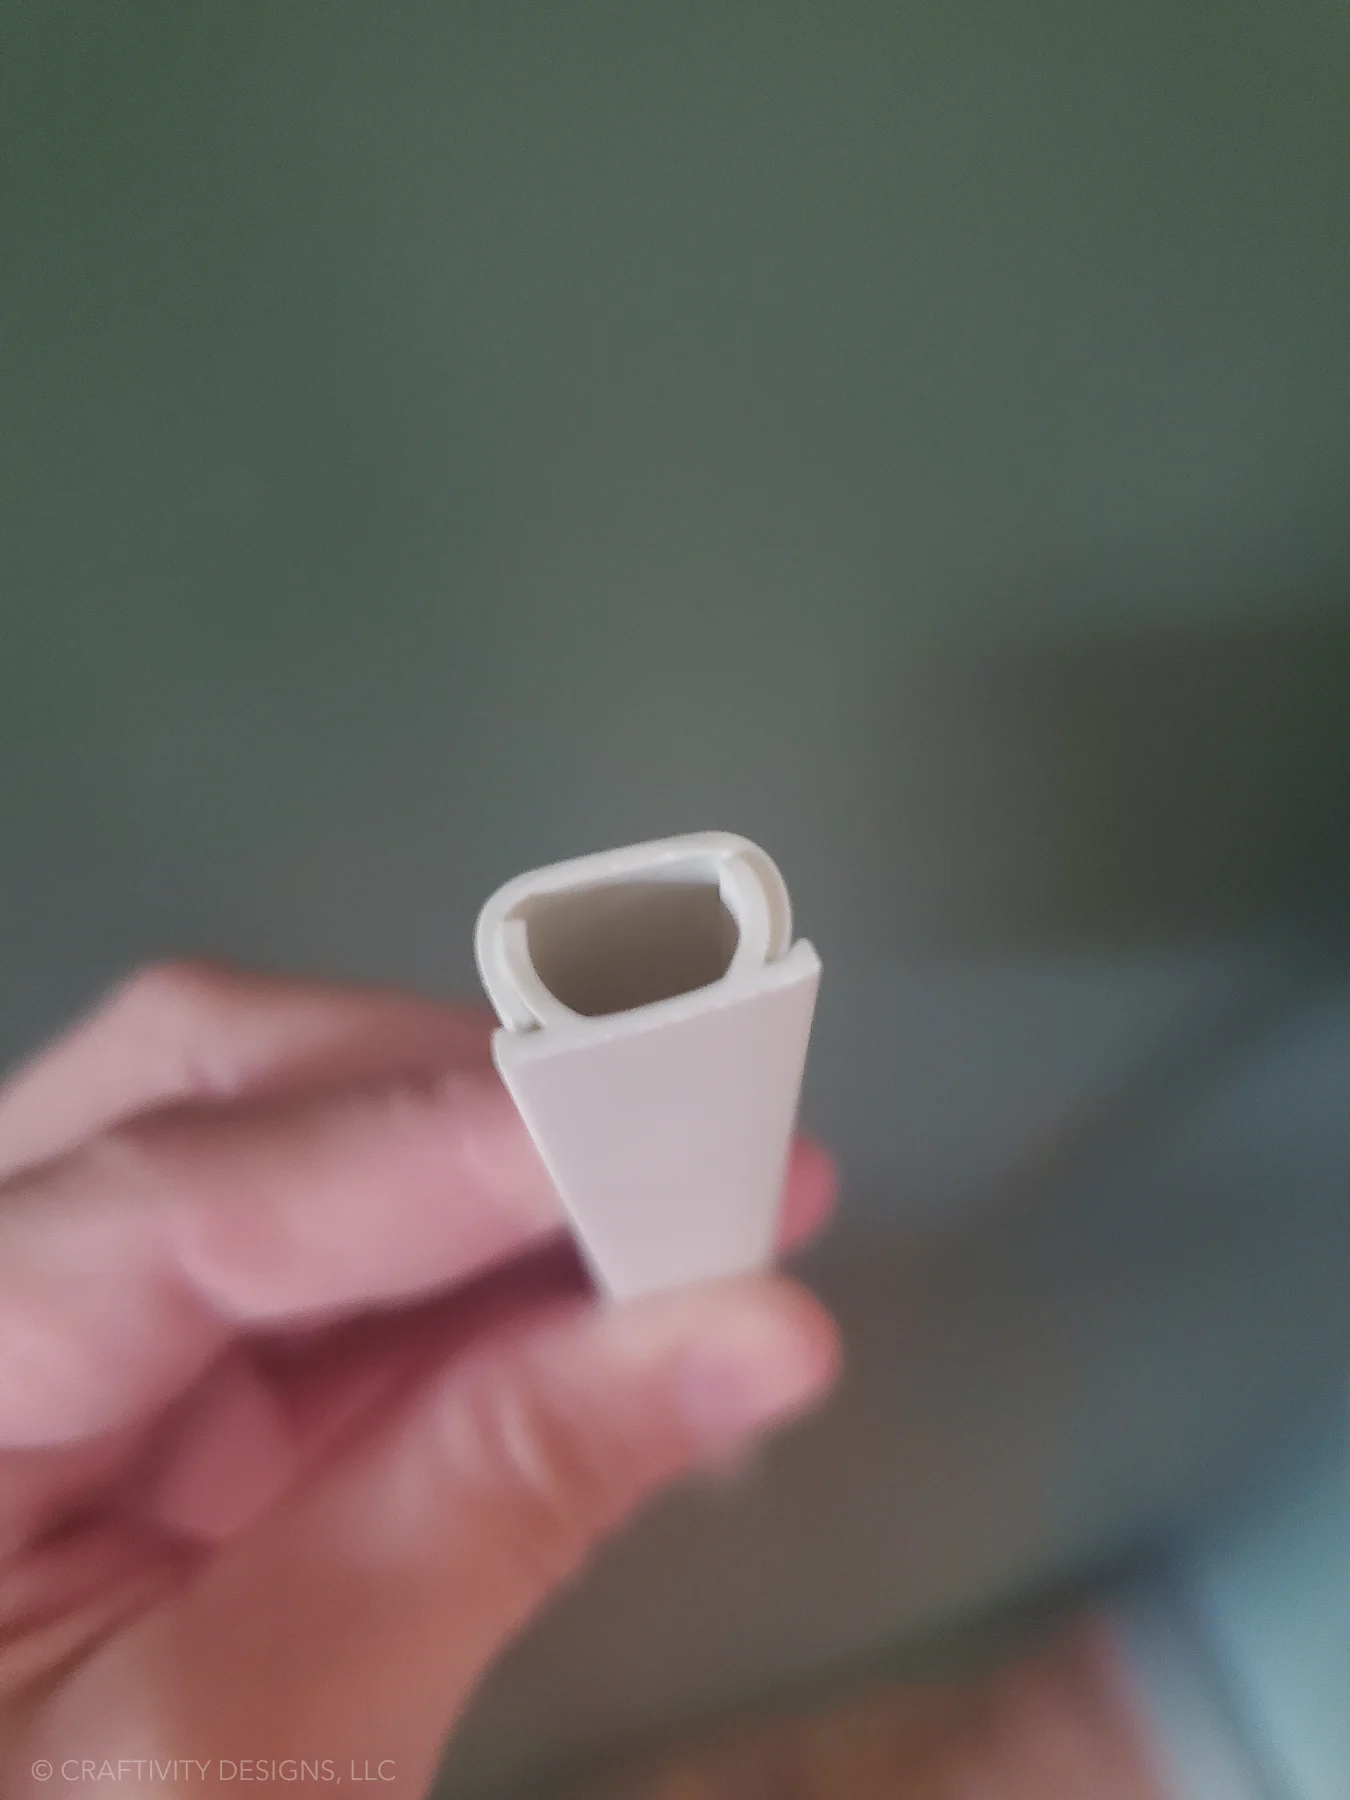
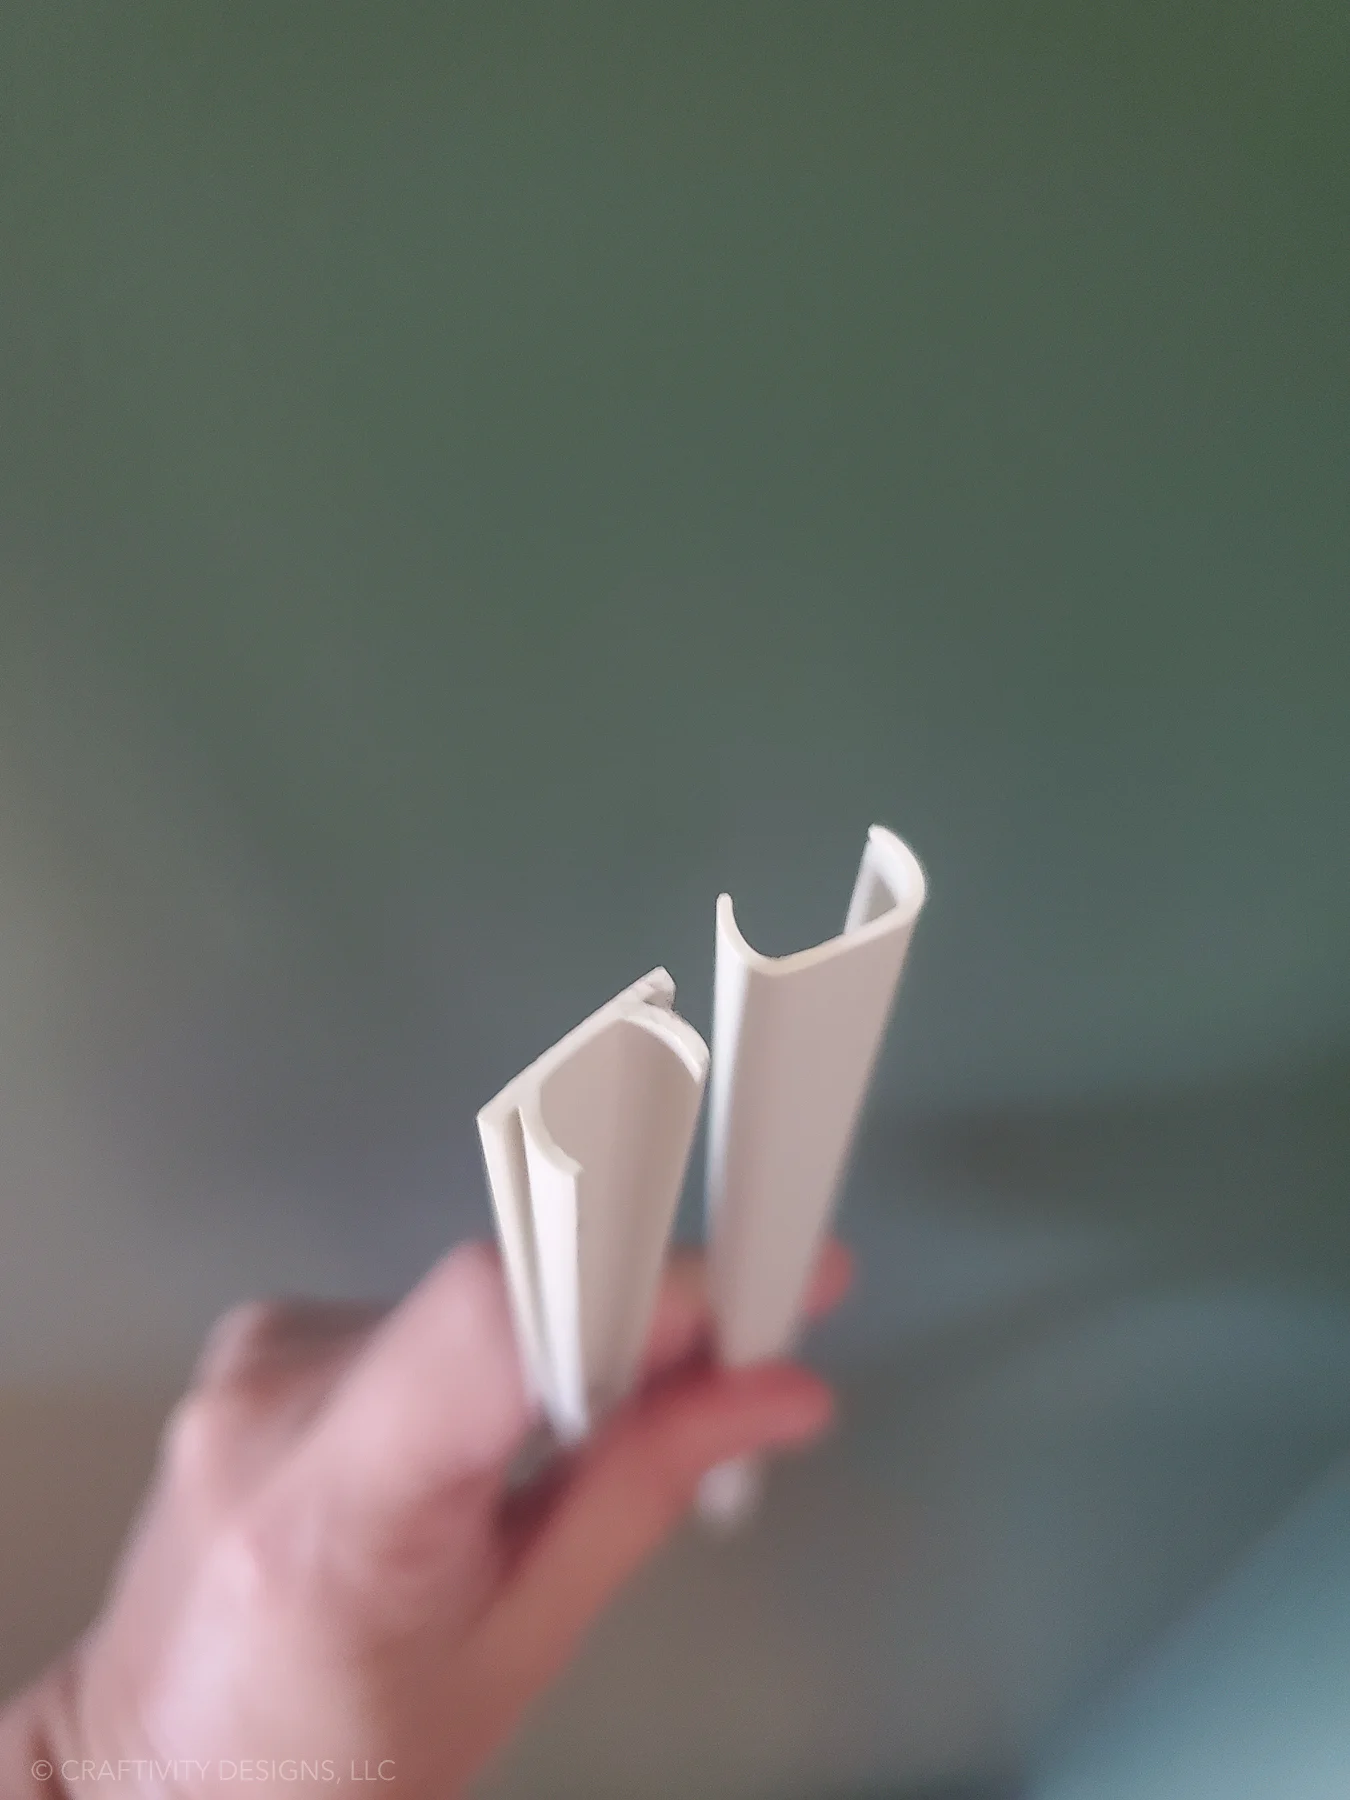
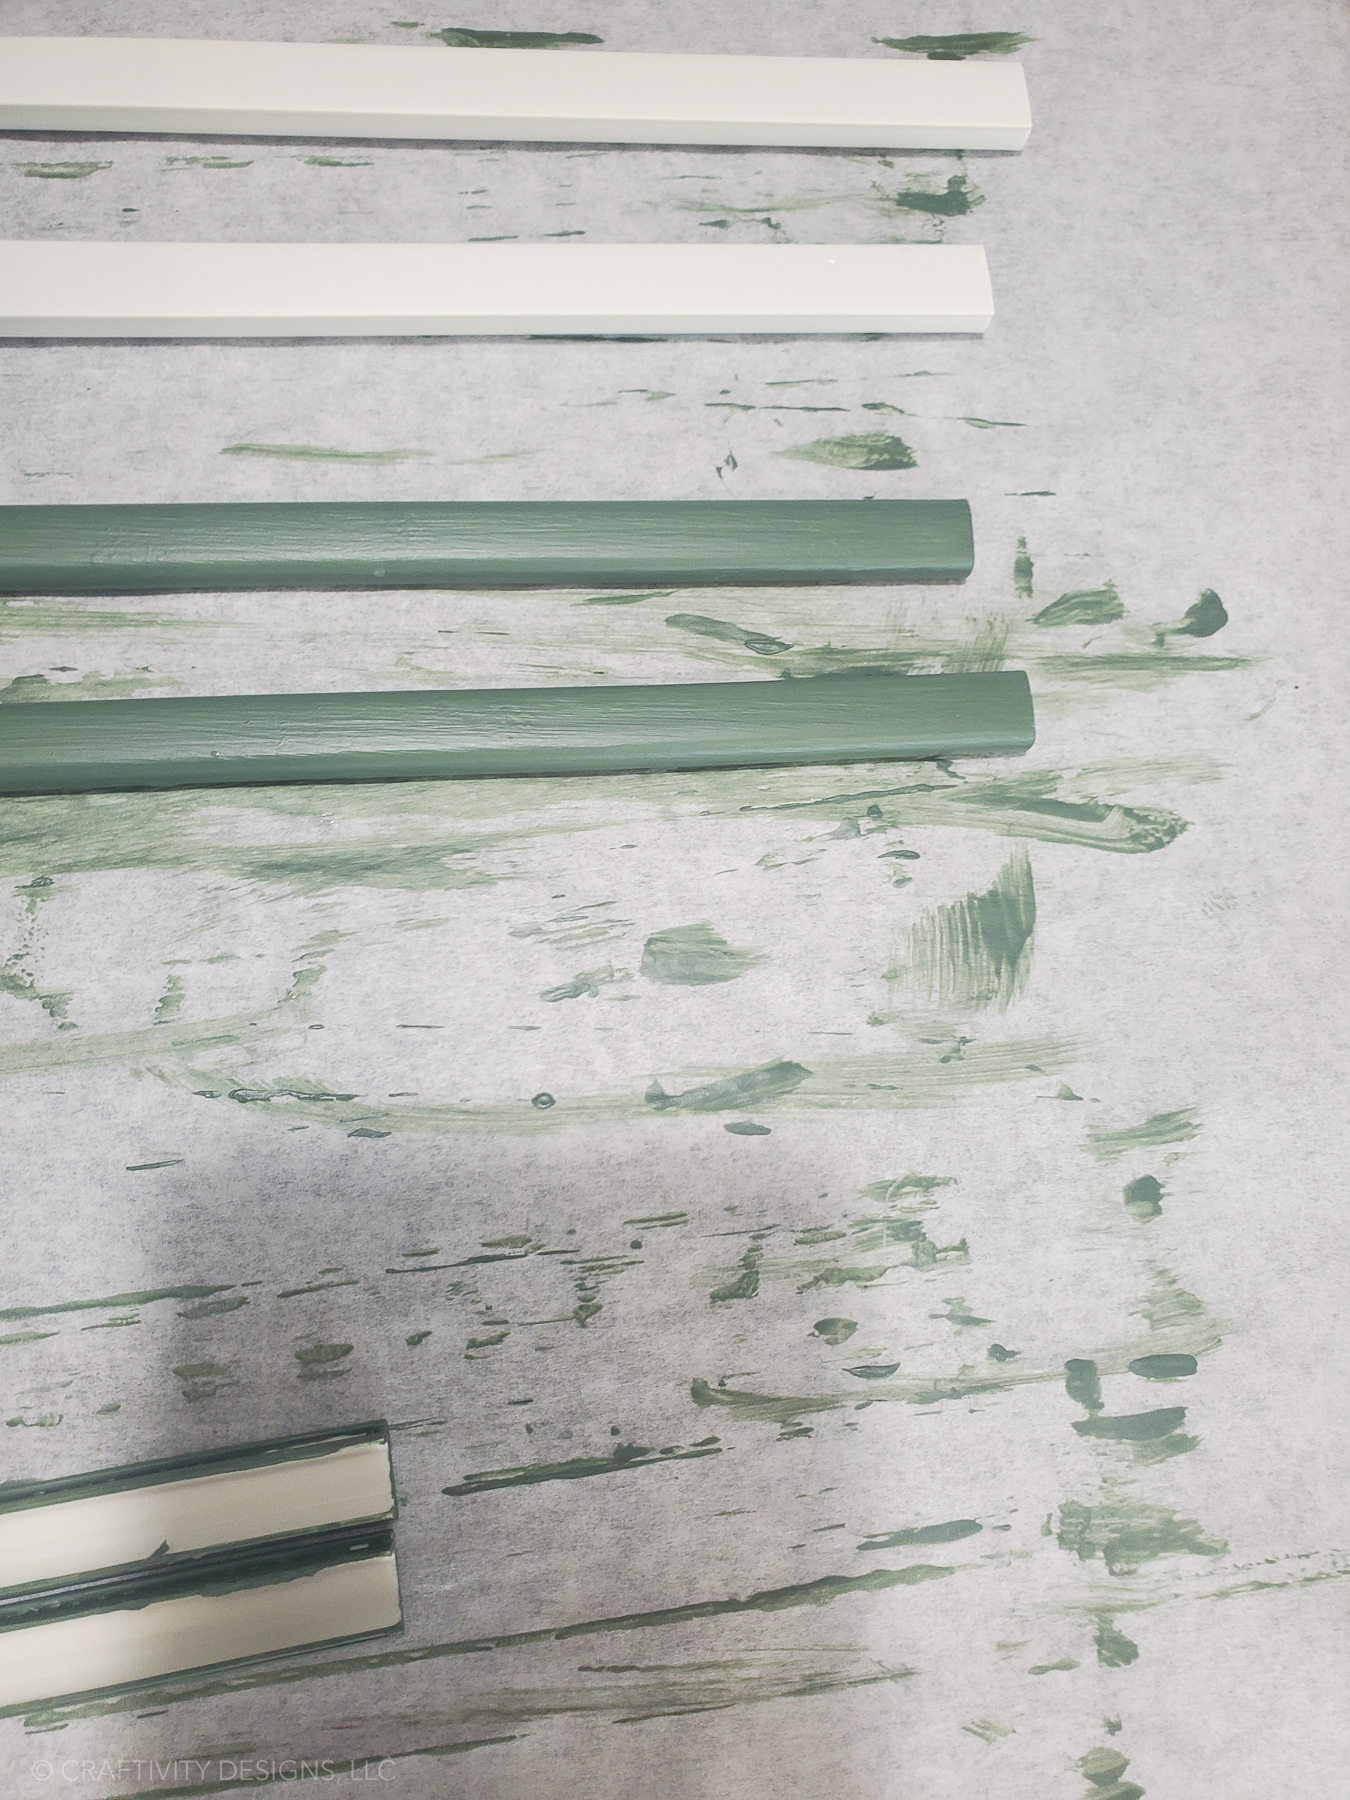
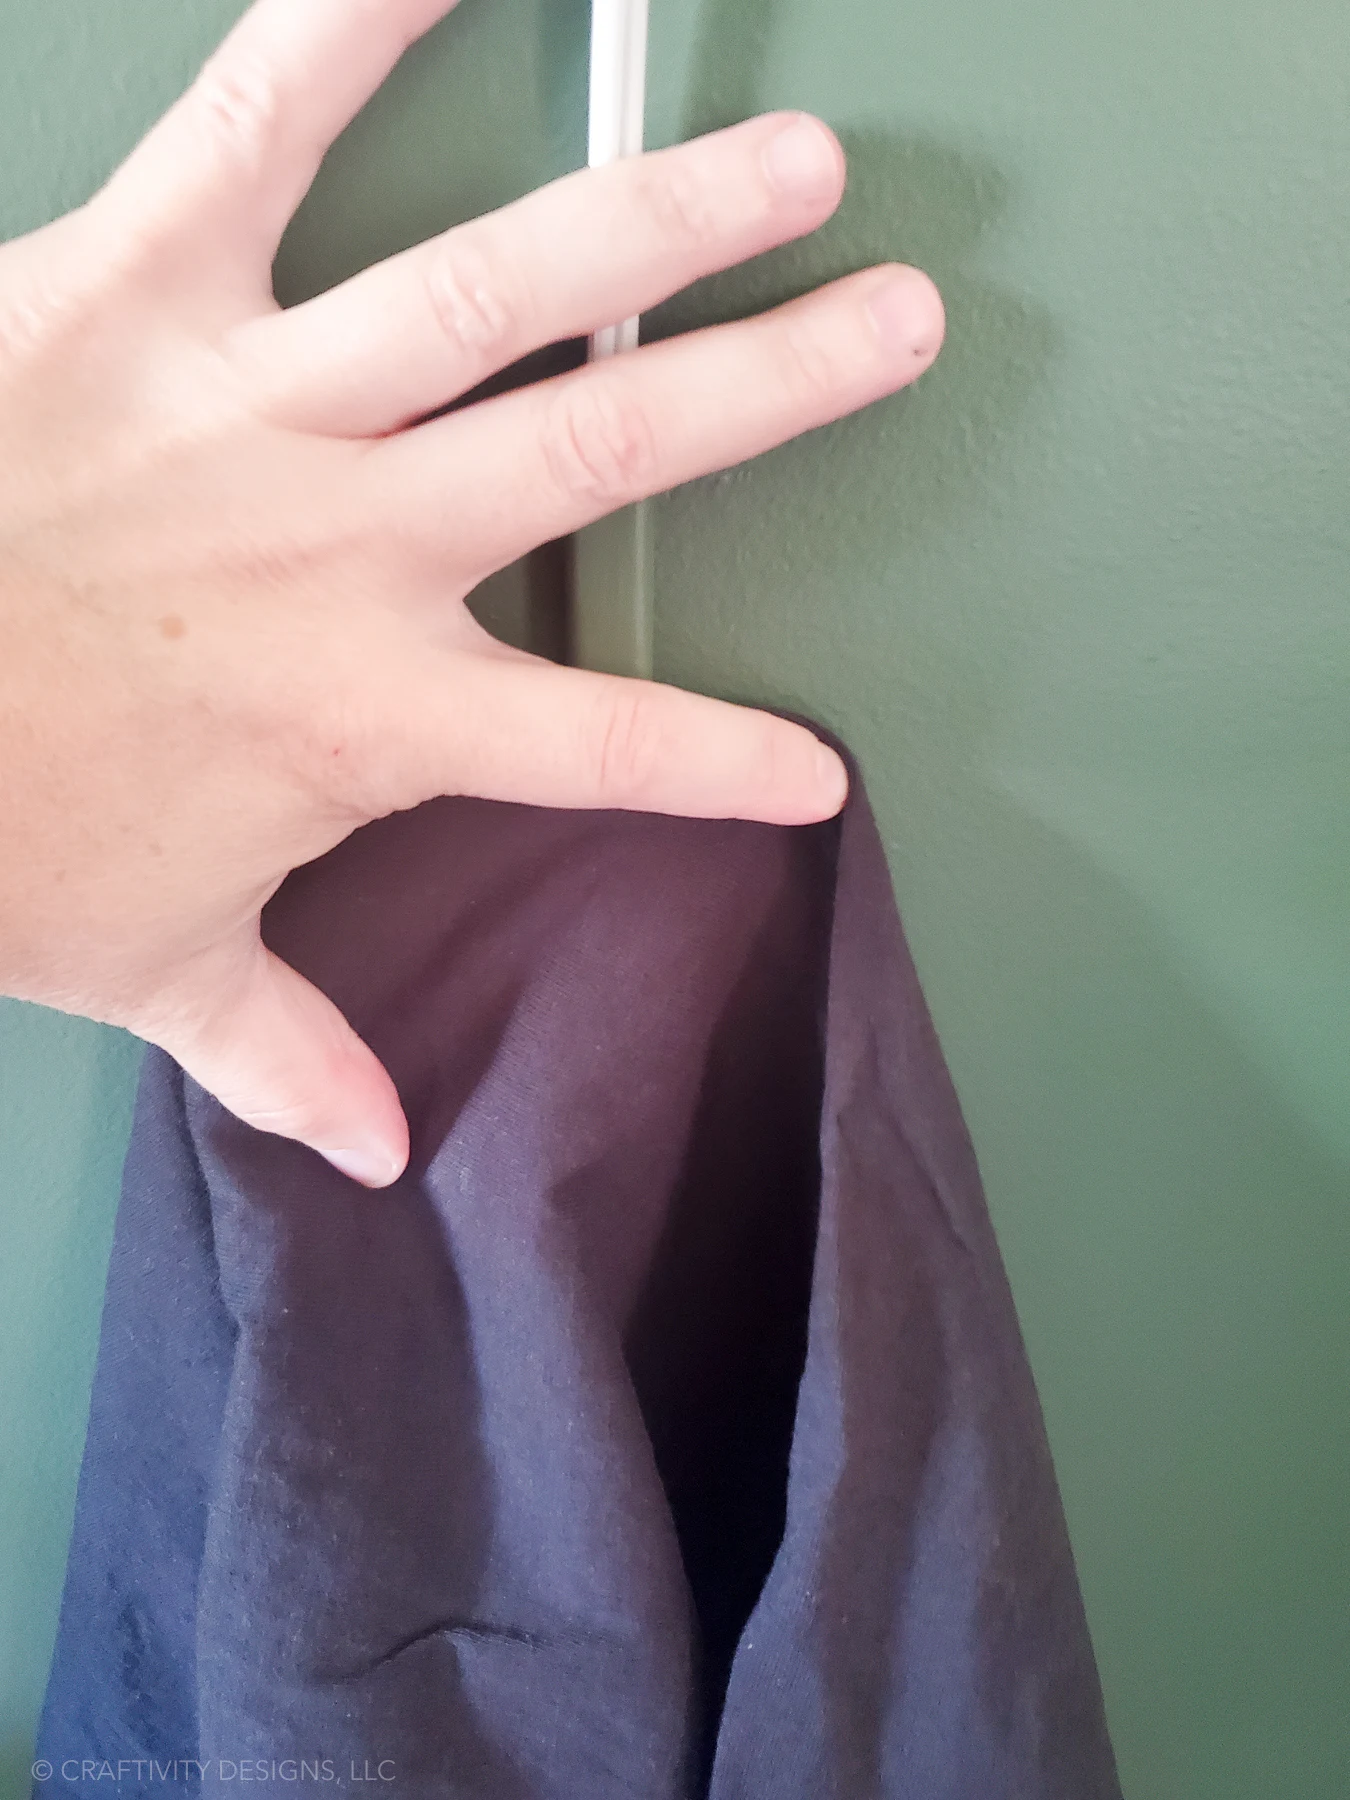
- First, seperate the cord cover into two pieces as designed.

- Next, paint the cord cover pieces with extra wall paint. Let dry 24 hours before installing.

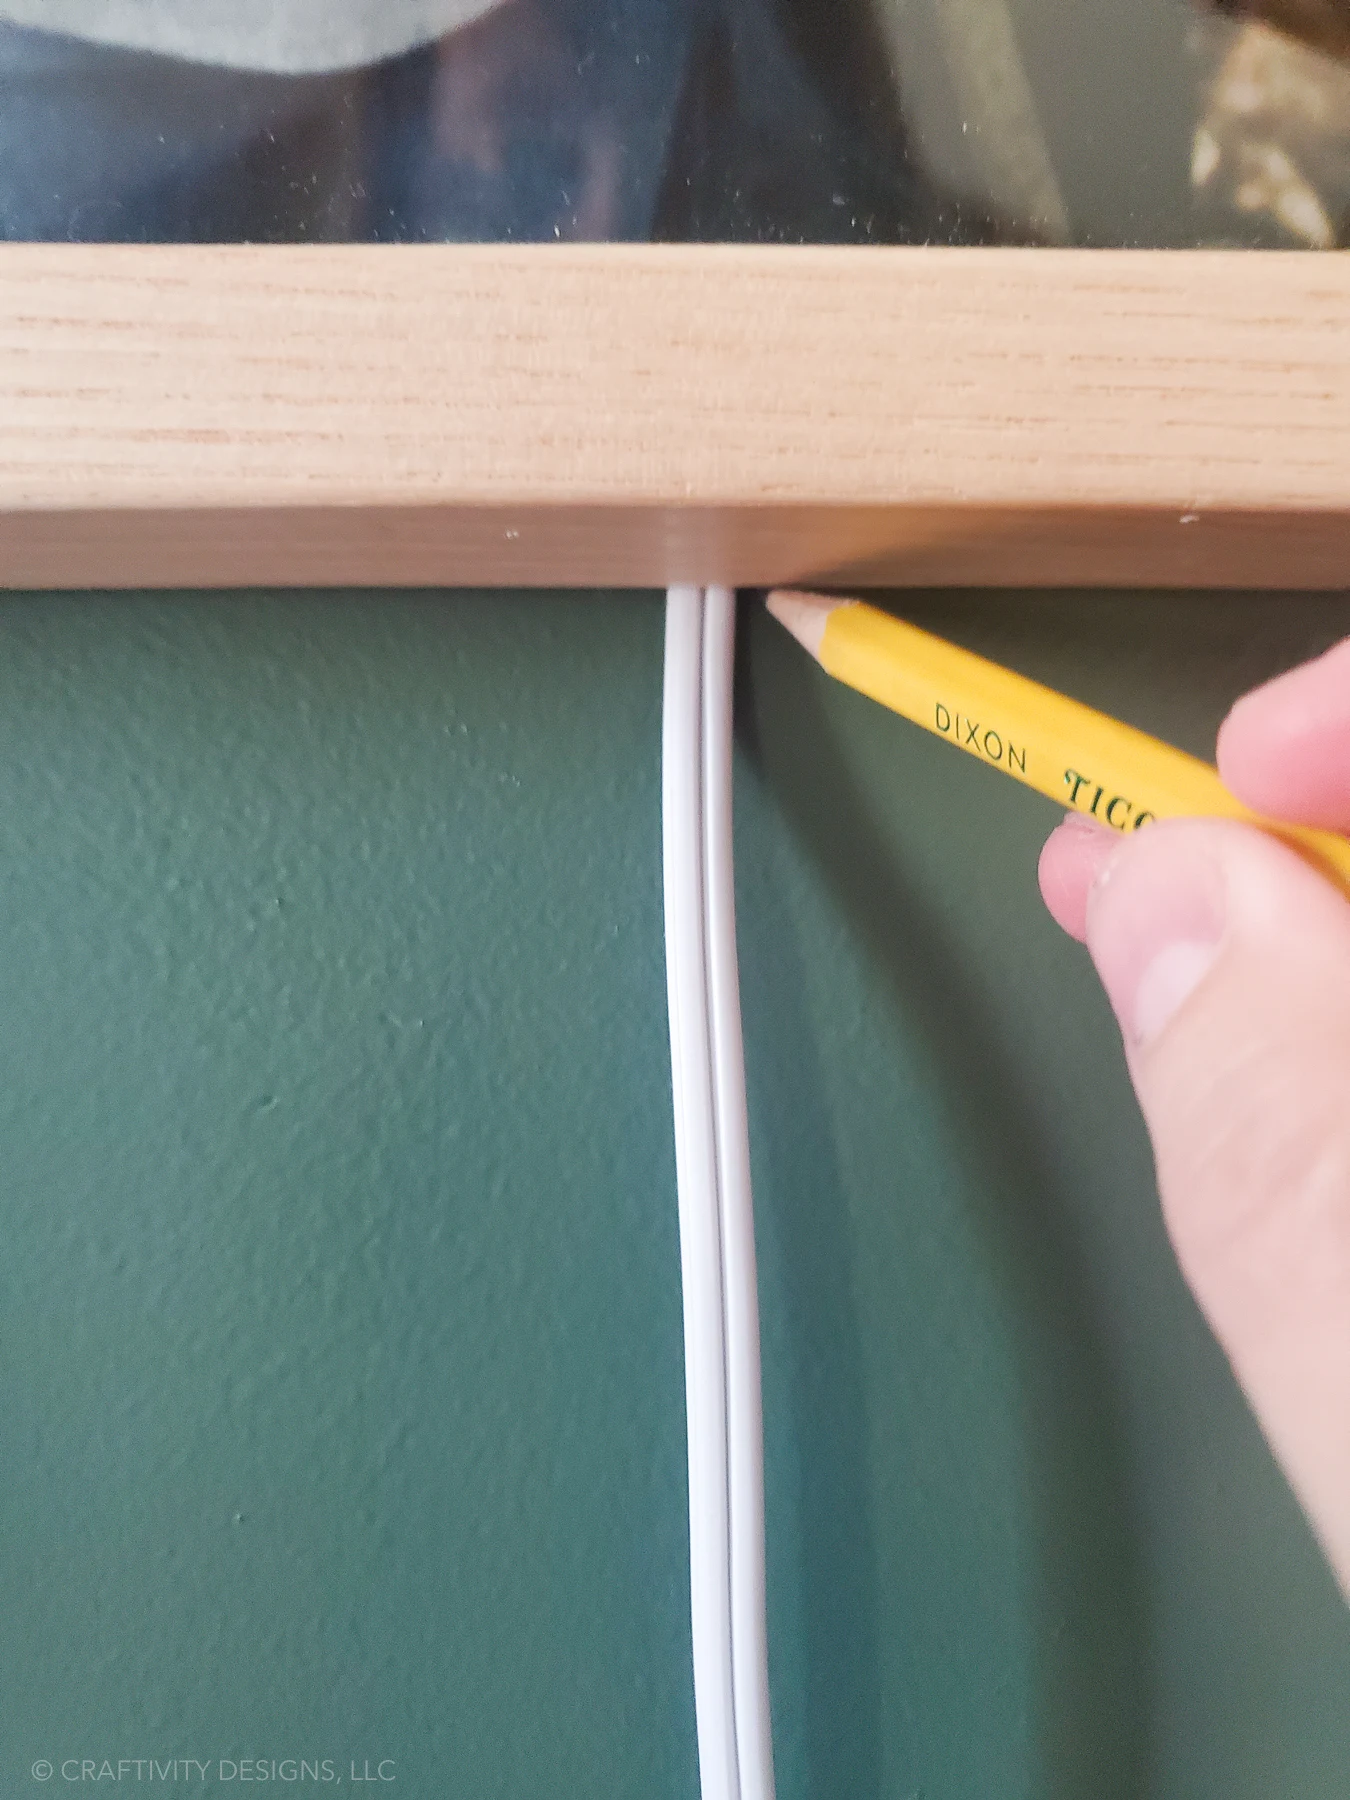
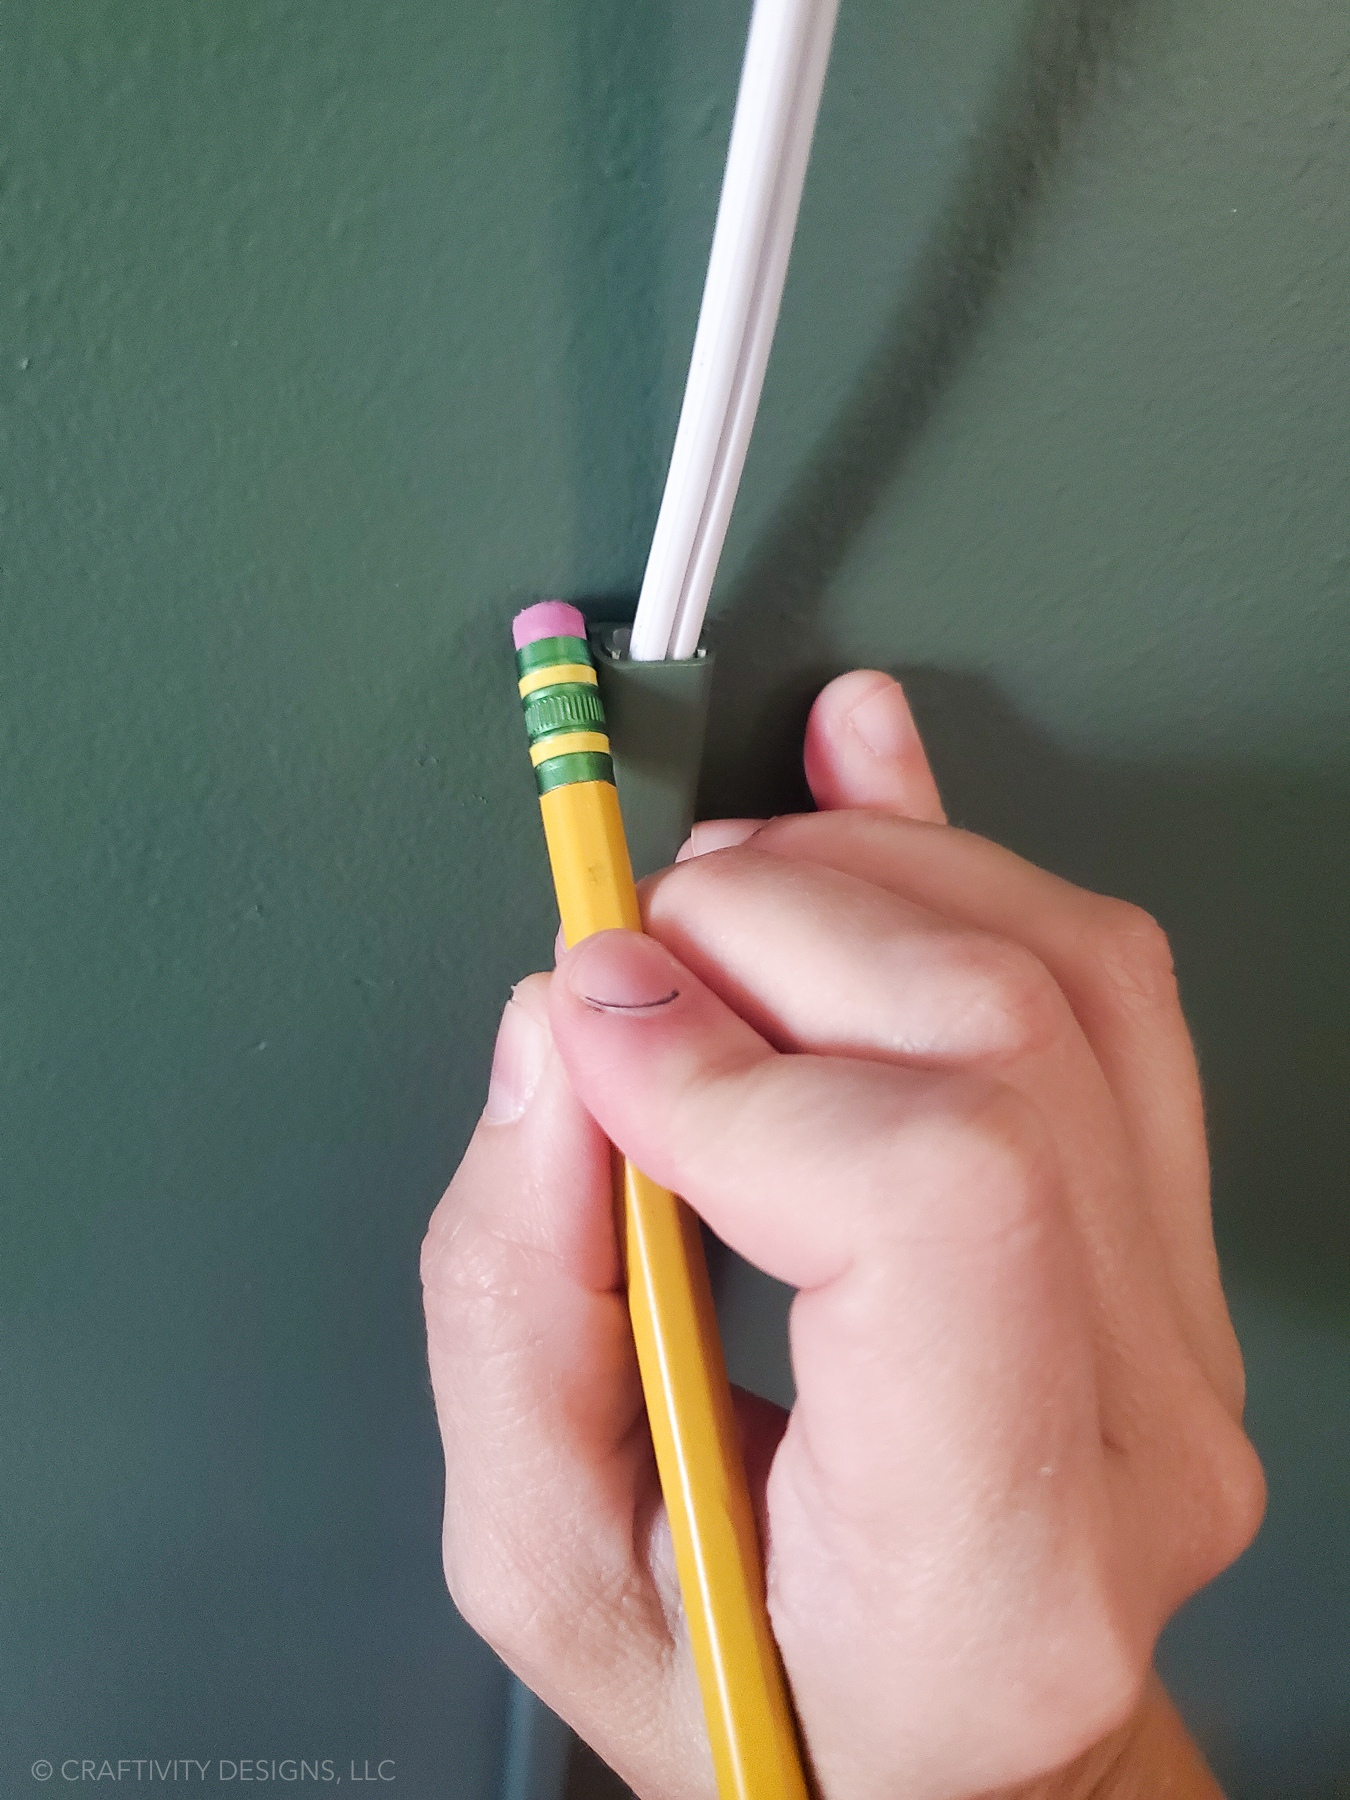
- Once dry, mark with pencil where the top of the cord cover will be located.


- Do NOT use the included adhesive. Do NOT expose the adhesive.
- Next, use stick tacky or painters tape to temporarily hold the base of the cord cover in place.
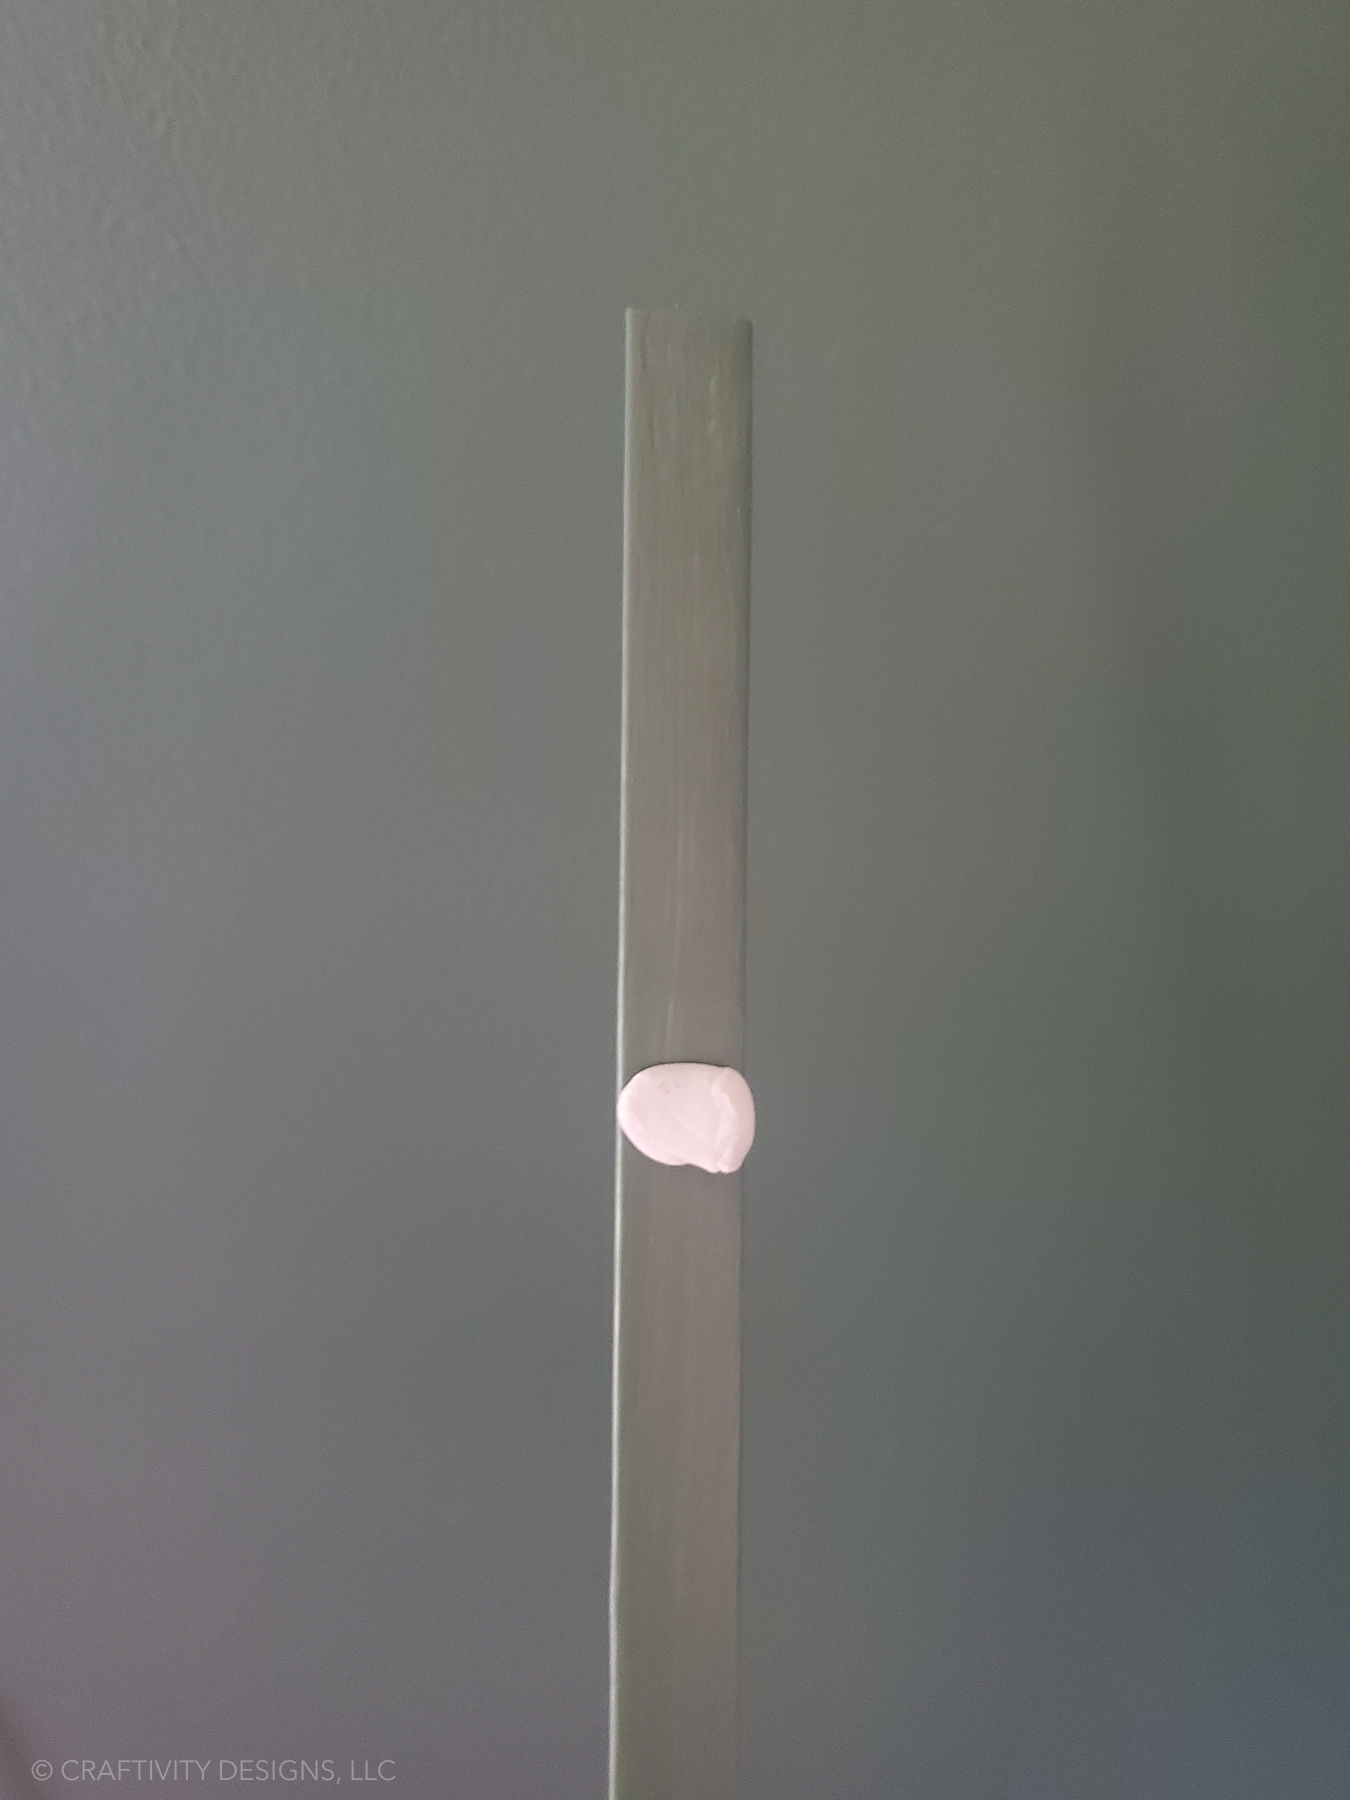
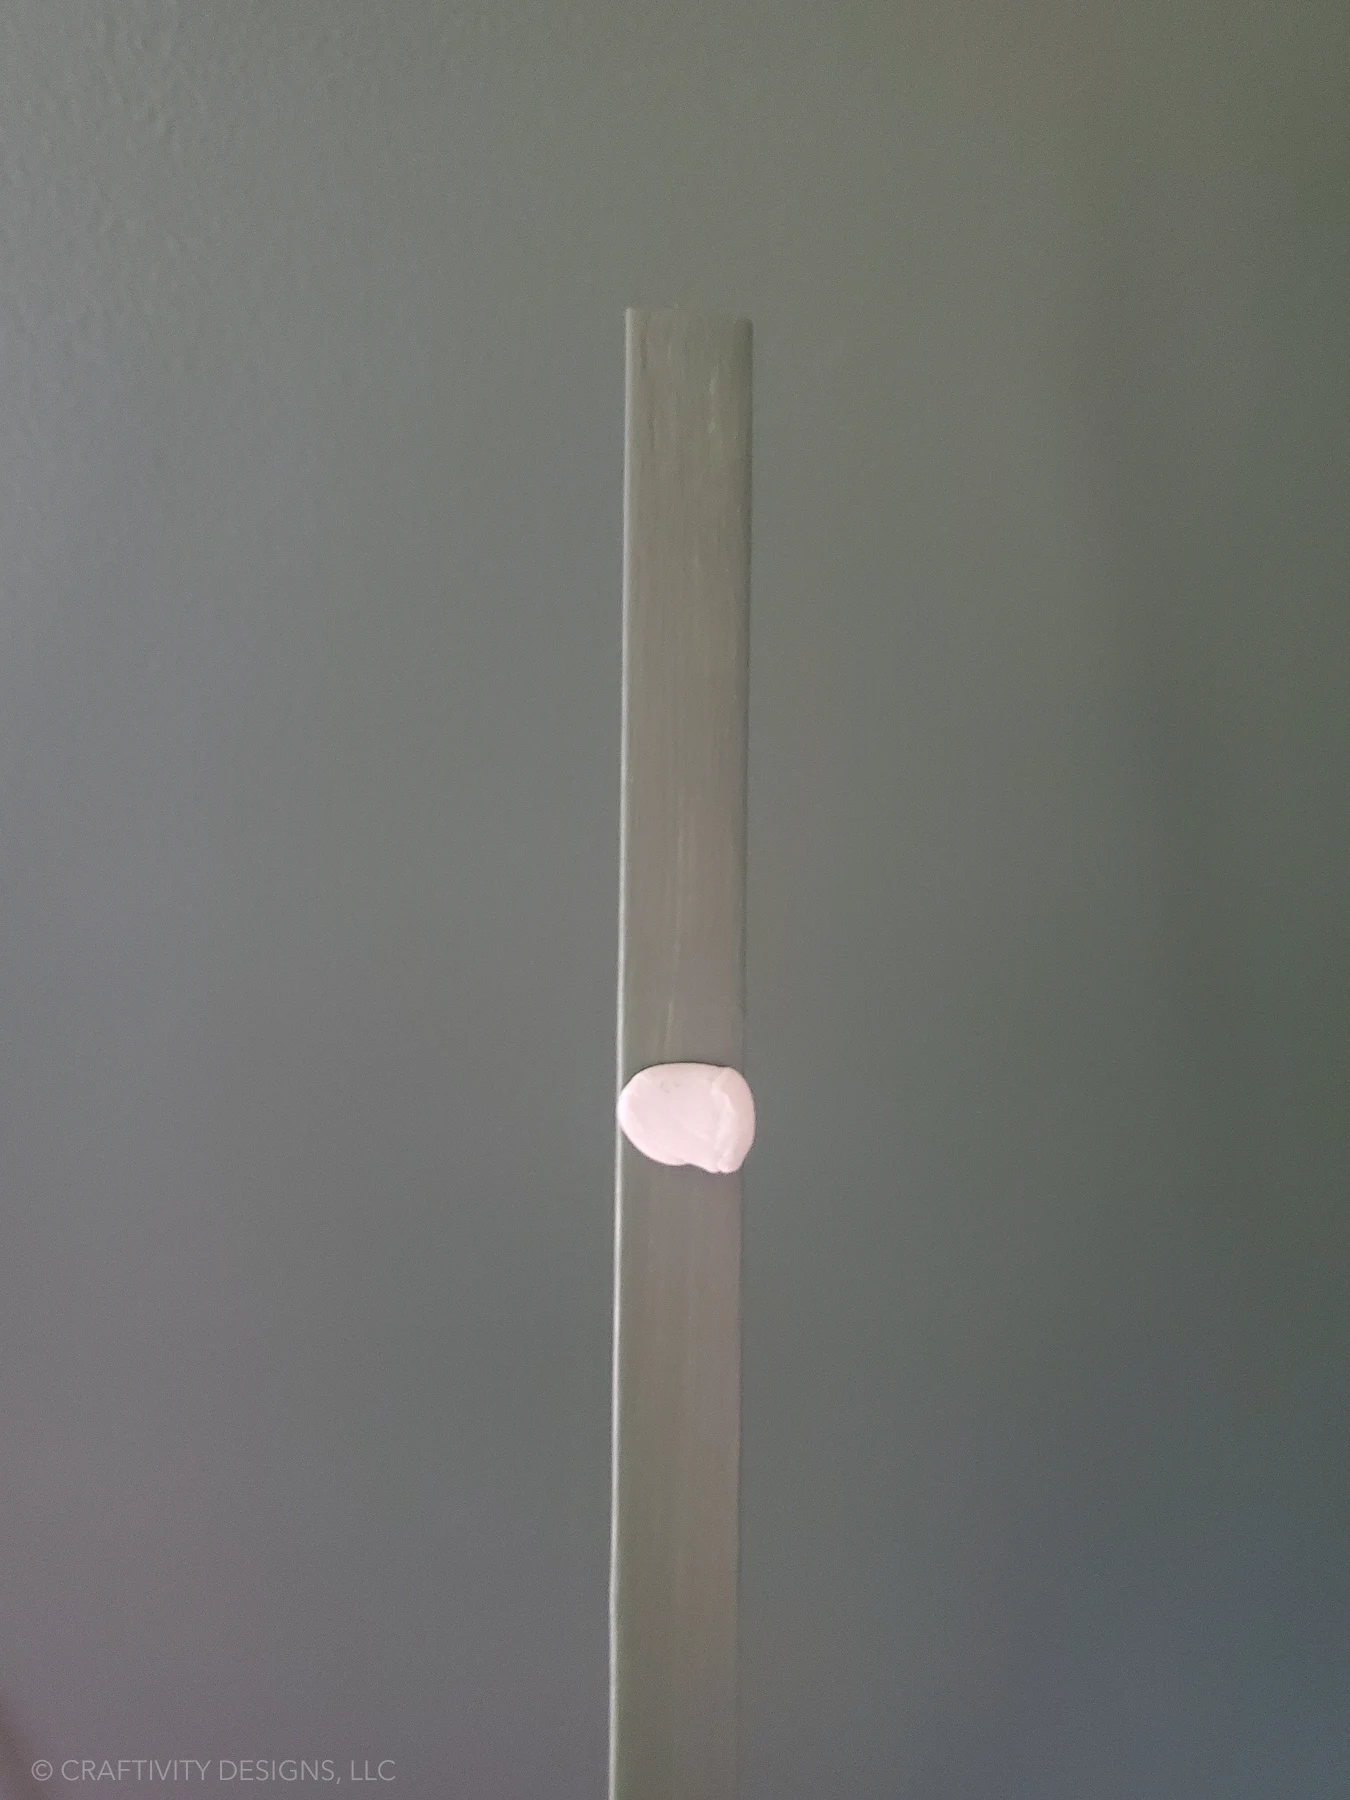
- Check to ensure that the base of the cord cover is level. Adjust as needed.
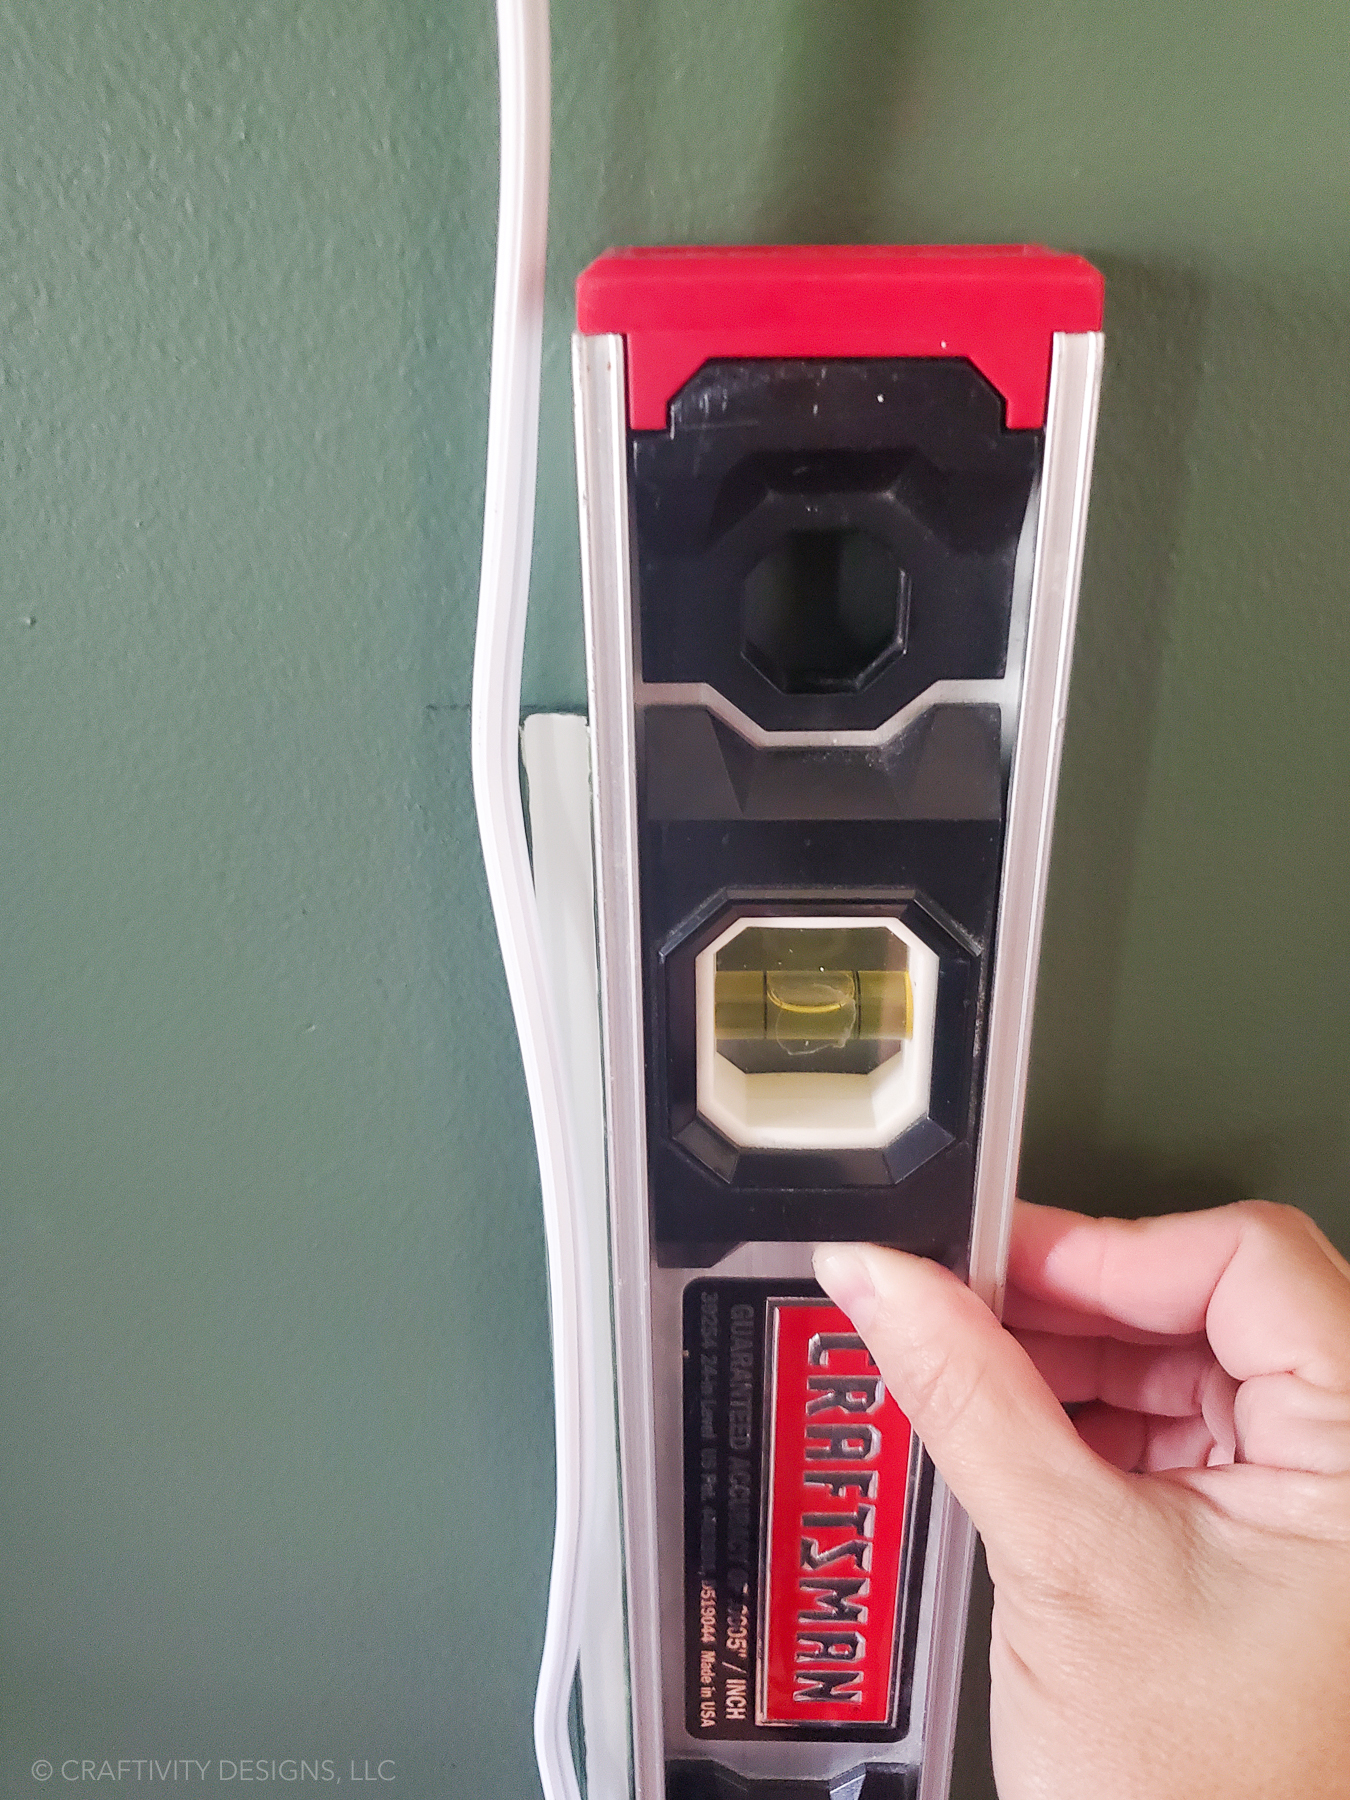

- Use a nail punch and hammer to nail the base of the cord cover in place with a picture-hanging nail.

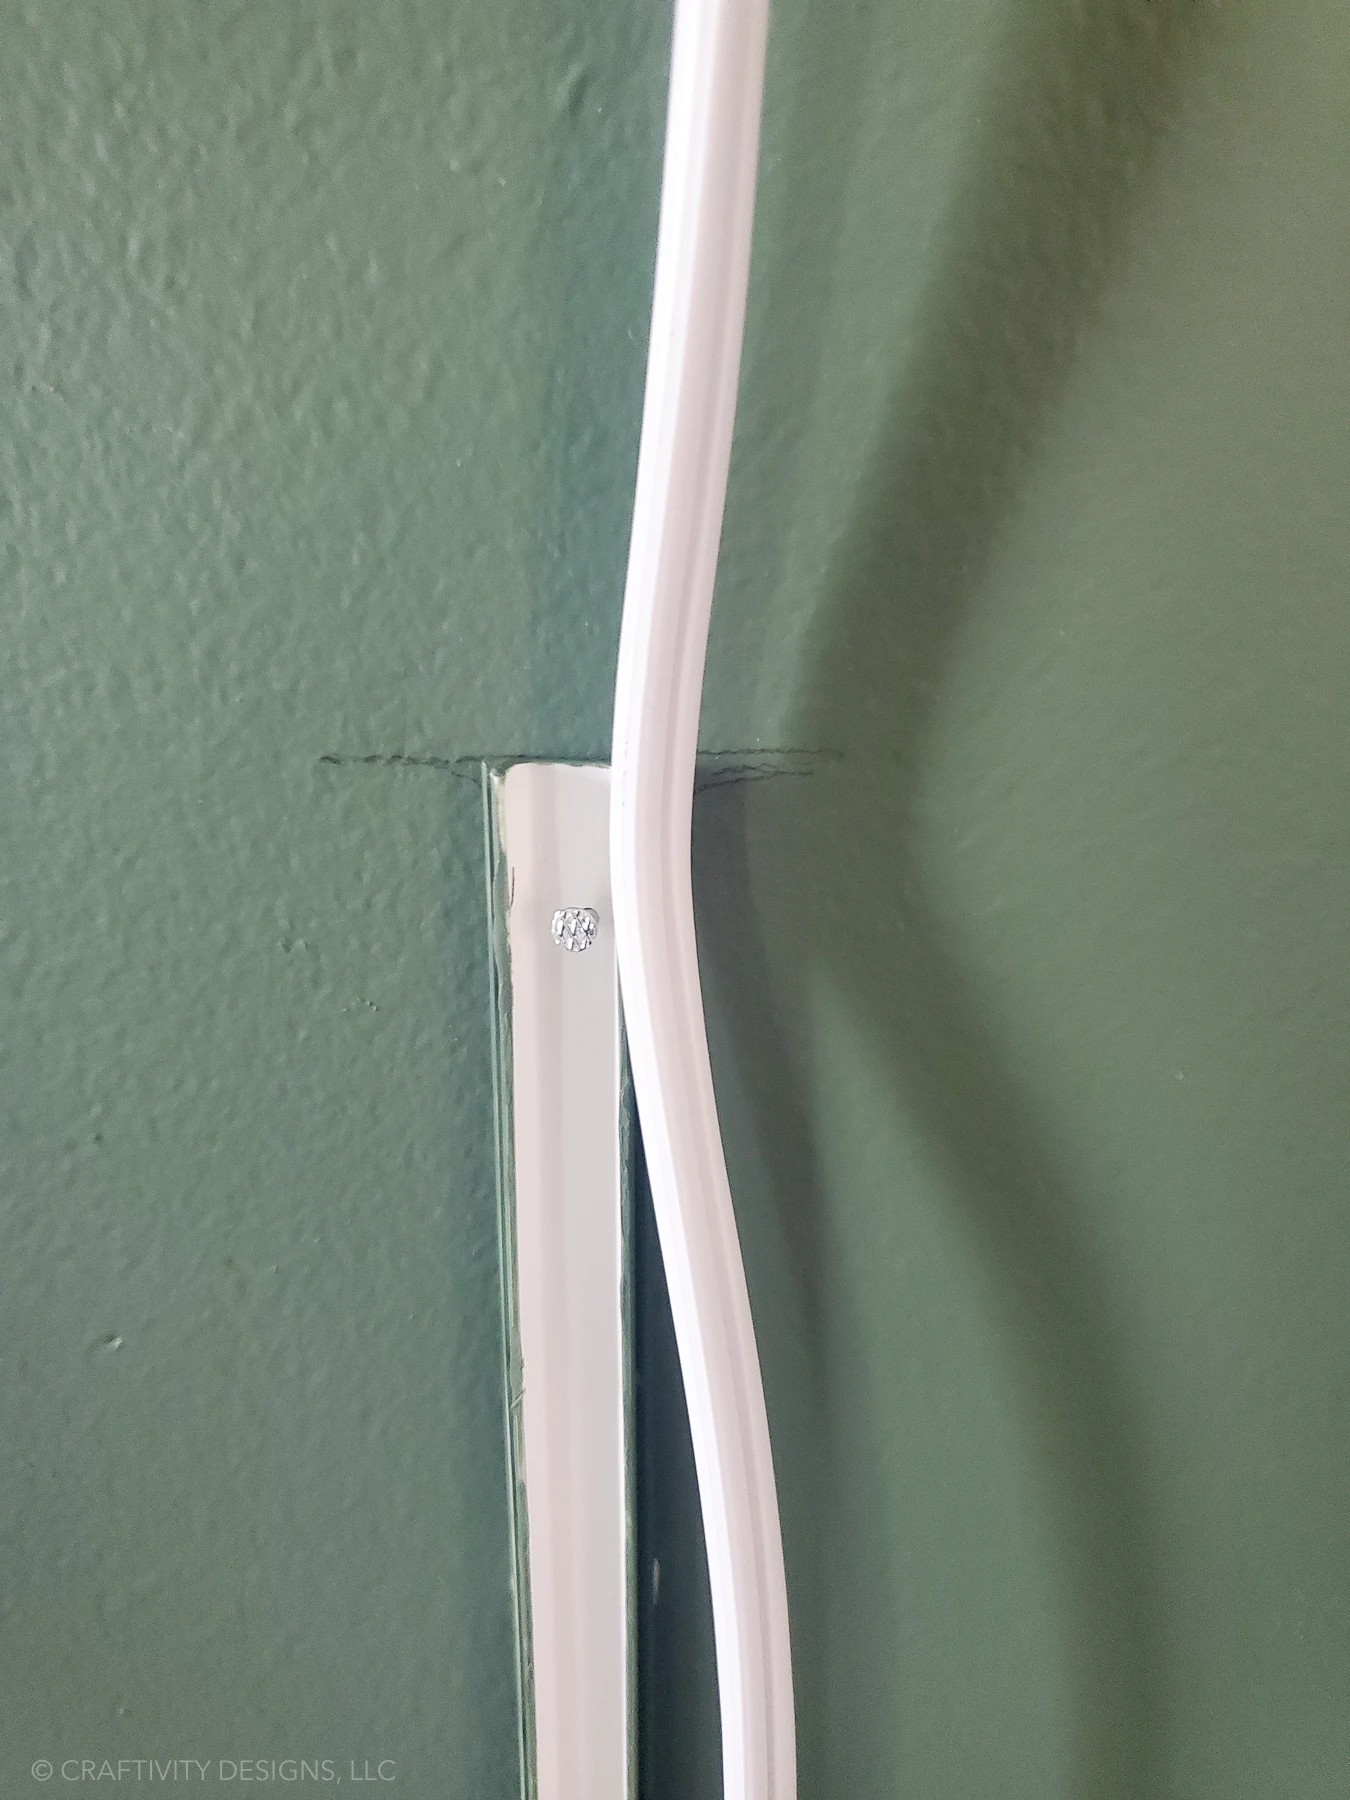
- Route the cord through the base of the cord cover and attach the top of the cord cover. Use a mallet if needed. Protect the painted finish with cloth when using the mallet.

- Erase the pencil lines.

If you liked this easy interior home idea, you might also like:
- How to Make Cheap DIY Bamboo Blinds
- DIY Long Curtain Rods for Sunrooms and Big Windows
- How to Paint a Brick Fireplace (and which type of paint to use!)
Want to save this cord cover tutorial for later? Pin it!
Leslie
Friday 15th of September 2023
Thank you for this tutorial! Would you mind sharing how you hung the artwork on top of the cord?
Lora Green
Wednesday 18th of October 2023
The cord is relatively flat, so I simply hung it behind the frame.