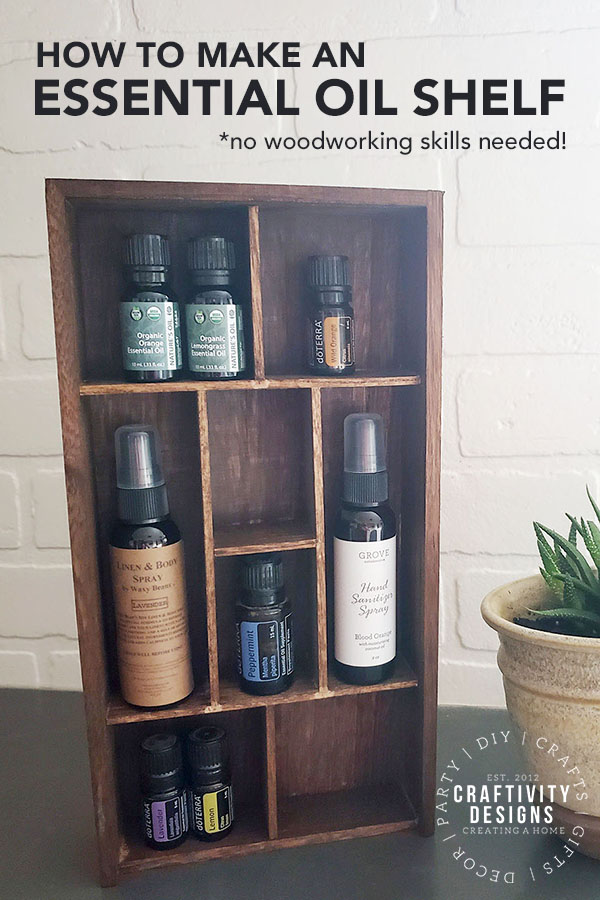
Need a spot to store your essential oils? Learn how to make a DIY essential oil shelf – in minutes! This DIY essential oil holder is easy and inexpensive.
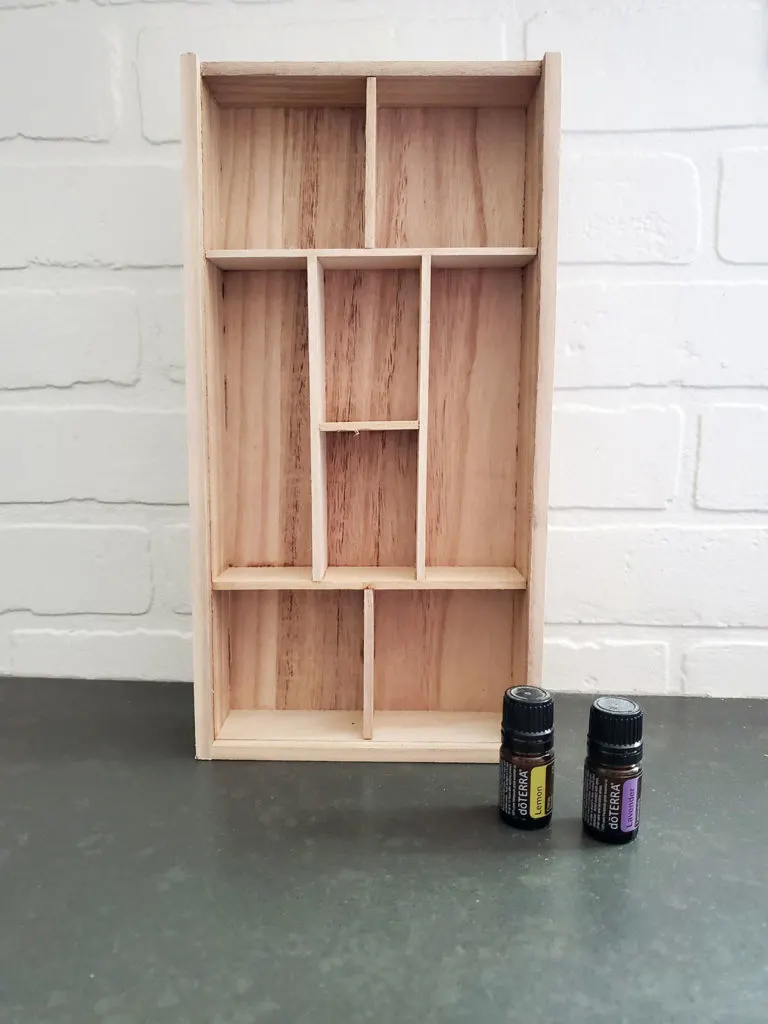
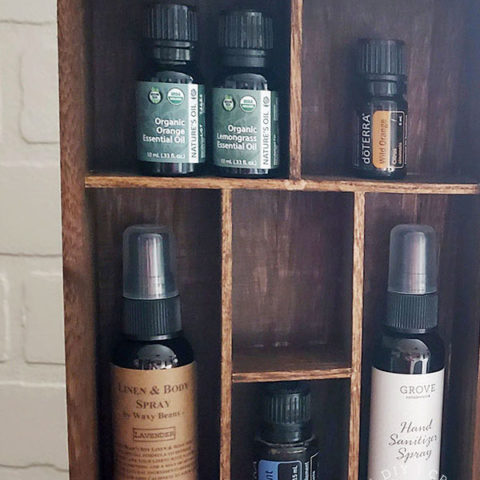
I’ve been slowly collecting essential oils to use around the house for bath bombs, linen sprays, and body scrubs. Over time, my little 2-3 bottle collection grew and it was time to invest in a holder for my oils. In less than a half-hour, I whipped up this wooden DIY essential oil shelf. Hanging on the wall, it organizes my essential oil bottles and keeps them out of reach from the kiddos.
Speaking of the kids, their rock collection and LEGO® minifigures collection were actually the inspiration for this quick DIY project. I love the look of their letterpress drawers and I wanted one of my own (yes, I was jealous of my kids’ cool decor *wink*).
Since we have a small laundry room, it didn’t make sense to invest in buying another antique printers tray. Instead, this DIY essential oil holder is inexpensive (less than $15, including supplies!) and provides that same letterpress drawer vibe.
How can I organize essential oils?
Disclosure: This page includes affiliate links.
There are many ways to organize and store essential oils. A few of my favorite ideas include:
- wooden hexagon shelves
- magnetic racks
- wooden boxes
- inside-the-cabinet racks
- tiered wood stands
- slanted racks for drawers
If you aren’t sure which option is best for you, ask yourself the following questions:
- In which room, is it most convenient to store my oils?
- Do I want the oils on display or hidden in the room?
- On what surface (or in what furniture) should the oils be stored?

In my case, the laundry room is the most convenient room because I use the oils to scent wool dryer balls. Since I wanted the oils on display and out of reach of the kids, a wooden wall shelf is the best choice.
Similarly, if you want to store essential oils in the kitchen and out of sight, a slanted rack for a kitchen drawer may be the best choice.
How to Make a DIY Essential Oil Shelf
SUPPLIES REQUIRED

INSTRUCTIONS
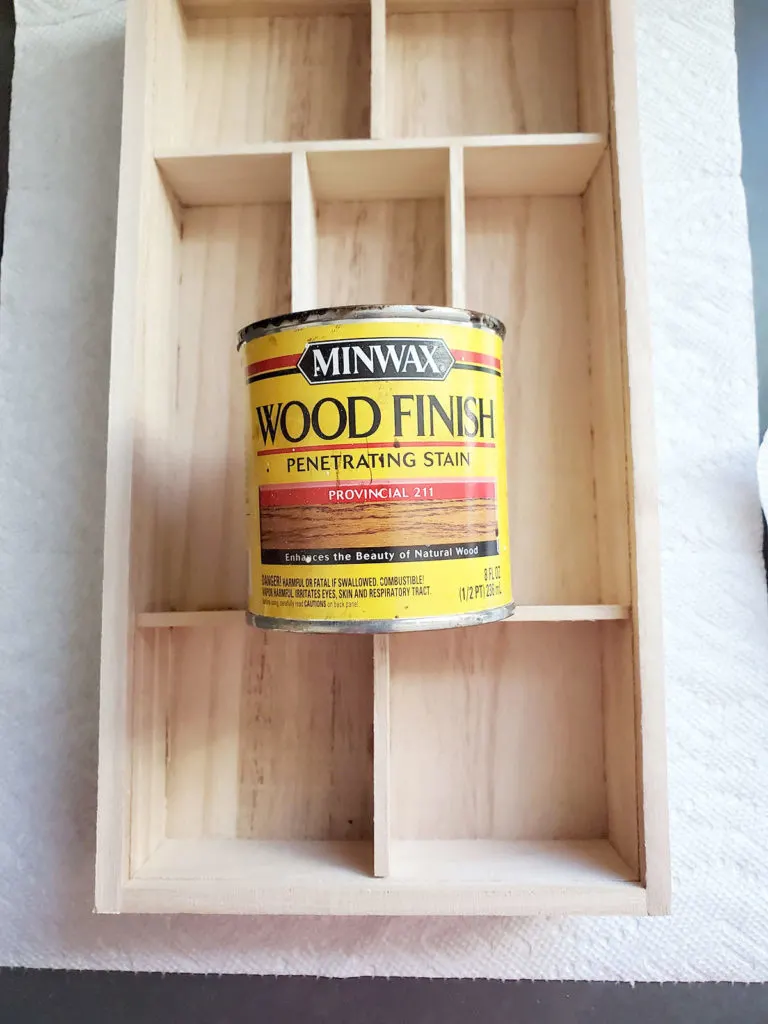
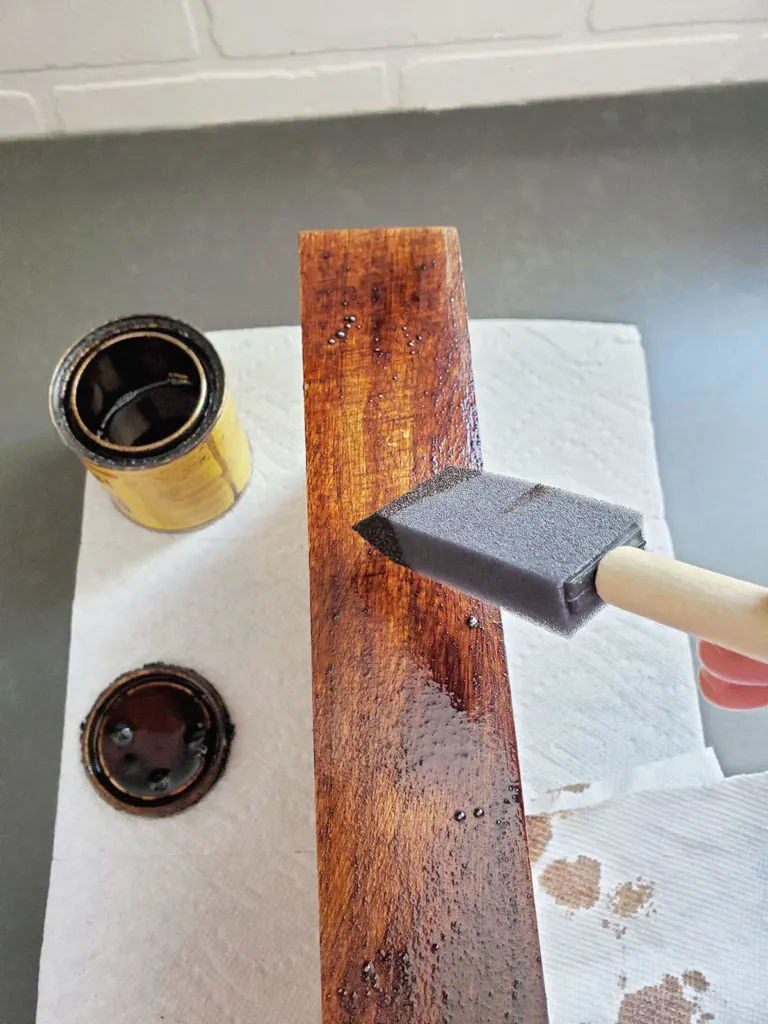
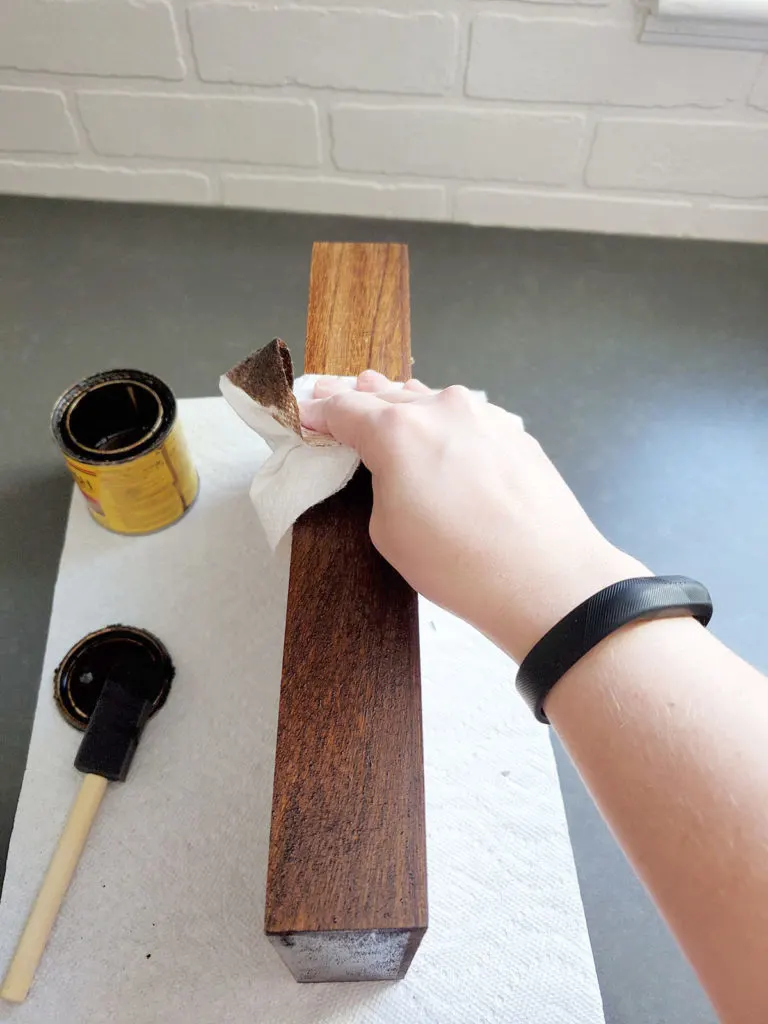
Apply Stain with Brush
First, apply the stain with a foam paintbrush. Foam paintbrushes are great for projects using stain because they are inexpensive. Once you are done, just toss the brush in the trash.
During this step, apply the stain liberally. This is especially important inside the cubbies so that the liquid stain gets into the corners.

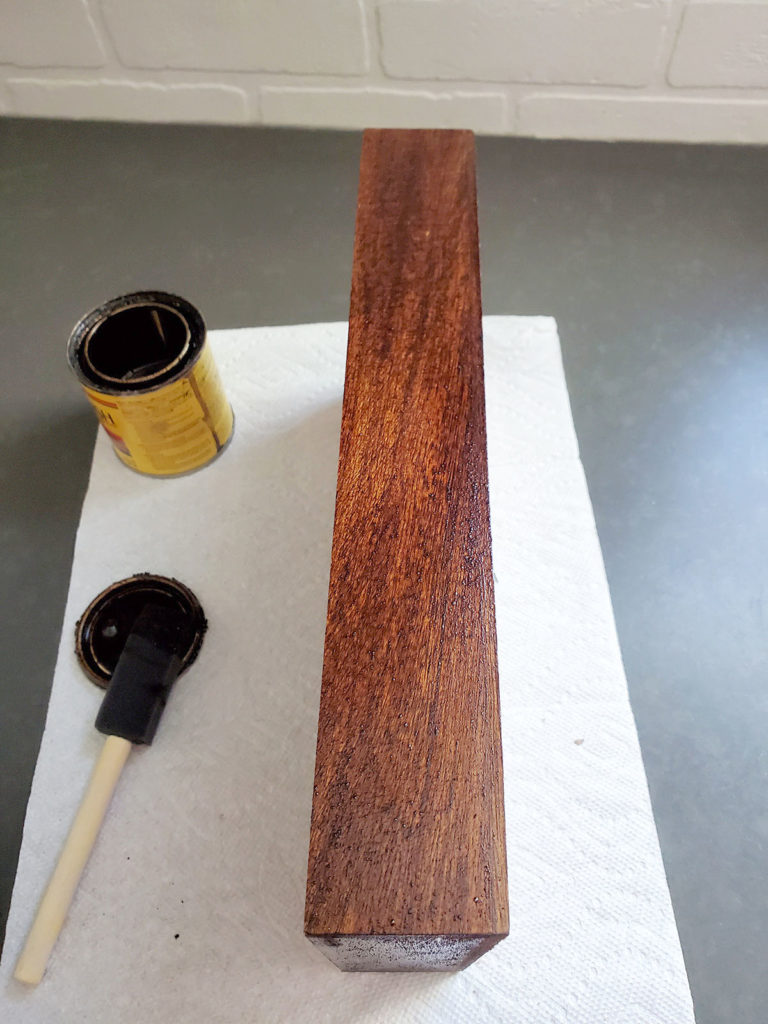
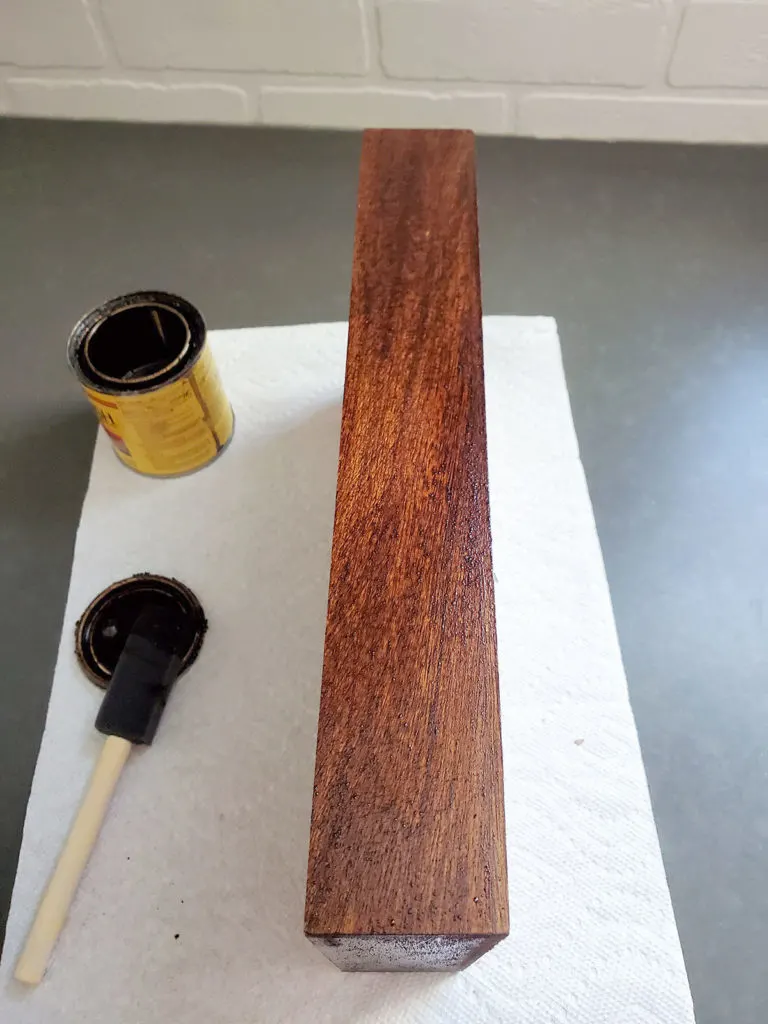
Allow the Stain to Penetrate the Wood
For several minutes, let the stain sit on the wood surface. The longer you wait, the more the stain will penetrate into the wood grain.
For reference, I waited 3-5 minutes after applying the stain before moving forward.
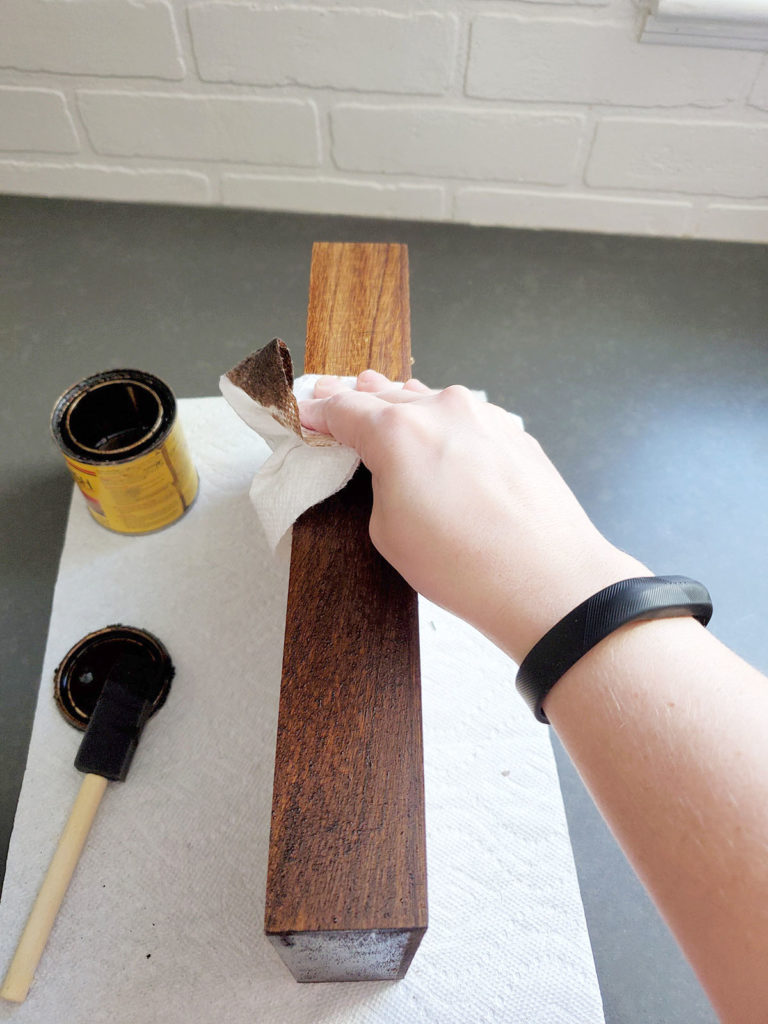
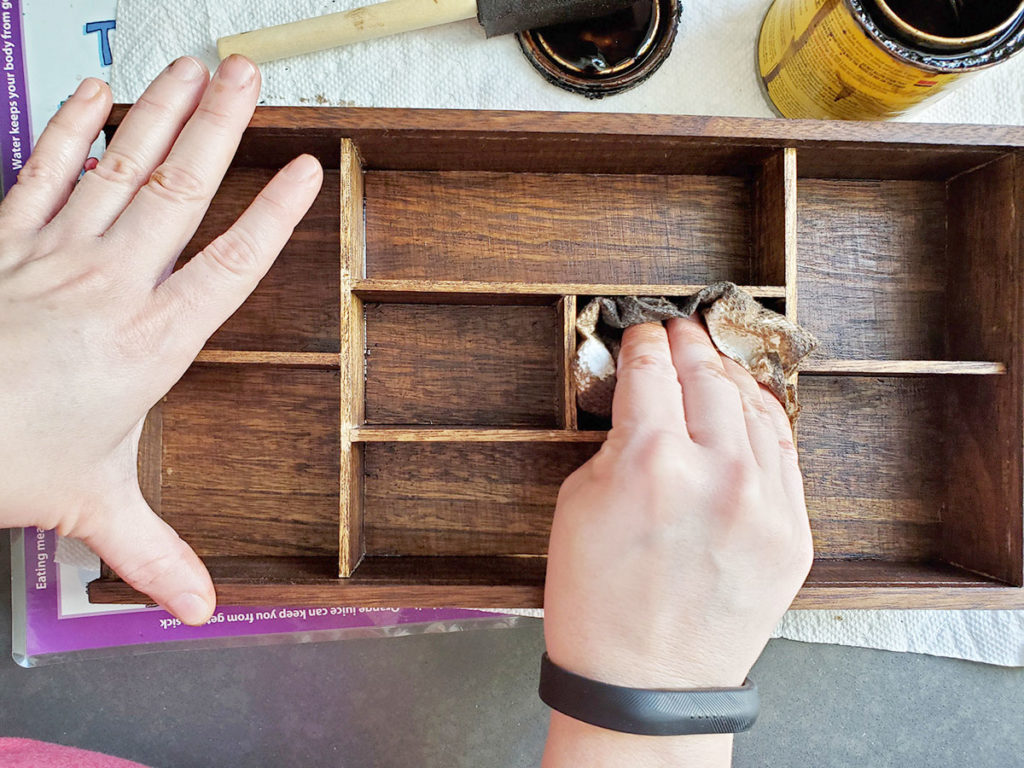
Remove Excess Stain
Finally, wipe away the excess stain with a paper towel. Make sure to wipe off the excess stain inside the cubbies, as well.
If you aren’t satisfied with the depth of the stain, simply repeat the process.

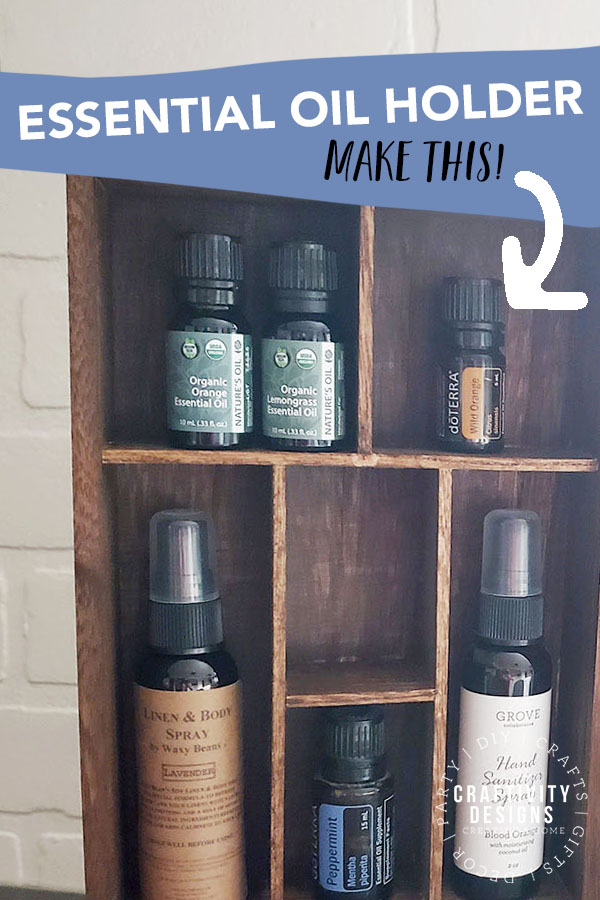
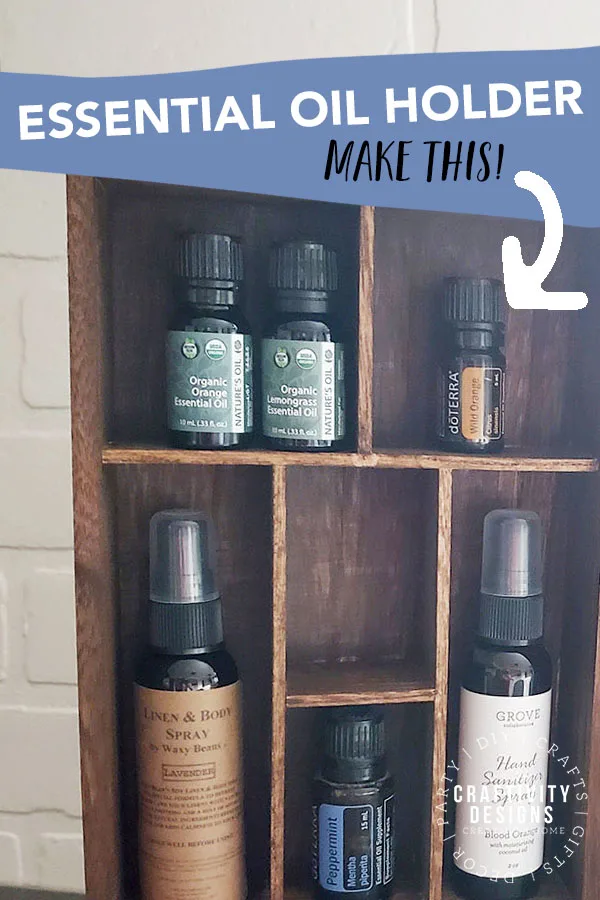
DIY Essential Oil Shelf in the Laundry Room
This wooden essential oil holder is at home in our vintage laundry room. The dark wood stain pairs perfectly with the deep green cabinetry and rustic shelf.
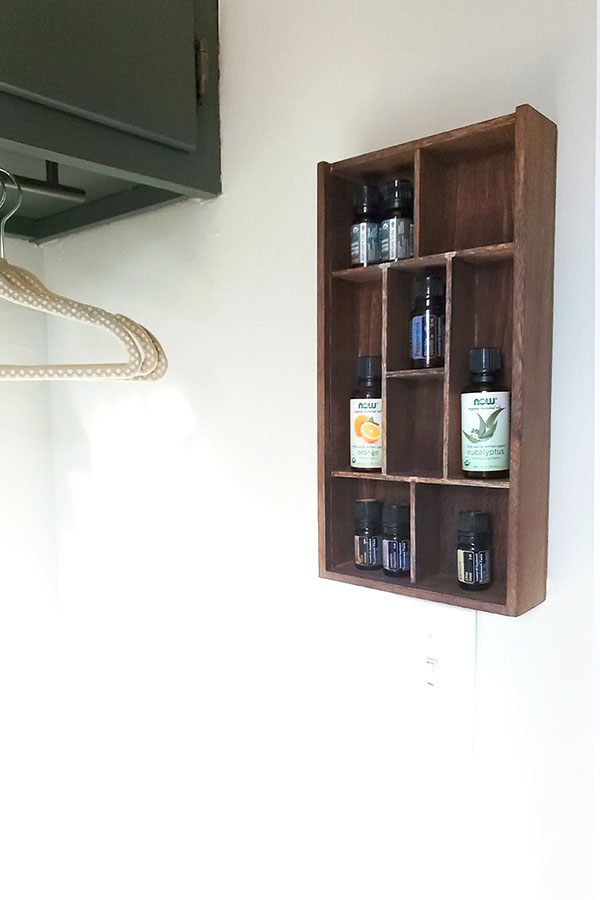
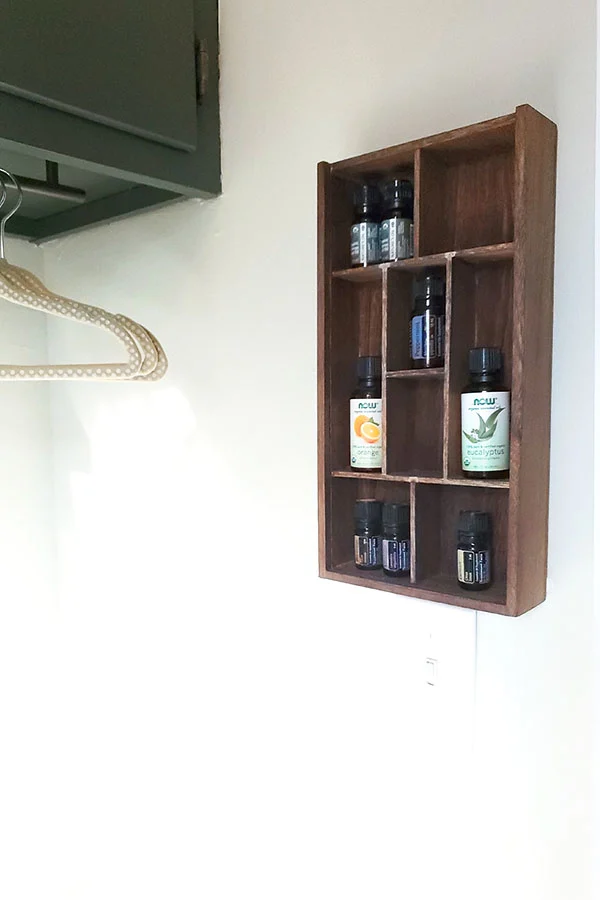
The unfinished wood display shelf came with a clear cover. At first, I didn’t think I’d use it as it seemed unnecessary. However, the clear cover has proven quite practical. I don’t have to worry about the essential oil bottles falling, breaking, and spilling.
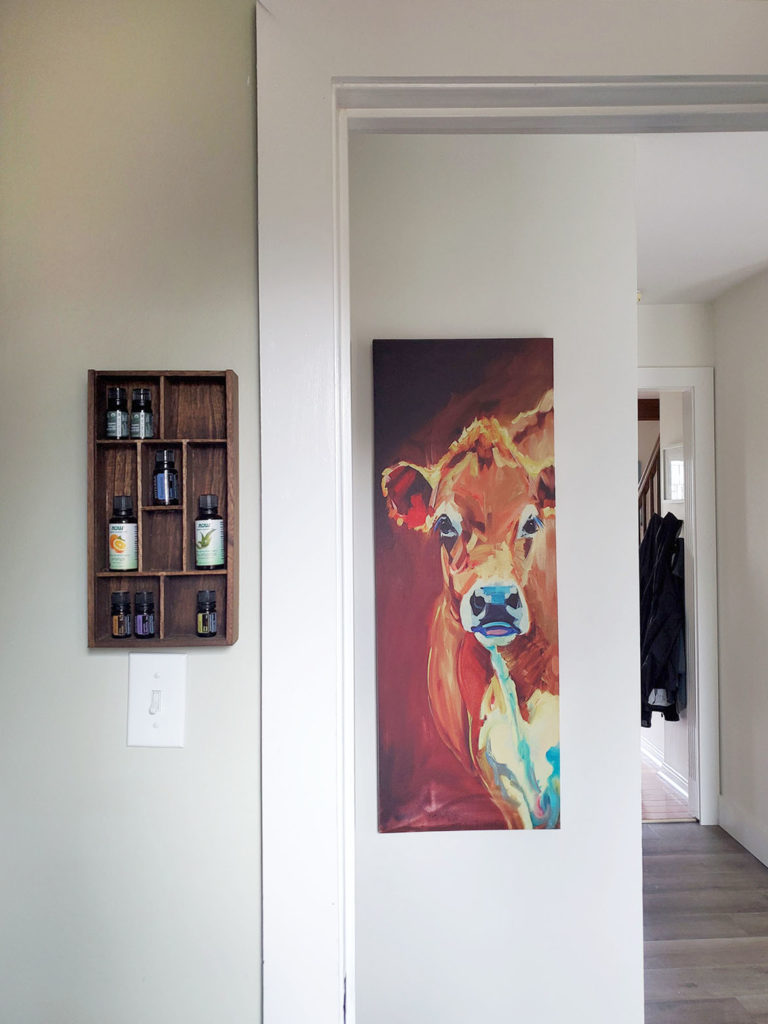

Atop the essential oil rack, I’ve added several linen spray bottles (just “thinking outside the box”… ha!). The shelf is hung just low enough that the doors from the cabinetry can’t hit the essential oil holder.

How to Make an Essential Oil Wall Shelf
Need a spot to store your essential oil wall shelf? Learn how to make a DIY essential oil shelf - in minutes! This DIY essential oil holder is easy and inexpensive.
Materials
- Unfinished Wood Shelf
- Wood Stain
- Paper Towels
Tools
Instructions
- With a paintbrush*, apply the stain generously to the wood shelf.
- For 3-5 minutes, let the stain sit while it soaks into the unfinished wood.
- Wipe off the excess stain with a paper towel.
- If the stain is too light, repeat steps 1-3 until the desired color is achieved.
- Let dry.
Notes
* Foam paintbrushes are great for projects using stain because they are inexpensive. Once you are done, just toss the brush in the trash.
Do you like this DIY project? Pin it!

Scarlet
Tuesday 19th of January 2021
I love this DIY project to display my essential oils and keep them handy to get to easily all at the same time. Thanks!