Learn how to install a mailbox and mailbox post. Update your curb appeal with a new mailbox, mailbox post, and house numbers by following this simple and quick tutorial.
Need to replace your mailbox? I’ll show you how to install a mailbox post and mailbox in only a couple of hours. This exterior DIY project is beginner friendly and quick, making it an easy way to update your home’s curb appeal.
We’ve invested a lot of time and money into curb appeal over the last 4 years, but our dingy mailbox was sticking out like a sore thumb. With new shake siding, a front door, exterior lighting, a house address sign, and landscaping; our mailbox is the only item that still needs an update.
Disclosure: This page includes affiliate links.
It felt gratifying to rip out that old, dingy mailbox – and ended up being fairly simple, too. Early spring rains led to soft soil, which made digging out the old box a short endeavor. So, add this exterior decor project to your spring to-do list and tackle it before the ground is tough and dry from summer heat.
Want to see what our mailbox looked like beforehand? Check out this beauty:

See? You can probably understand why we were anxious to replace it, and select something more suited to our cottage style home’s renovated exterior.
Can I Install a Mailbox Myself?
Yes! Installing a mailbox is a great beginner DIY project – especially if you purchase a mailbox post that is well-rated for assembly. Our mailbox post took less than 15 minutes to assemble because it came with the drill bit, high-quality screws, and pre-drilled holes.
Plus, using a quick set concrete makes it easy to secure the post in the ground. You won’t even have to mix the concrete beforehand. So, there are no special tools needed and there is no mess, either!
USPS Mailbox Installation Requirements
When installing your mailbox, make sure to be aware of the USPS requirements for height and distance from the street.
Our mailbox is 18″ deep, and is installed 6″ from the curb. Therefore, the post is 24″ from the curb. The post office requires that the box set 6-8″ from the road edge. Also, the base of the mailbox should be located 41-45″ from the ground.
You can find an image with details about mailbox placement directly on the USPS website.
Types of Mailbox Posts
There are many different types of mailbox posts:
- Wood Posts
- Metal Posts
- Plastic Posts
- Wood Posts with Sleeves (either metal or plastic sleeves)
- Poly-Lumber Posts (similar to composite decking)
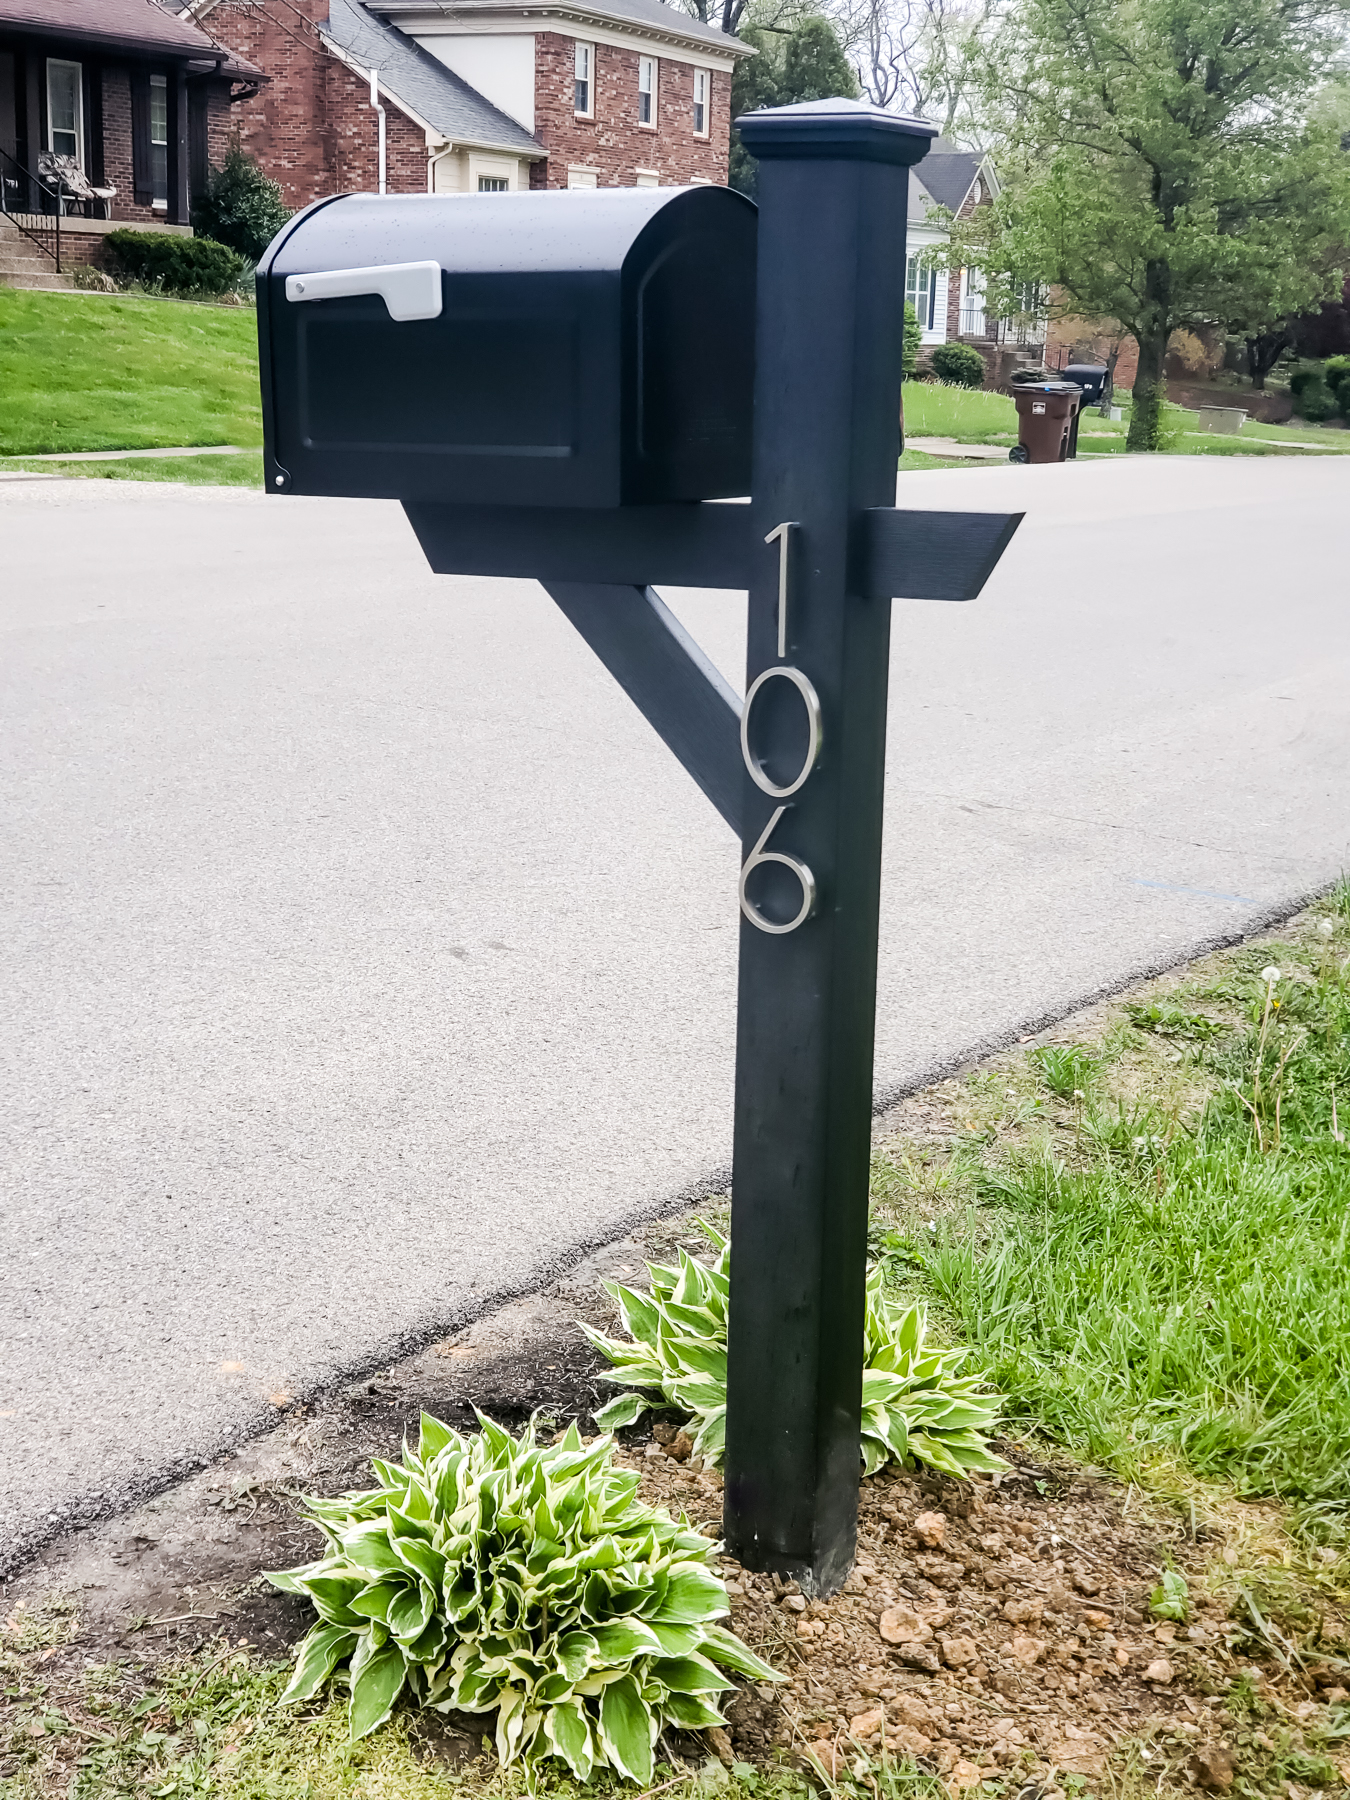
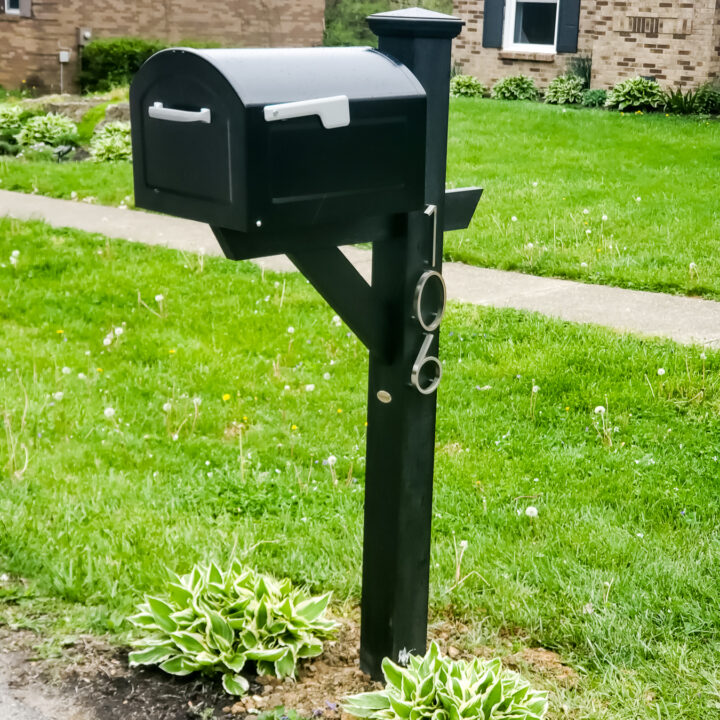
Initially, we chose a wood post with an aluminum sleeve; but we couldn’t find it in black at our local hardware stores. That ended up being a blessing in disguise, because that is how we learned about the Highwood Hazelton Post which is made with poly-lumber.

The reviews for ease of installation were stellar, and the poly-lumber makes it weatherproof year round. It looks like wood, but without the maintenance, just like a composite deck.
Plus, this mailbox post is designed to be installed directly in the ground (aka. it doesn’t sleeve over a wood post), making it easier to install and assemble.
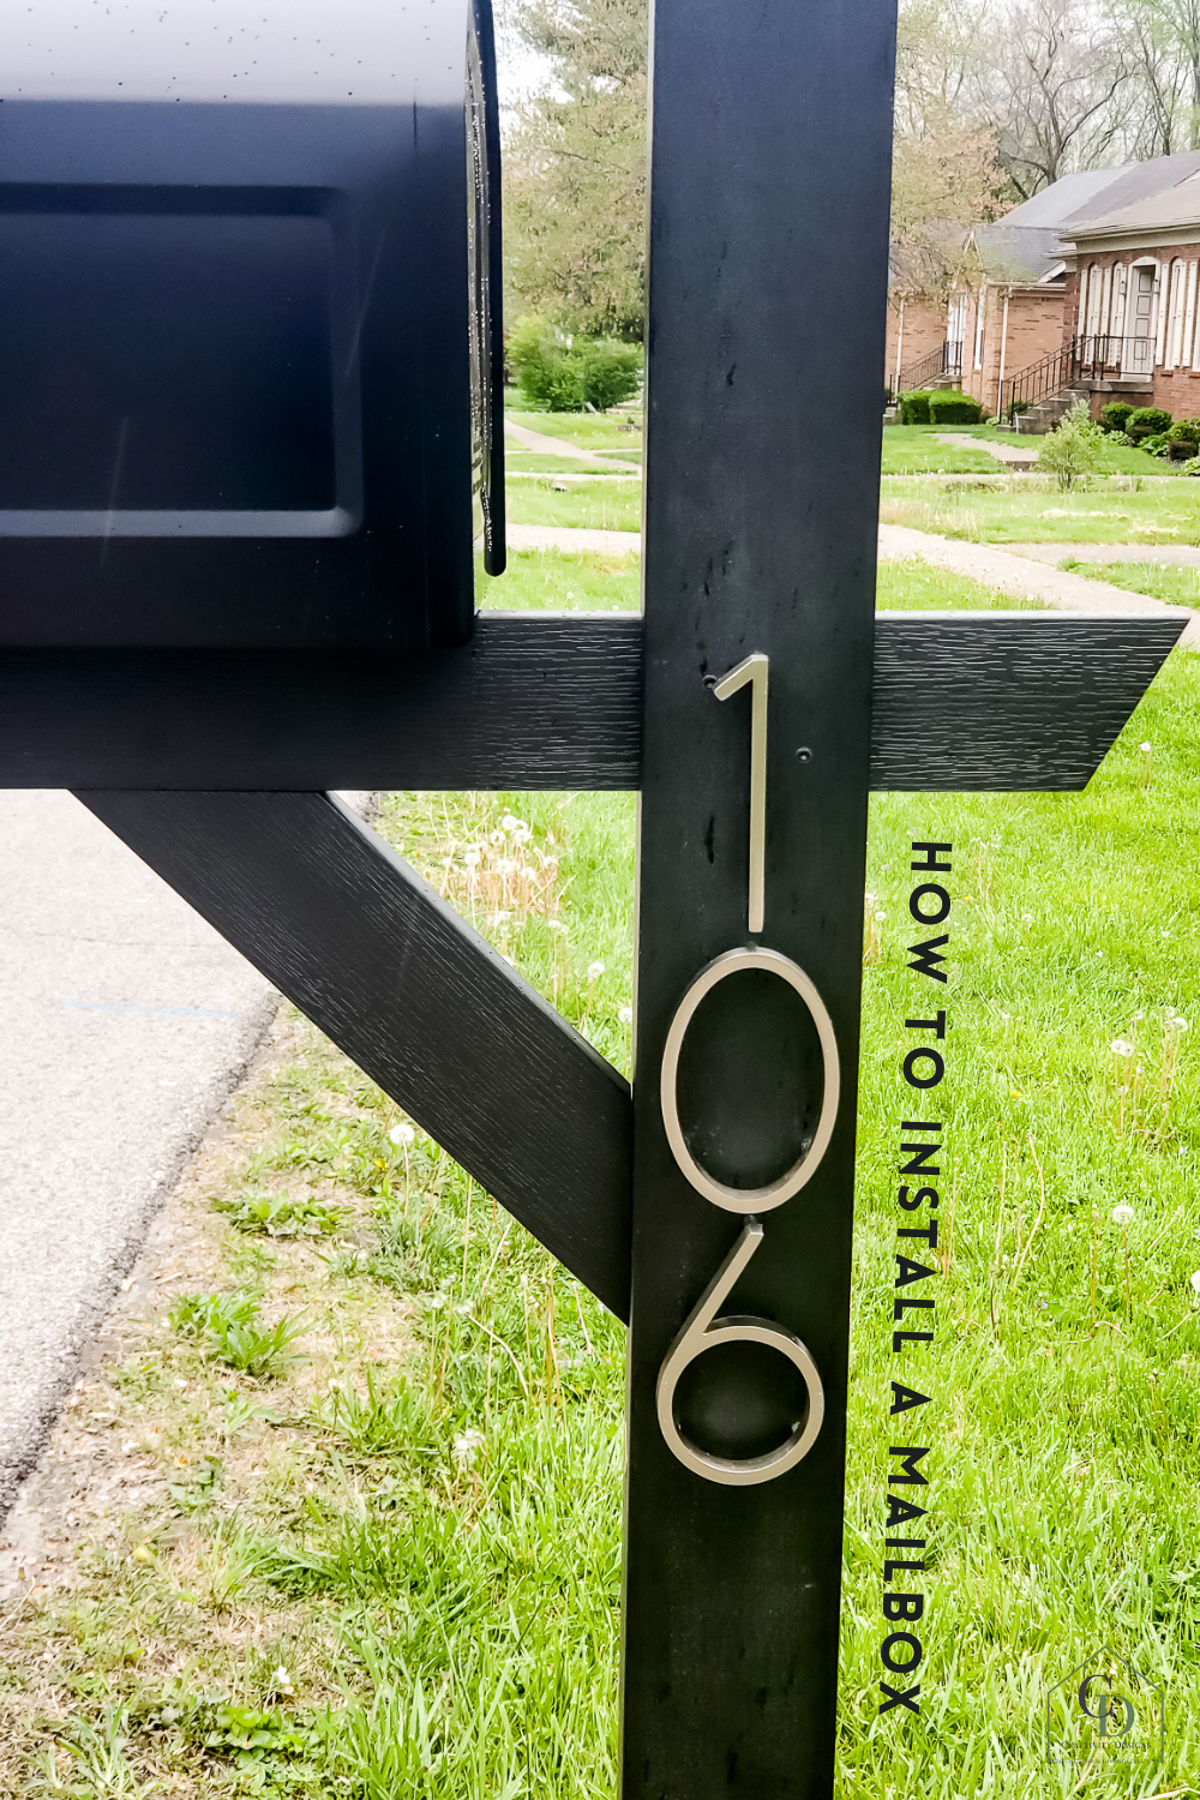
House Numbers on a Mailbox Post
Another bonus to the Highwood Hazelton Post is that we could install house numbers directly into the side of the post. If we had selected a metal post, we would have had to use house number stickers.
Using the included template, it was easy to install floating house numbers directly into the composite wood post.
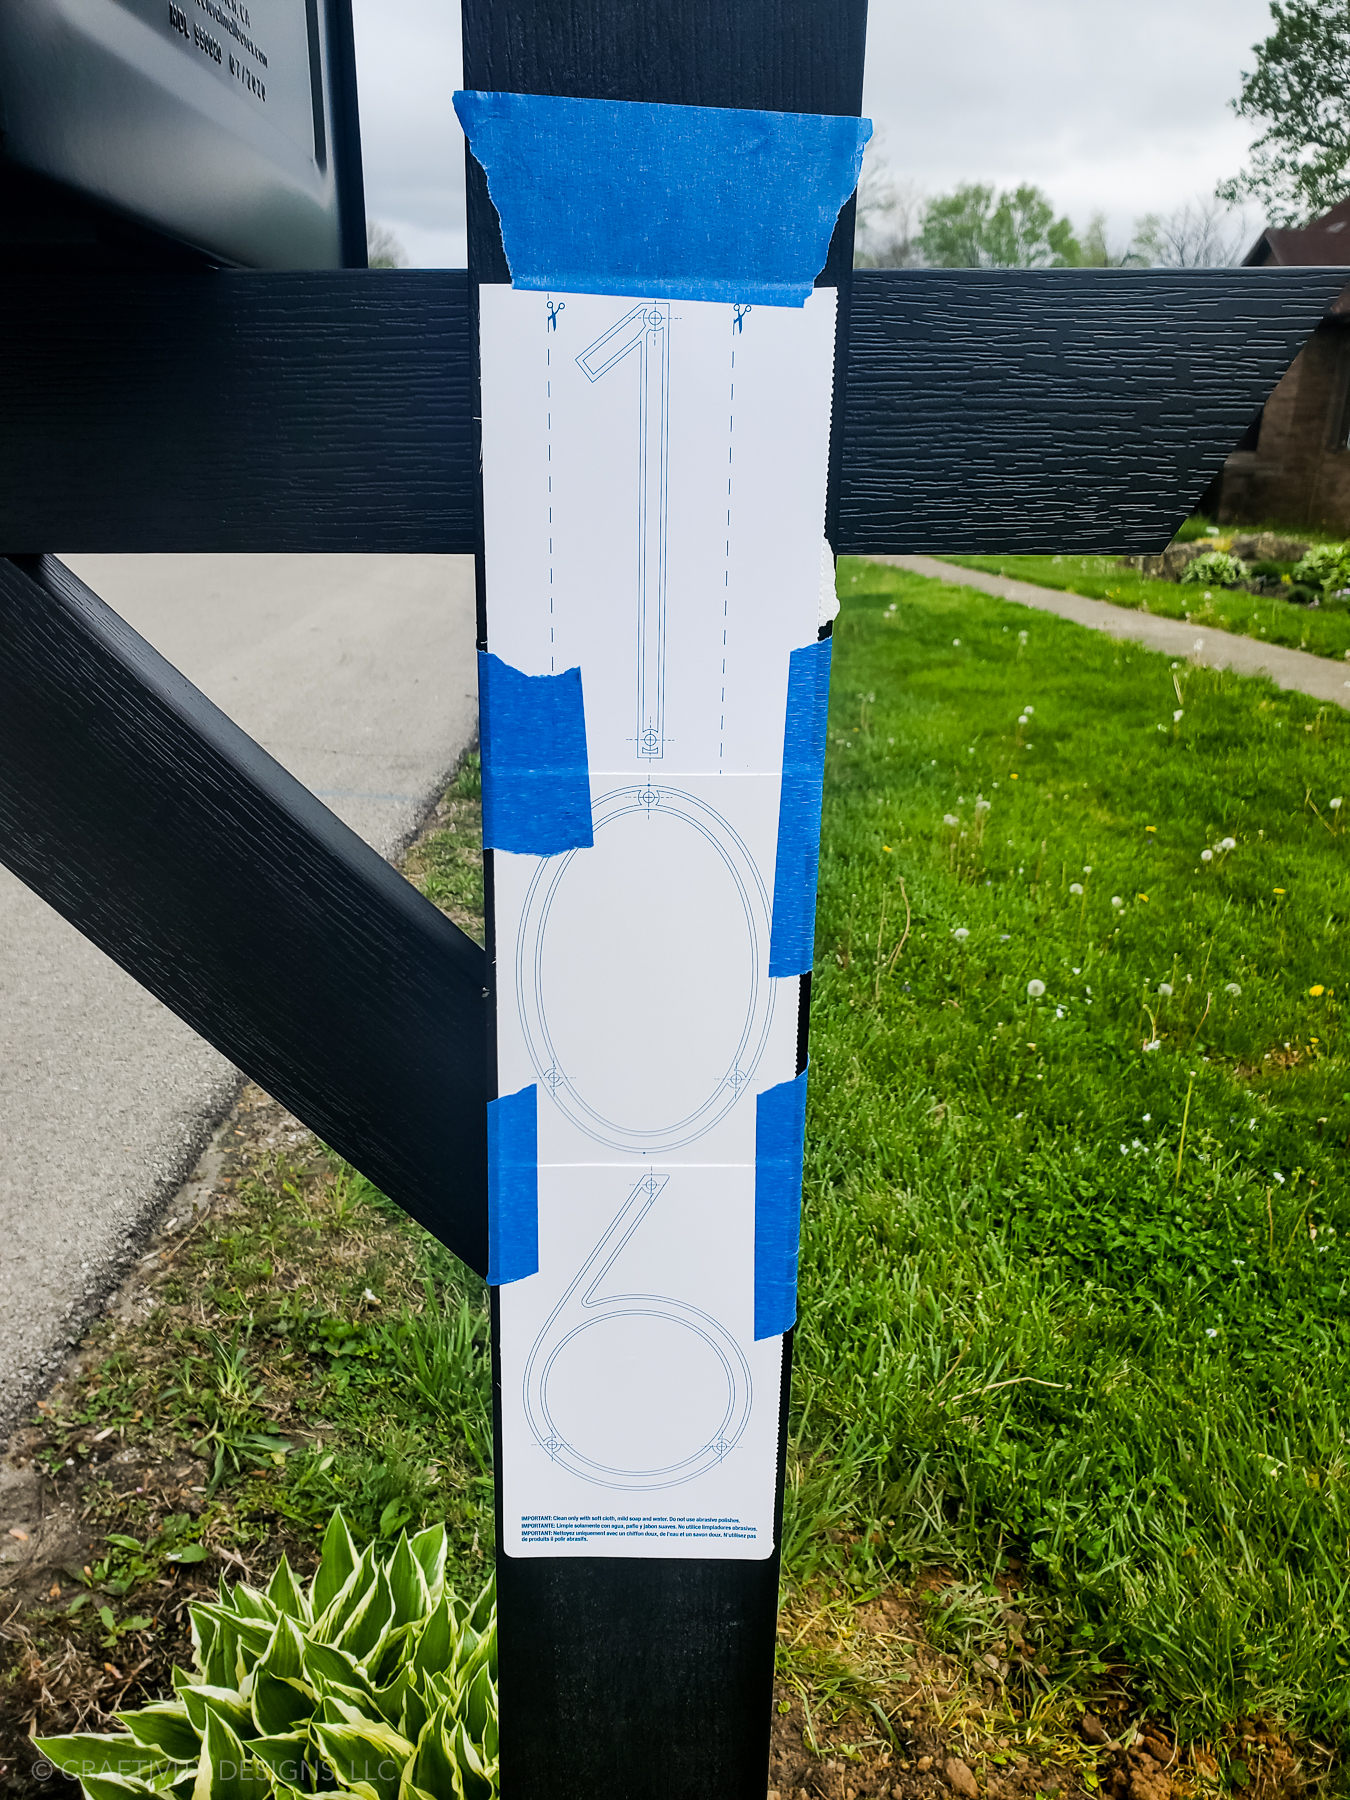
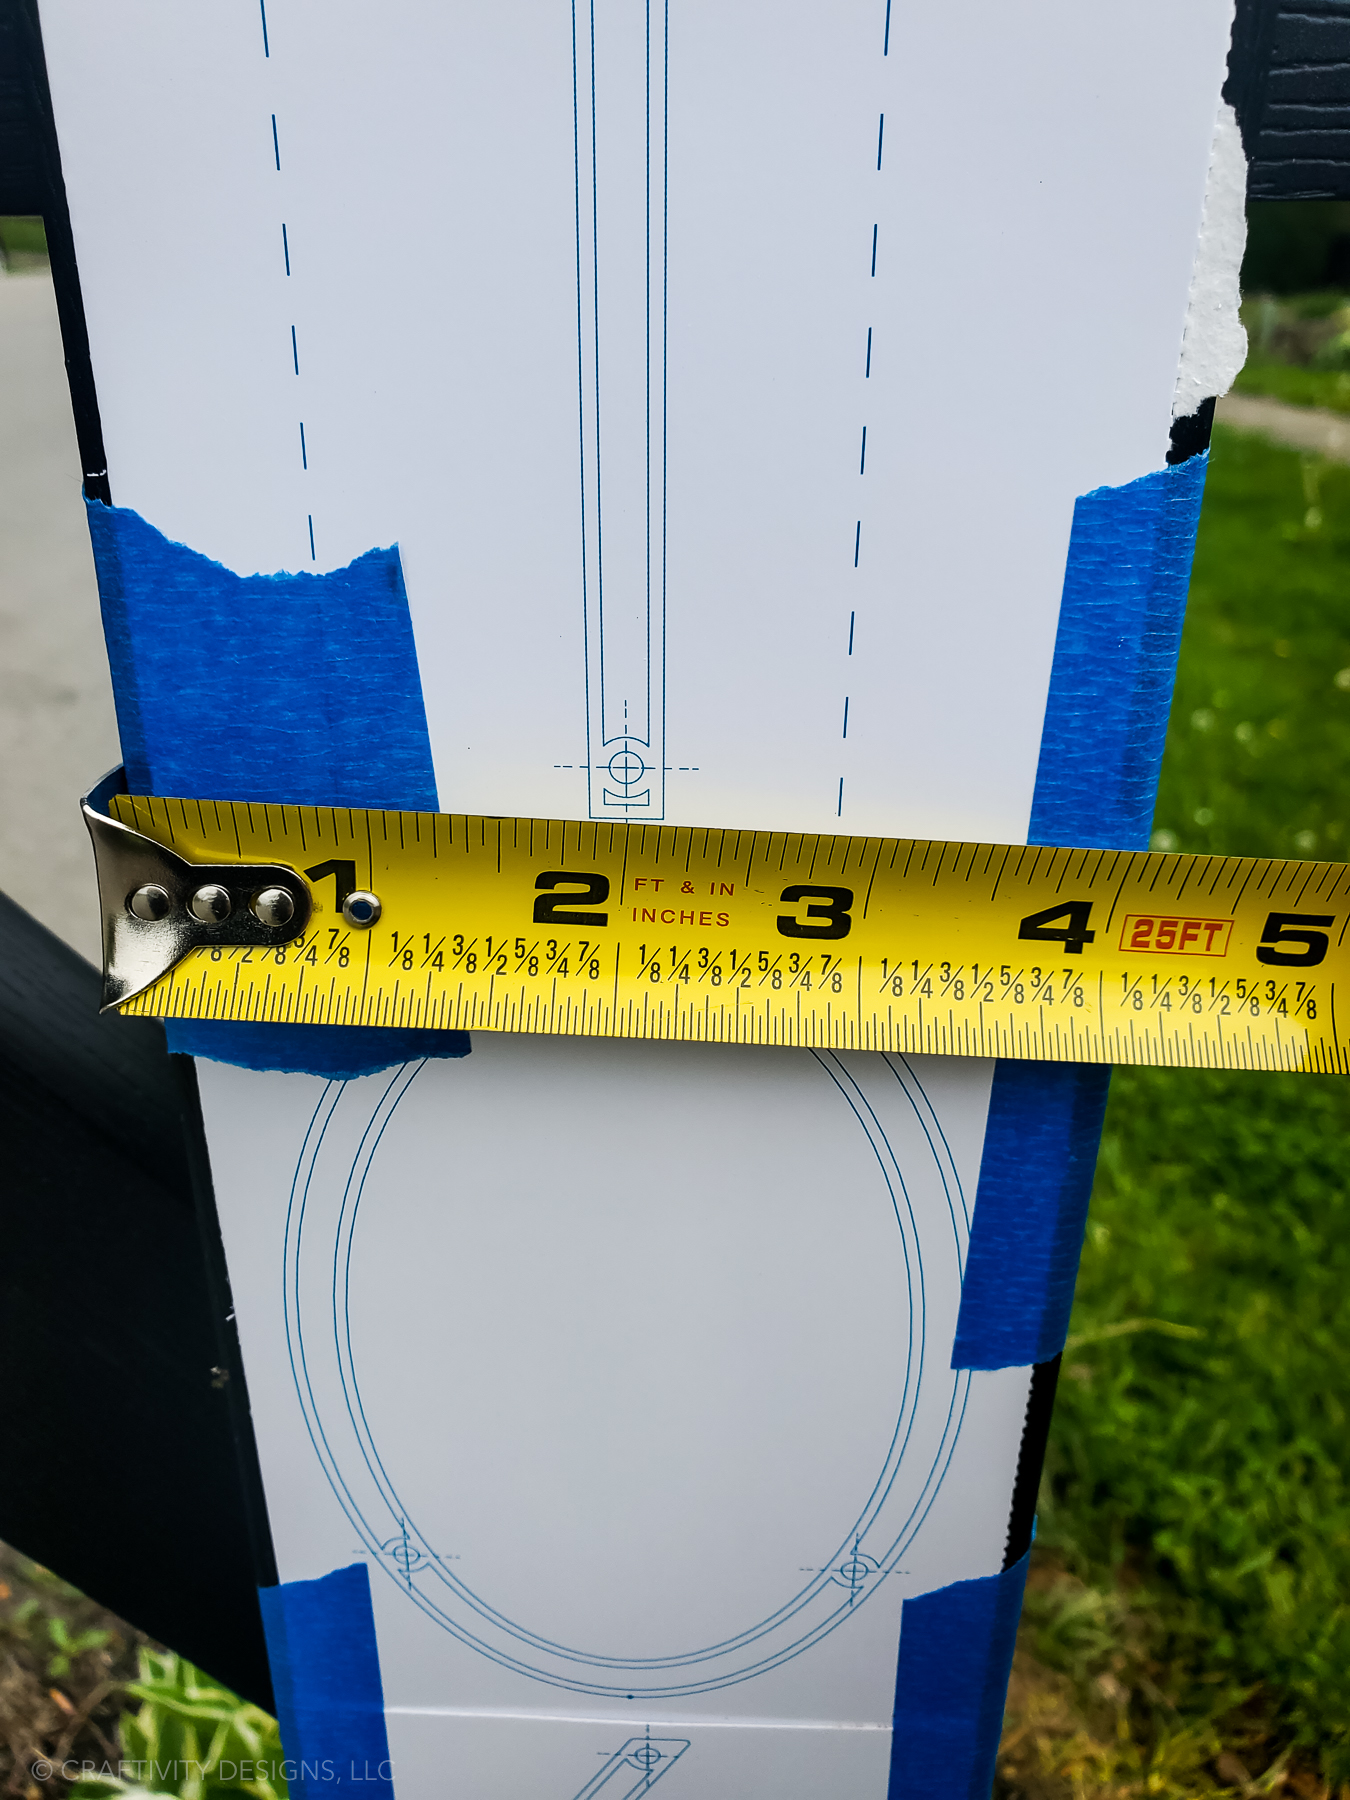
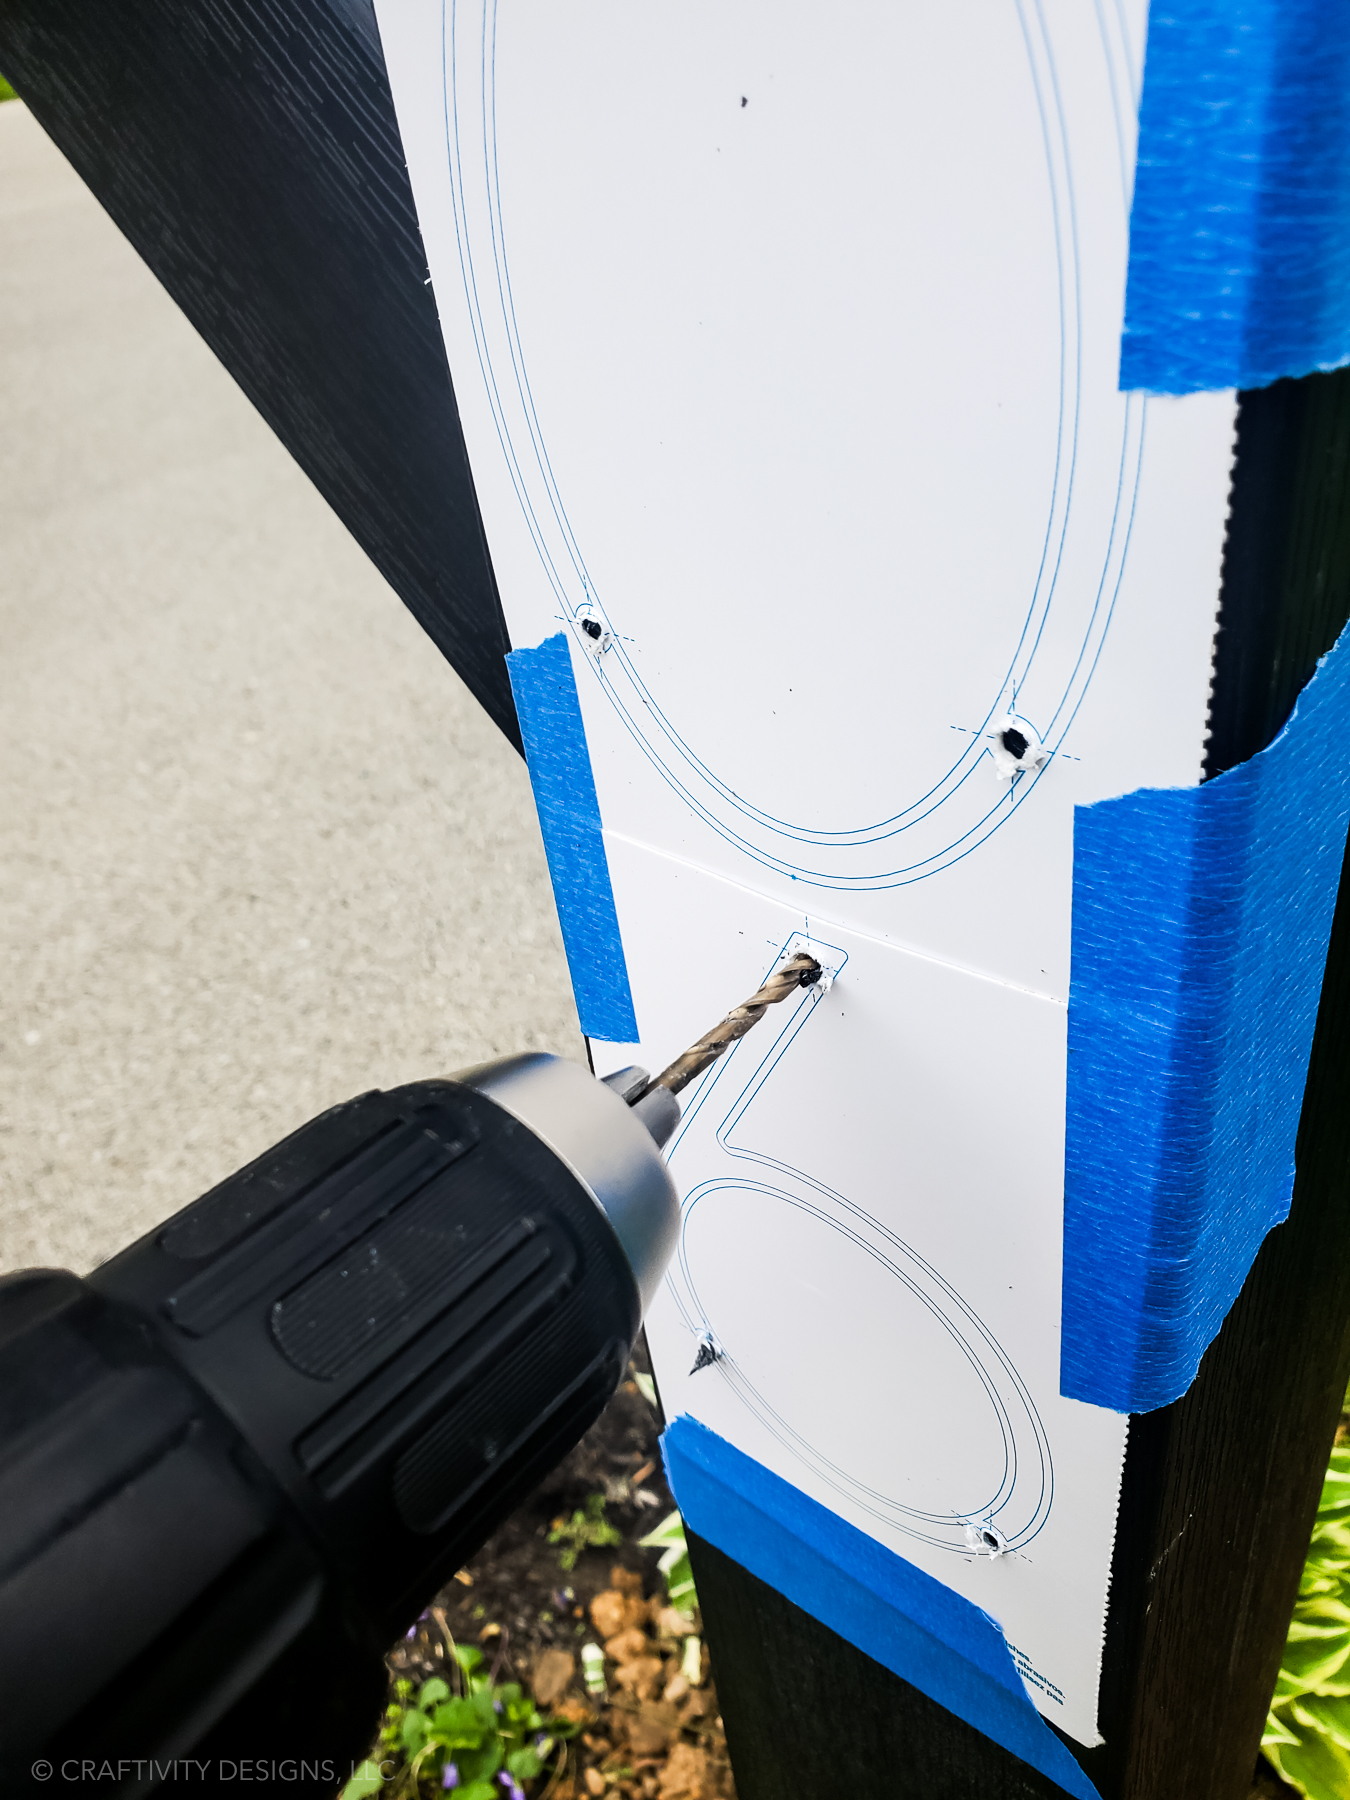
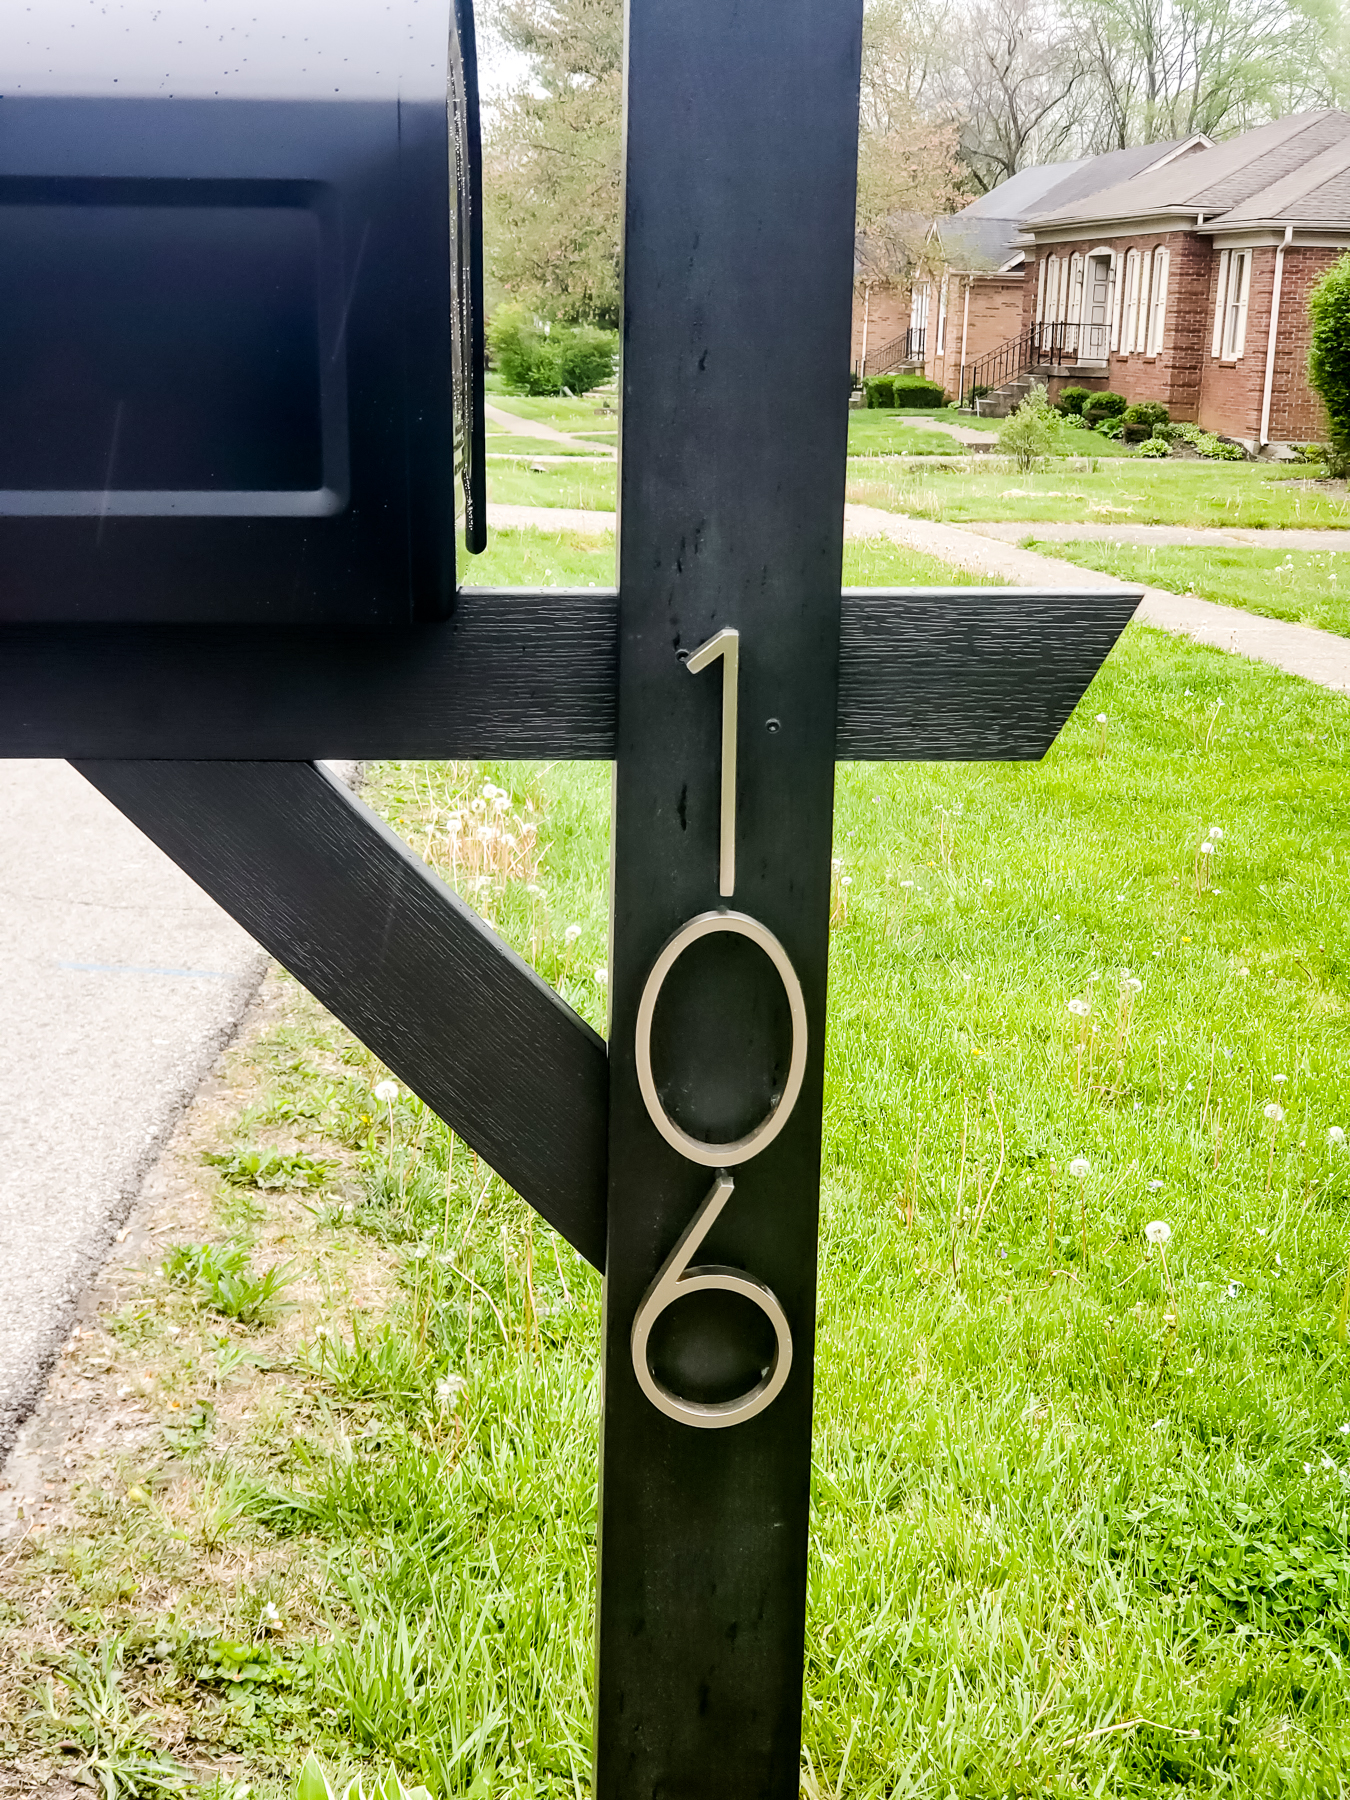
As a note, we skipped the step in the instructions which tells you to use silicone in the holes. The floating house numbers are such a snug fit, that it didn’t seem necessary. Time will tell if we need to go back and add silicone. If we do, I’ll update this post.
You might also like: 25 of the Best Modern House Numbers for Your Home
Mailbox that Holds Packages
Did you know that you can purchase a mailbox that is large enough to hold packages? Since we are frequent online shoppers and also ship scavenger hunt products from our home, an XL mailbox seemed practical.
In addition to holding several packages, I also like that the larger size feels more substantial. The mailbox and post combo make a statement as part of our home’s curb appeal.
How to Install a Mailbox Post and Mailbox
Now that we’ve learned a lot about selecting a mailbox post and mailbox, let’s learn how to install them. Continue reading, below, to find the detailed instructions with photos (feel free print them, too!) and frequently asked questions.

How to Install a Mailbox and Mailbox Post
Materials
- Mailbox Post
- Mailbox
- Quick Setting Concrete Mix (50 lb bag)
- Gravel
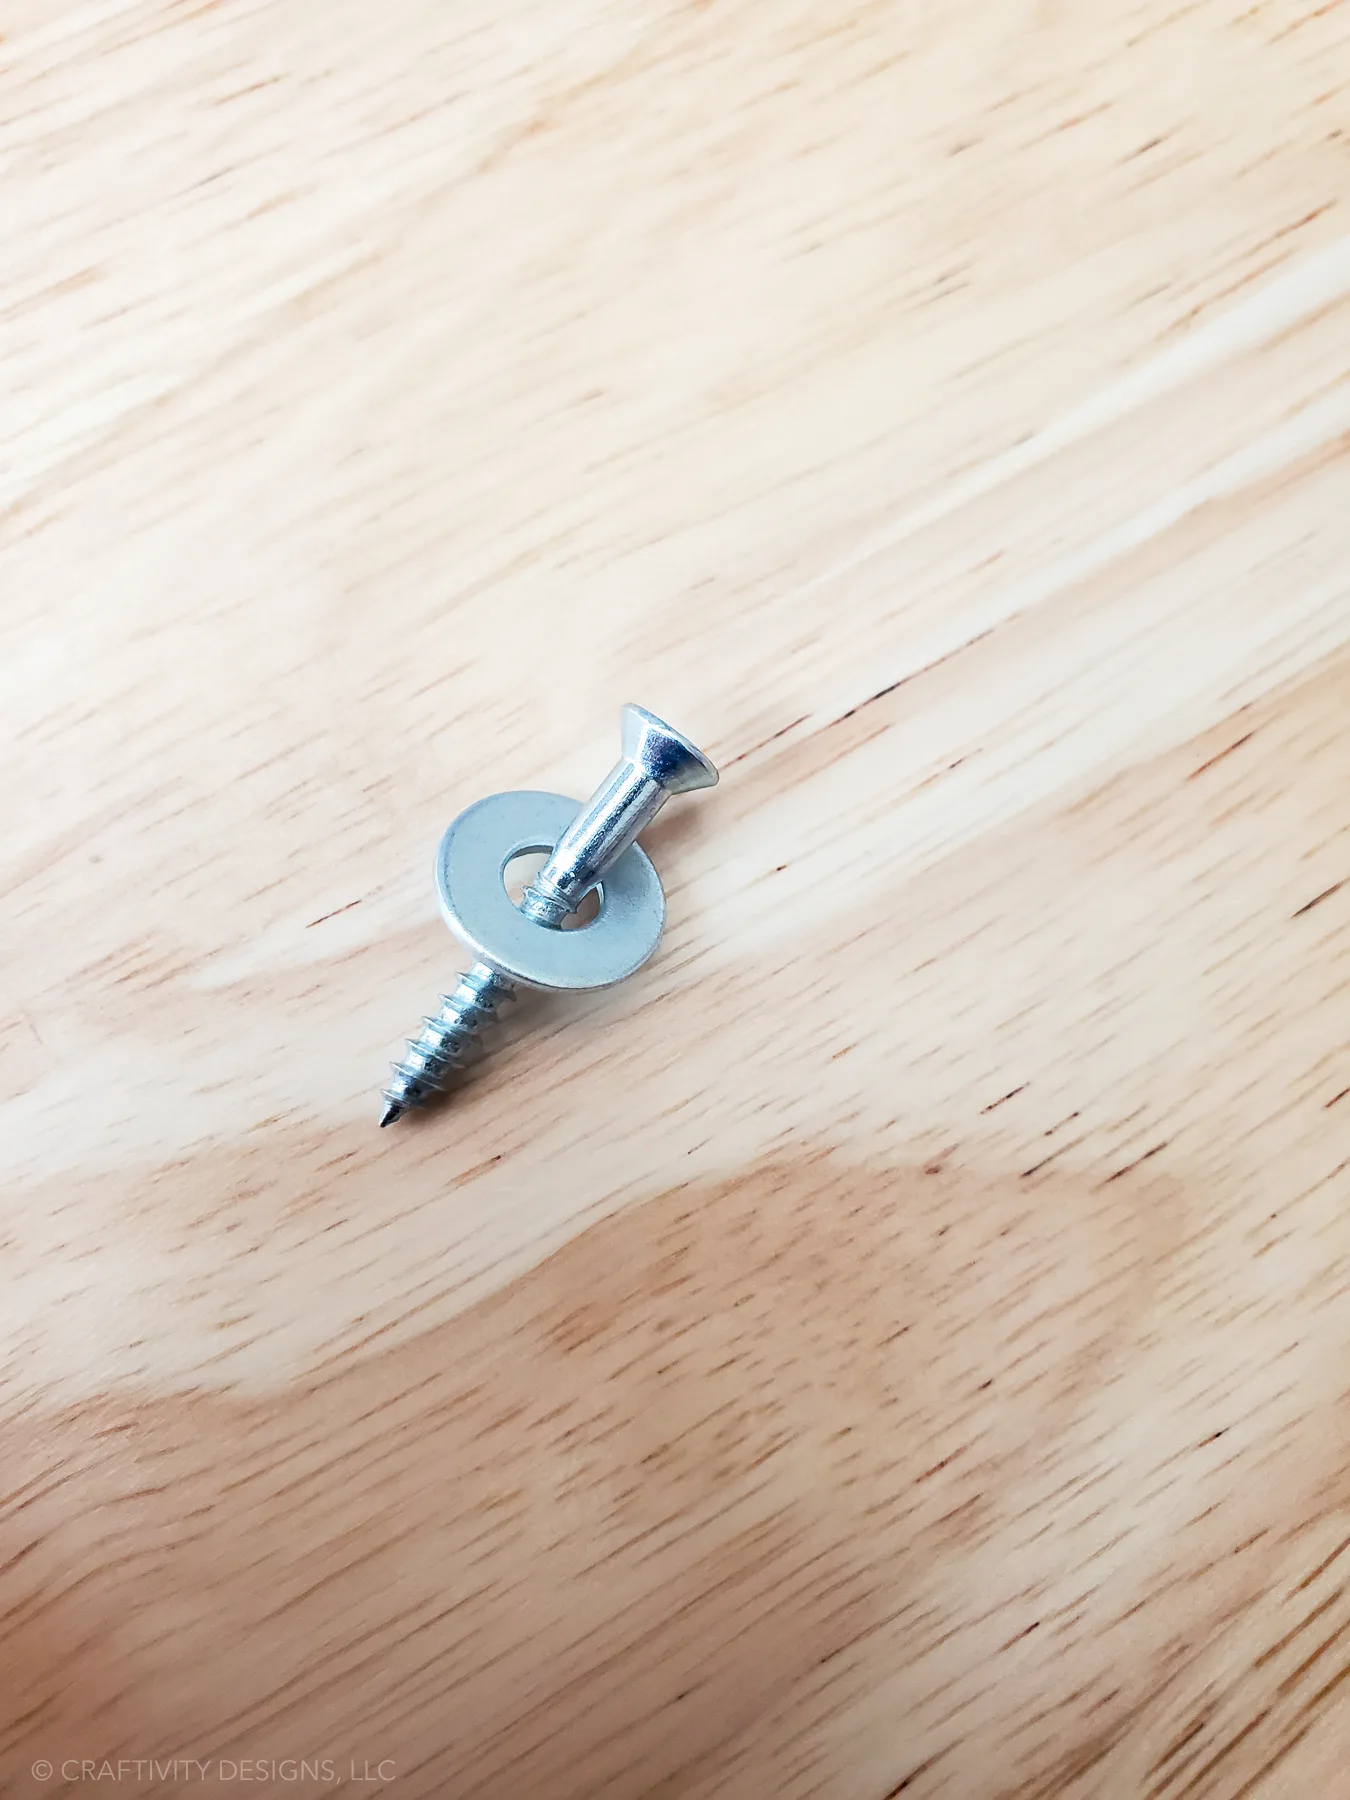
- 4 Flat-head Screws (1" Long)
- 4 Washers (approx. 1/4" inside diameter and at least 1/2" outside diameter)
Tools
- Shovel
- Level
- Water Hose
- Wood Boards and Heavy Items (Pavers, Rocks, etc.)
- Drill
- Screwdriver
- Pencil
Instructions
- Dig a 21" deep hole that is approximately 8-10" in diameter.
- Pour 3" of gravel into the hole.
- Set the post into the hole and adjust it until it is level on the top and sides of the post.
- Fill the hole with water per the quick set concrete instructions.
- Pour the concrete mix into the hole.
- Check that the post is still level. If not, adjust until level.
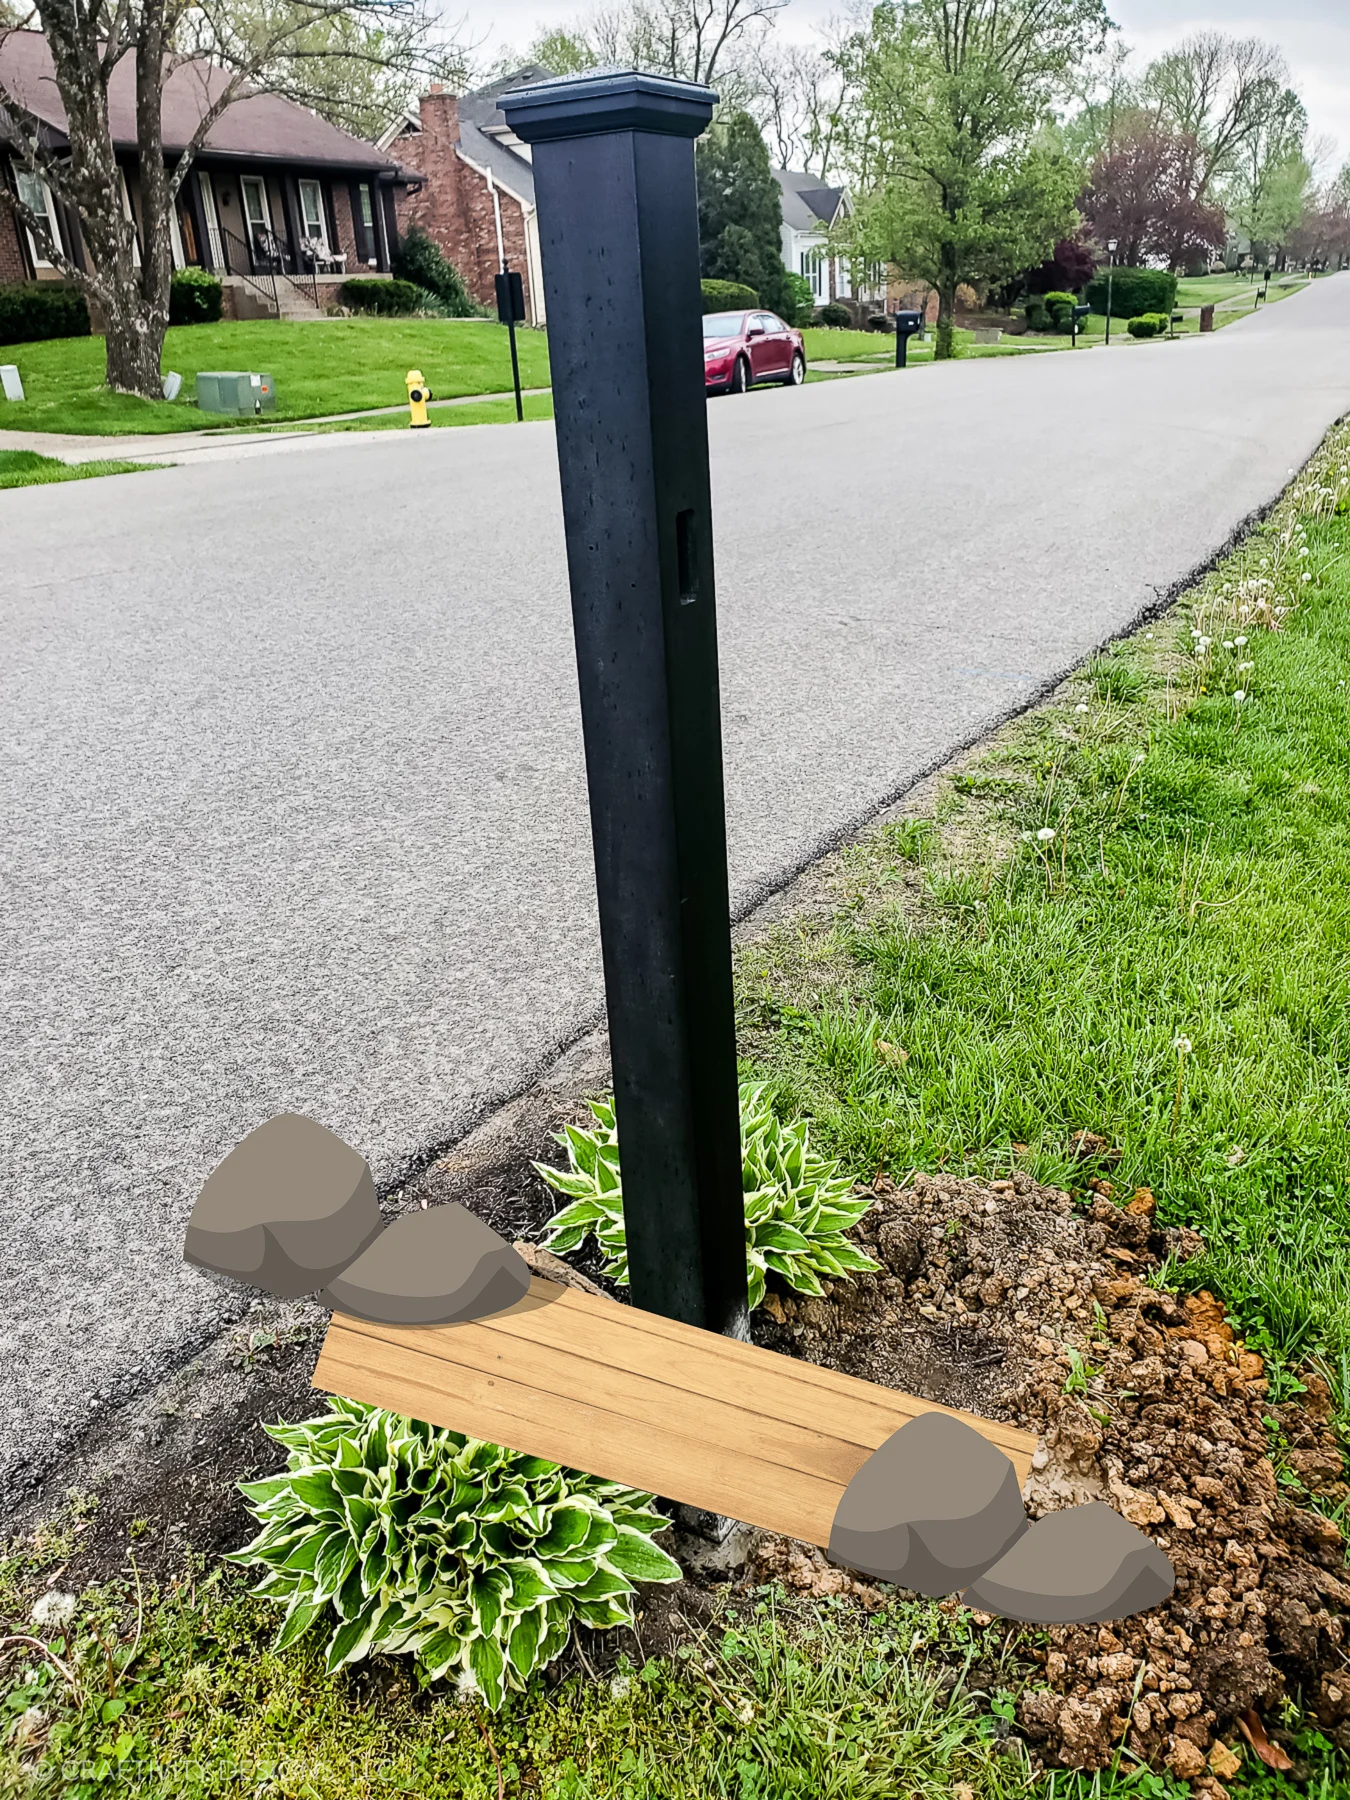
- Use wood boards and heavy items on each side of the post to keep it level while the concrete sets. (see illustration - sorry I don't have a photo of this step)
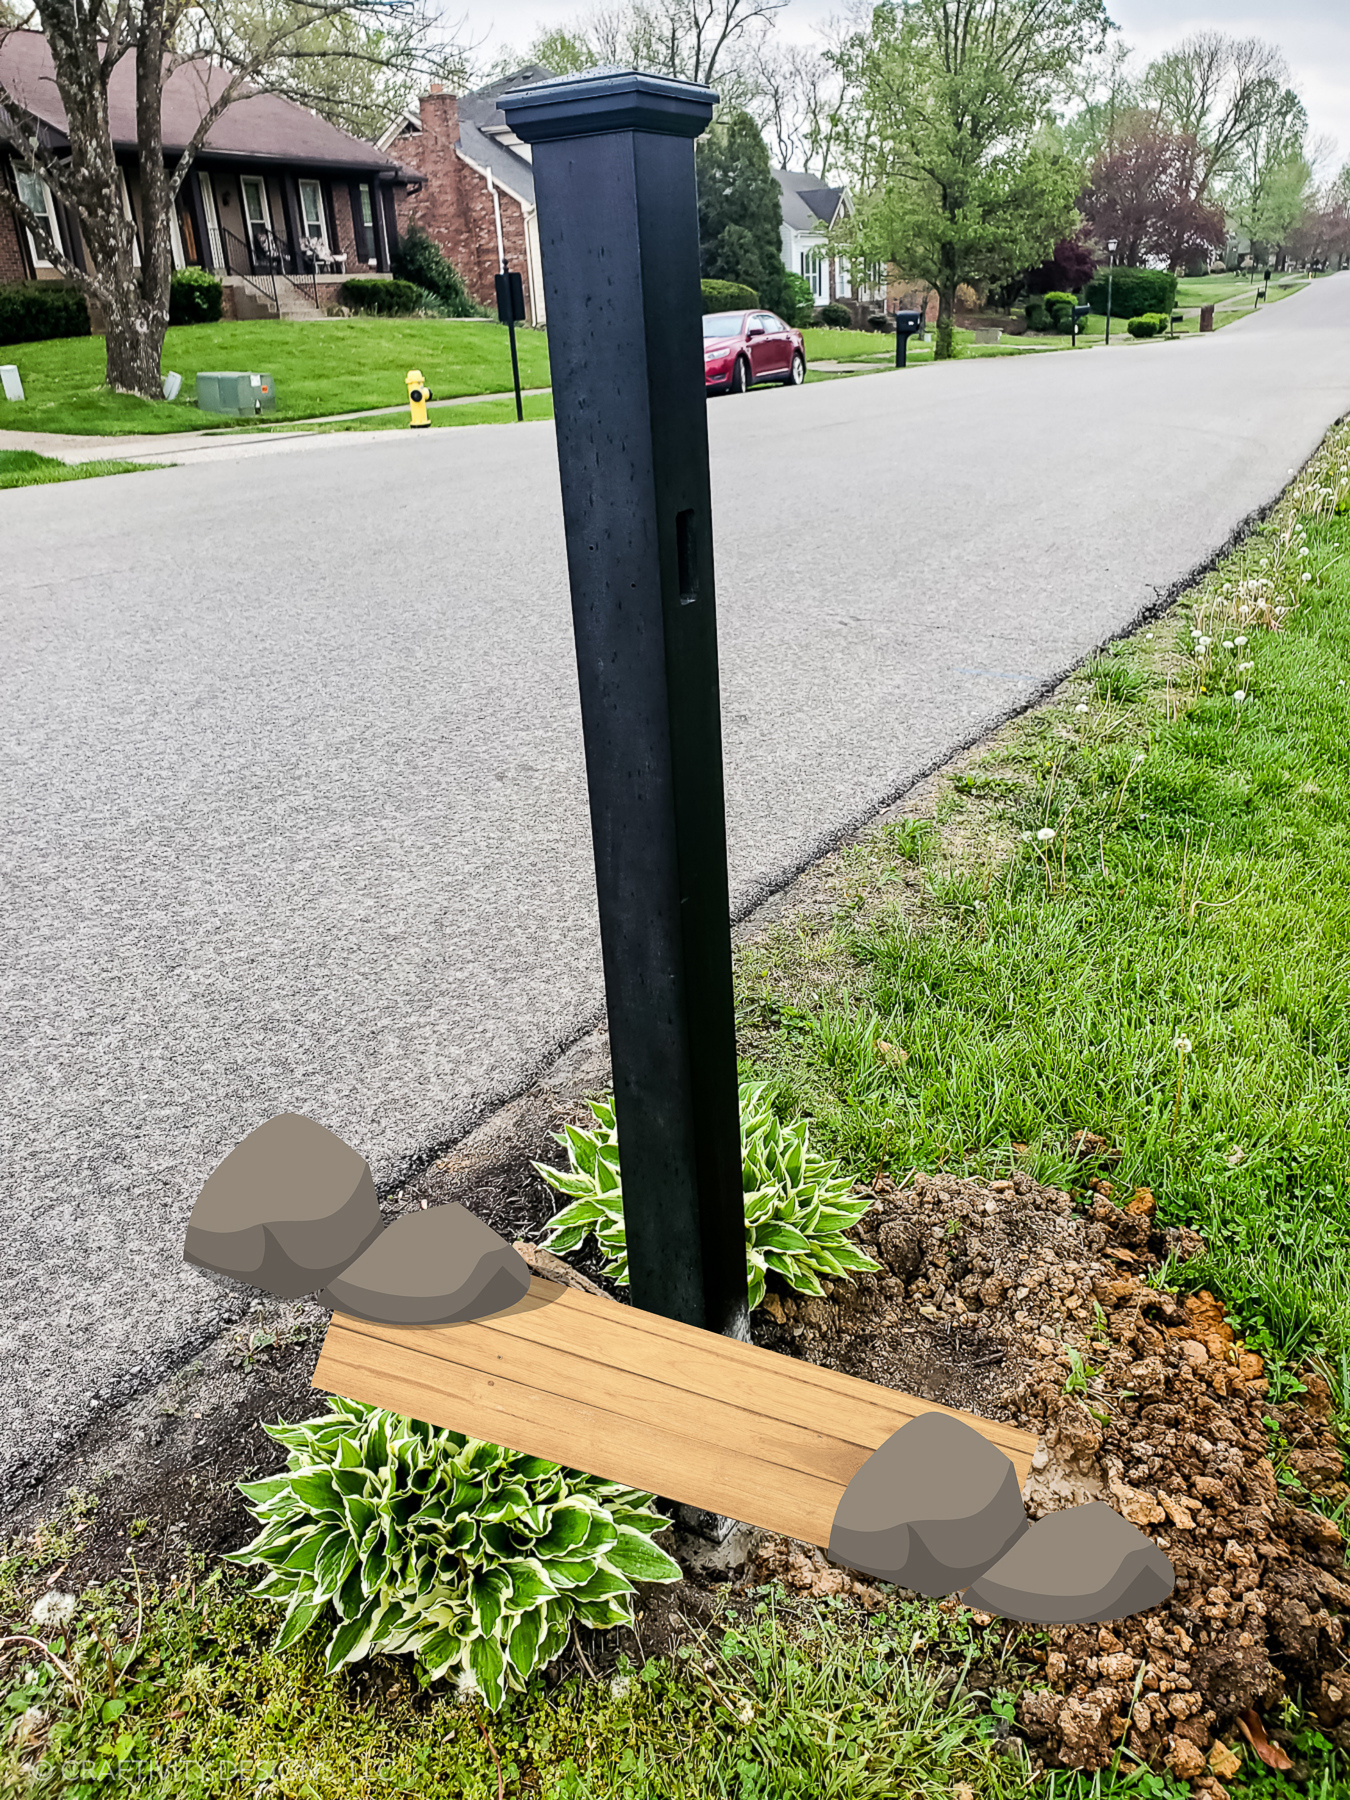
- Wait for the concrete to set (time will vary based on the brand, but most quick setting concrete mix takes less than an hour).
- Fill the rest of the hole with dirt.
- Attach the beam, support bracket, and baseplate using the 6 included screws.

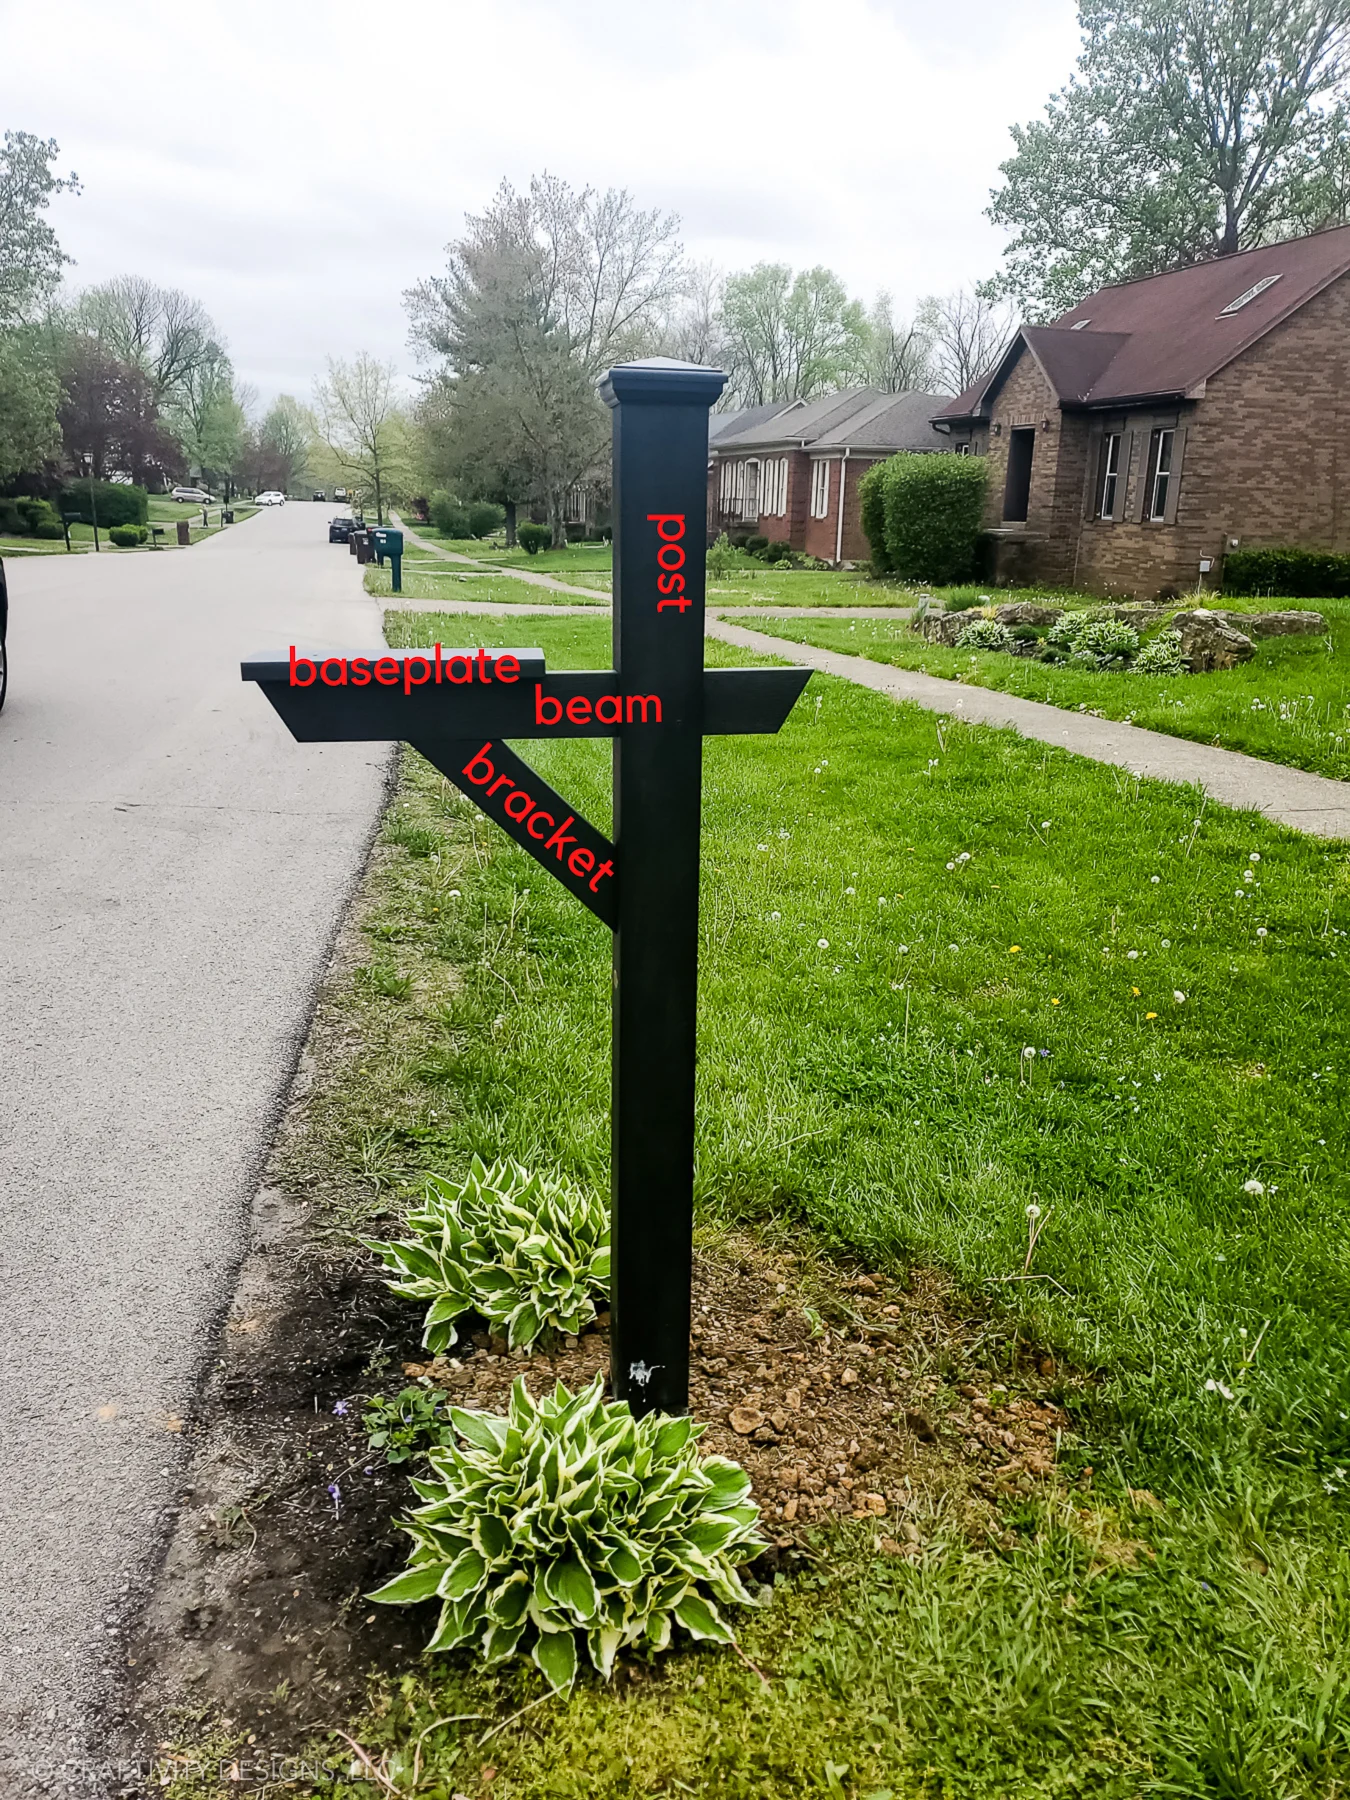
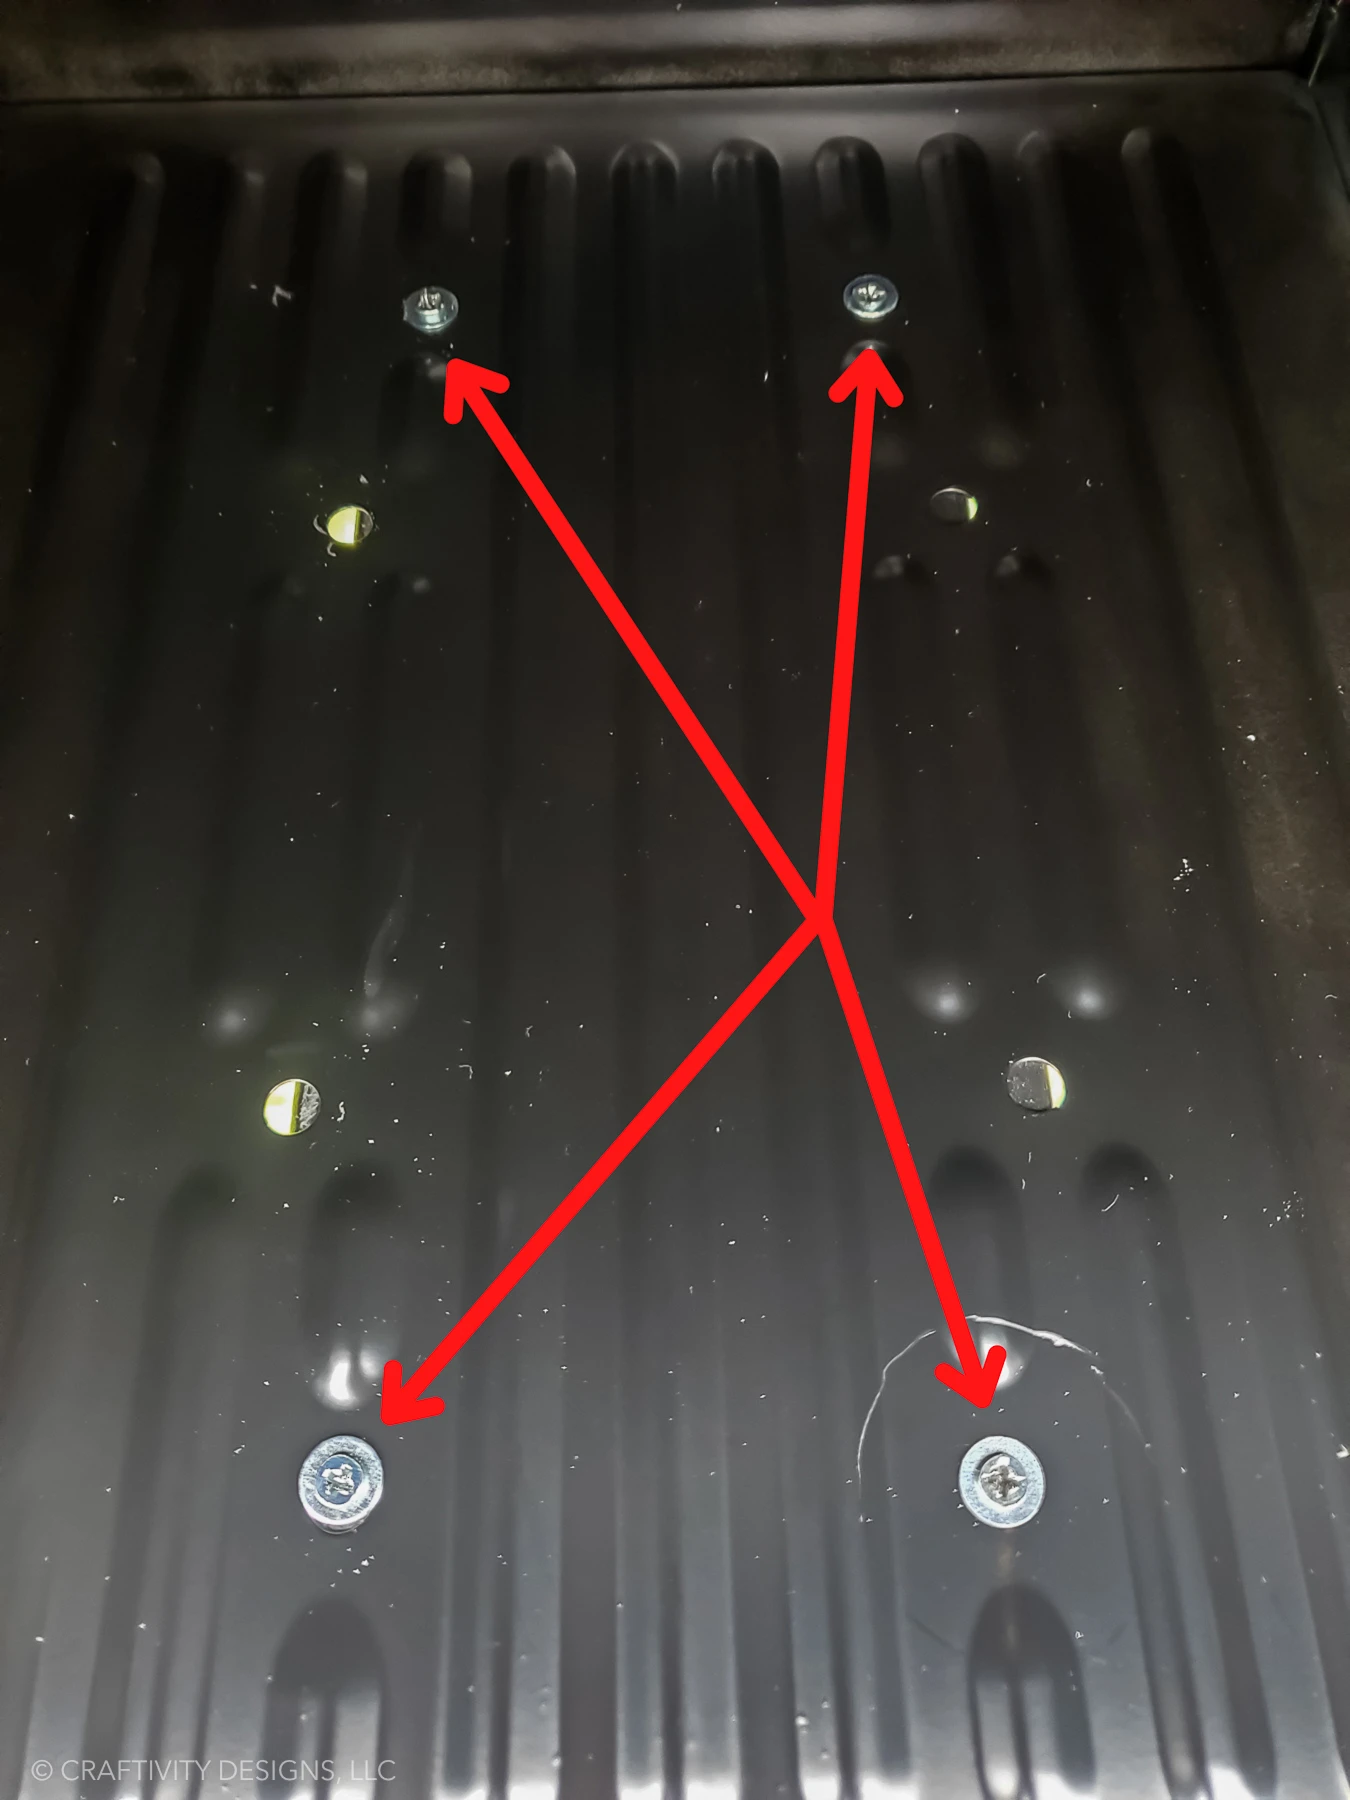
- Set the mailbox, centered, on top of the baseplate to mark the hole locations with a pencil. Remove the mailbox.
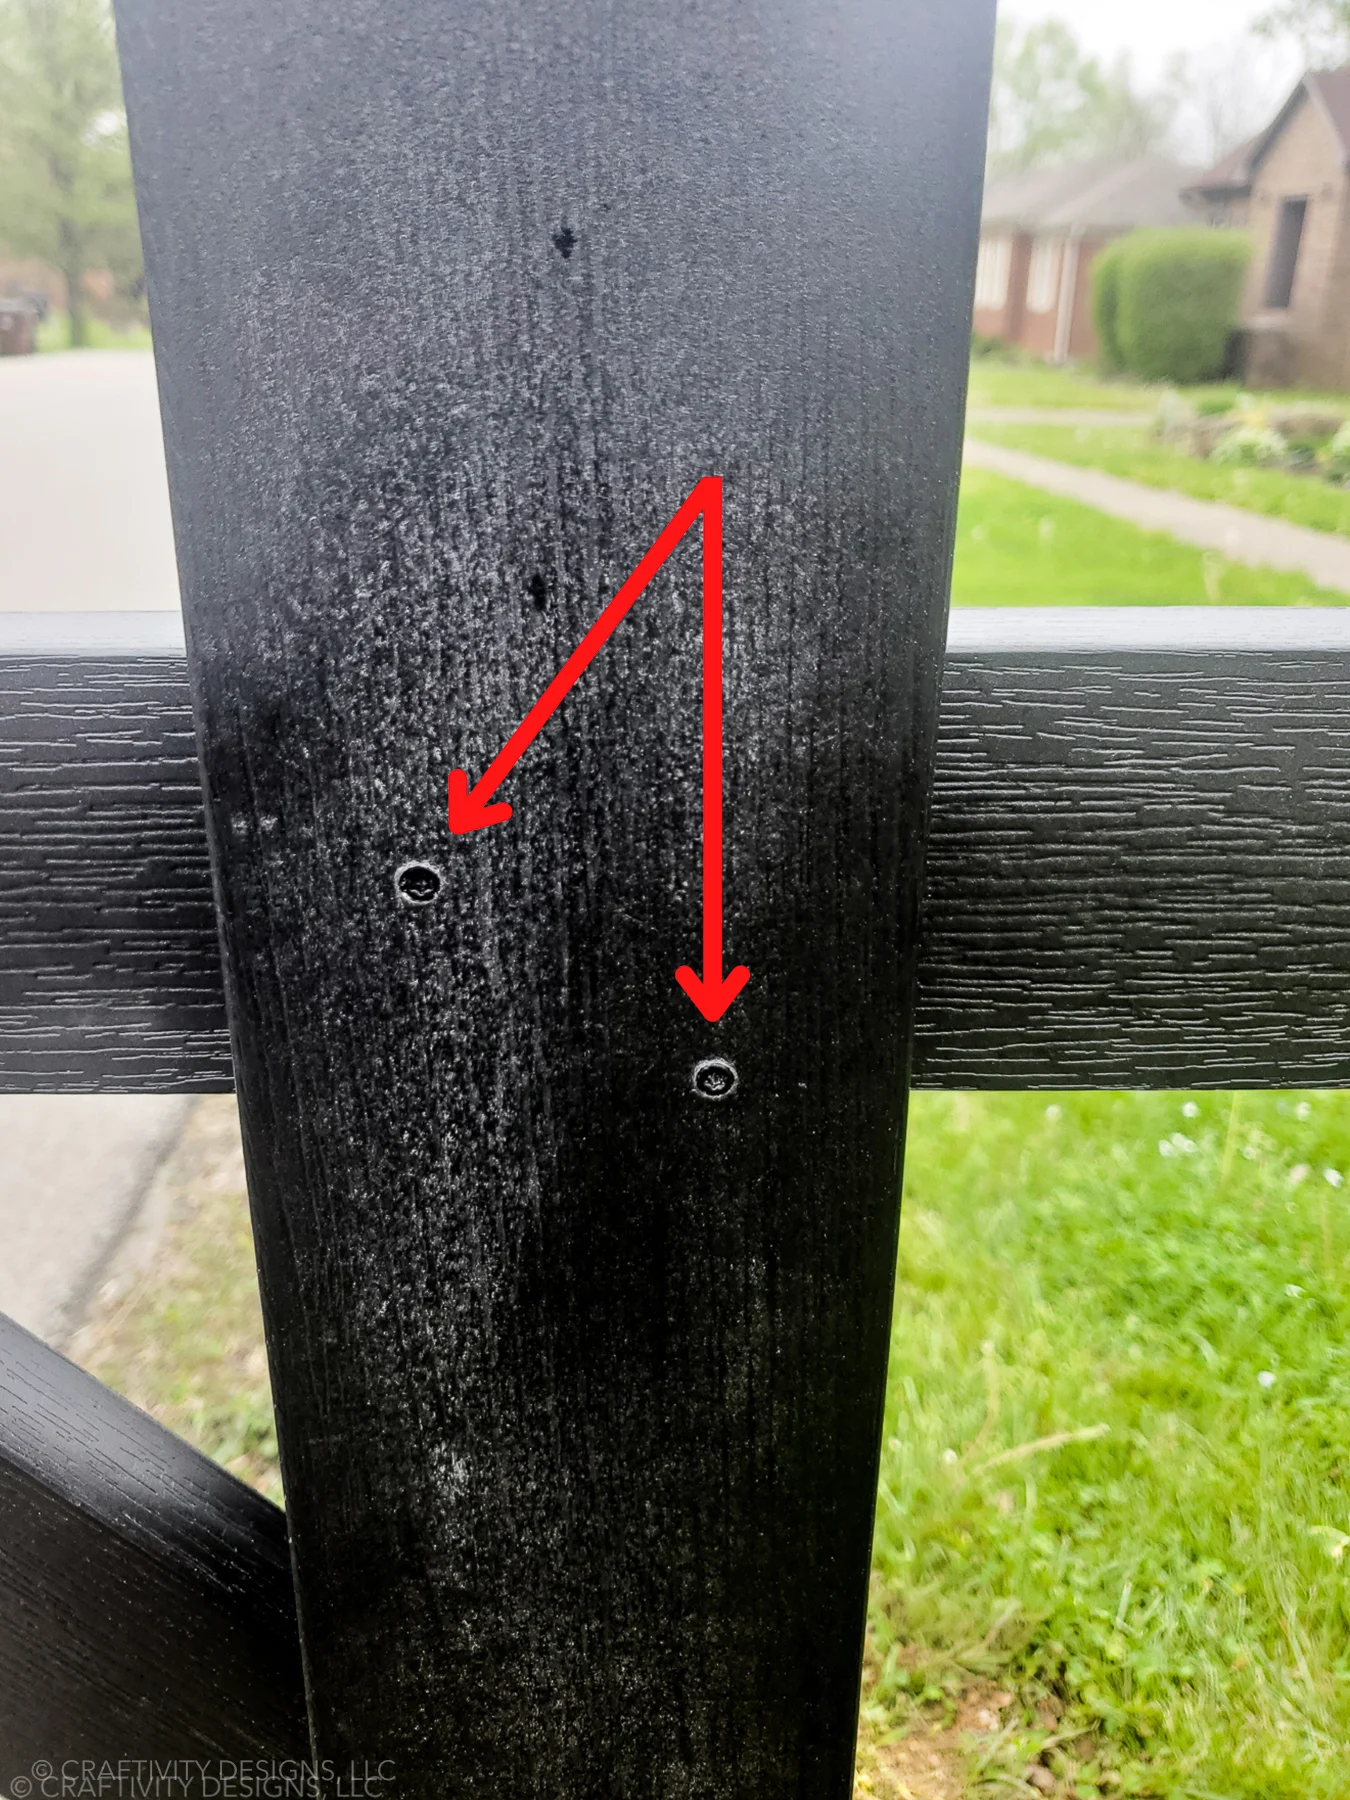
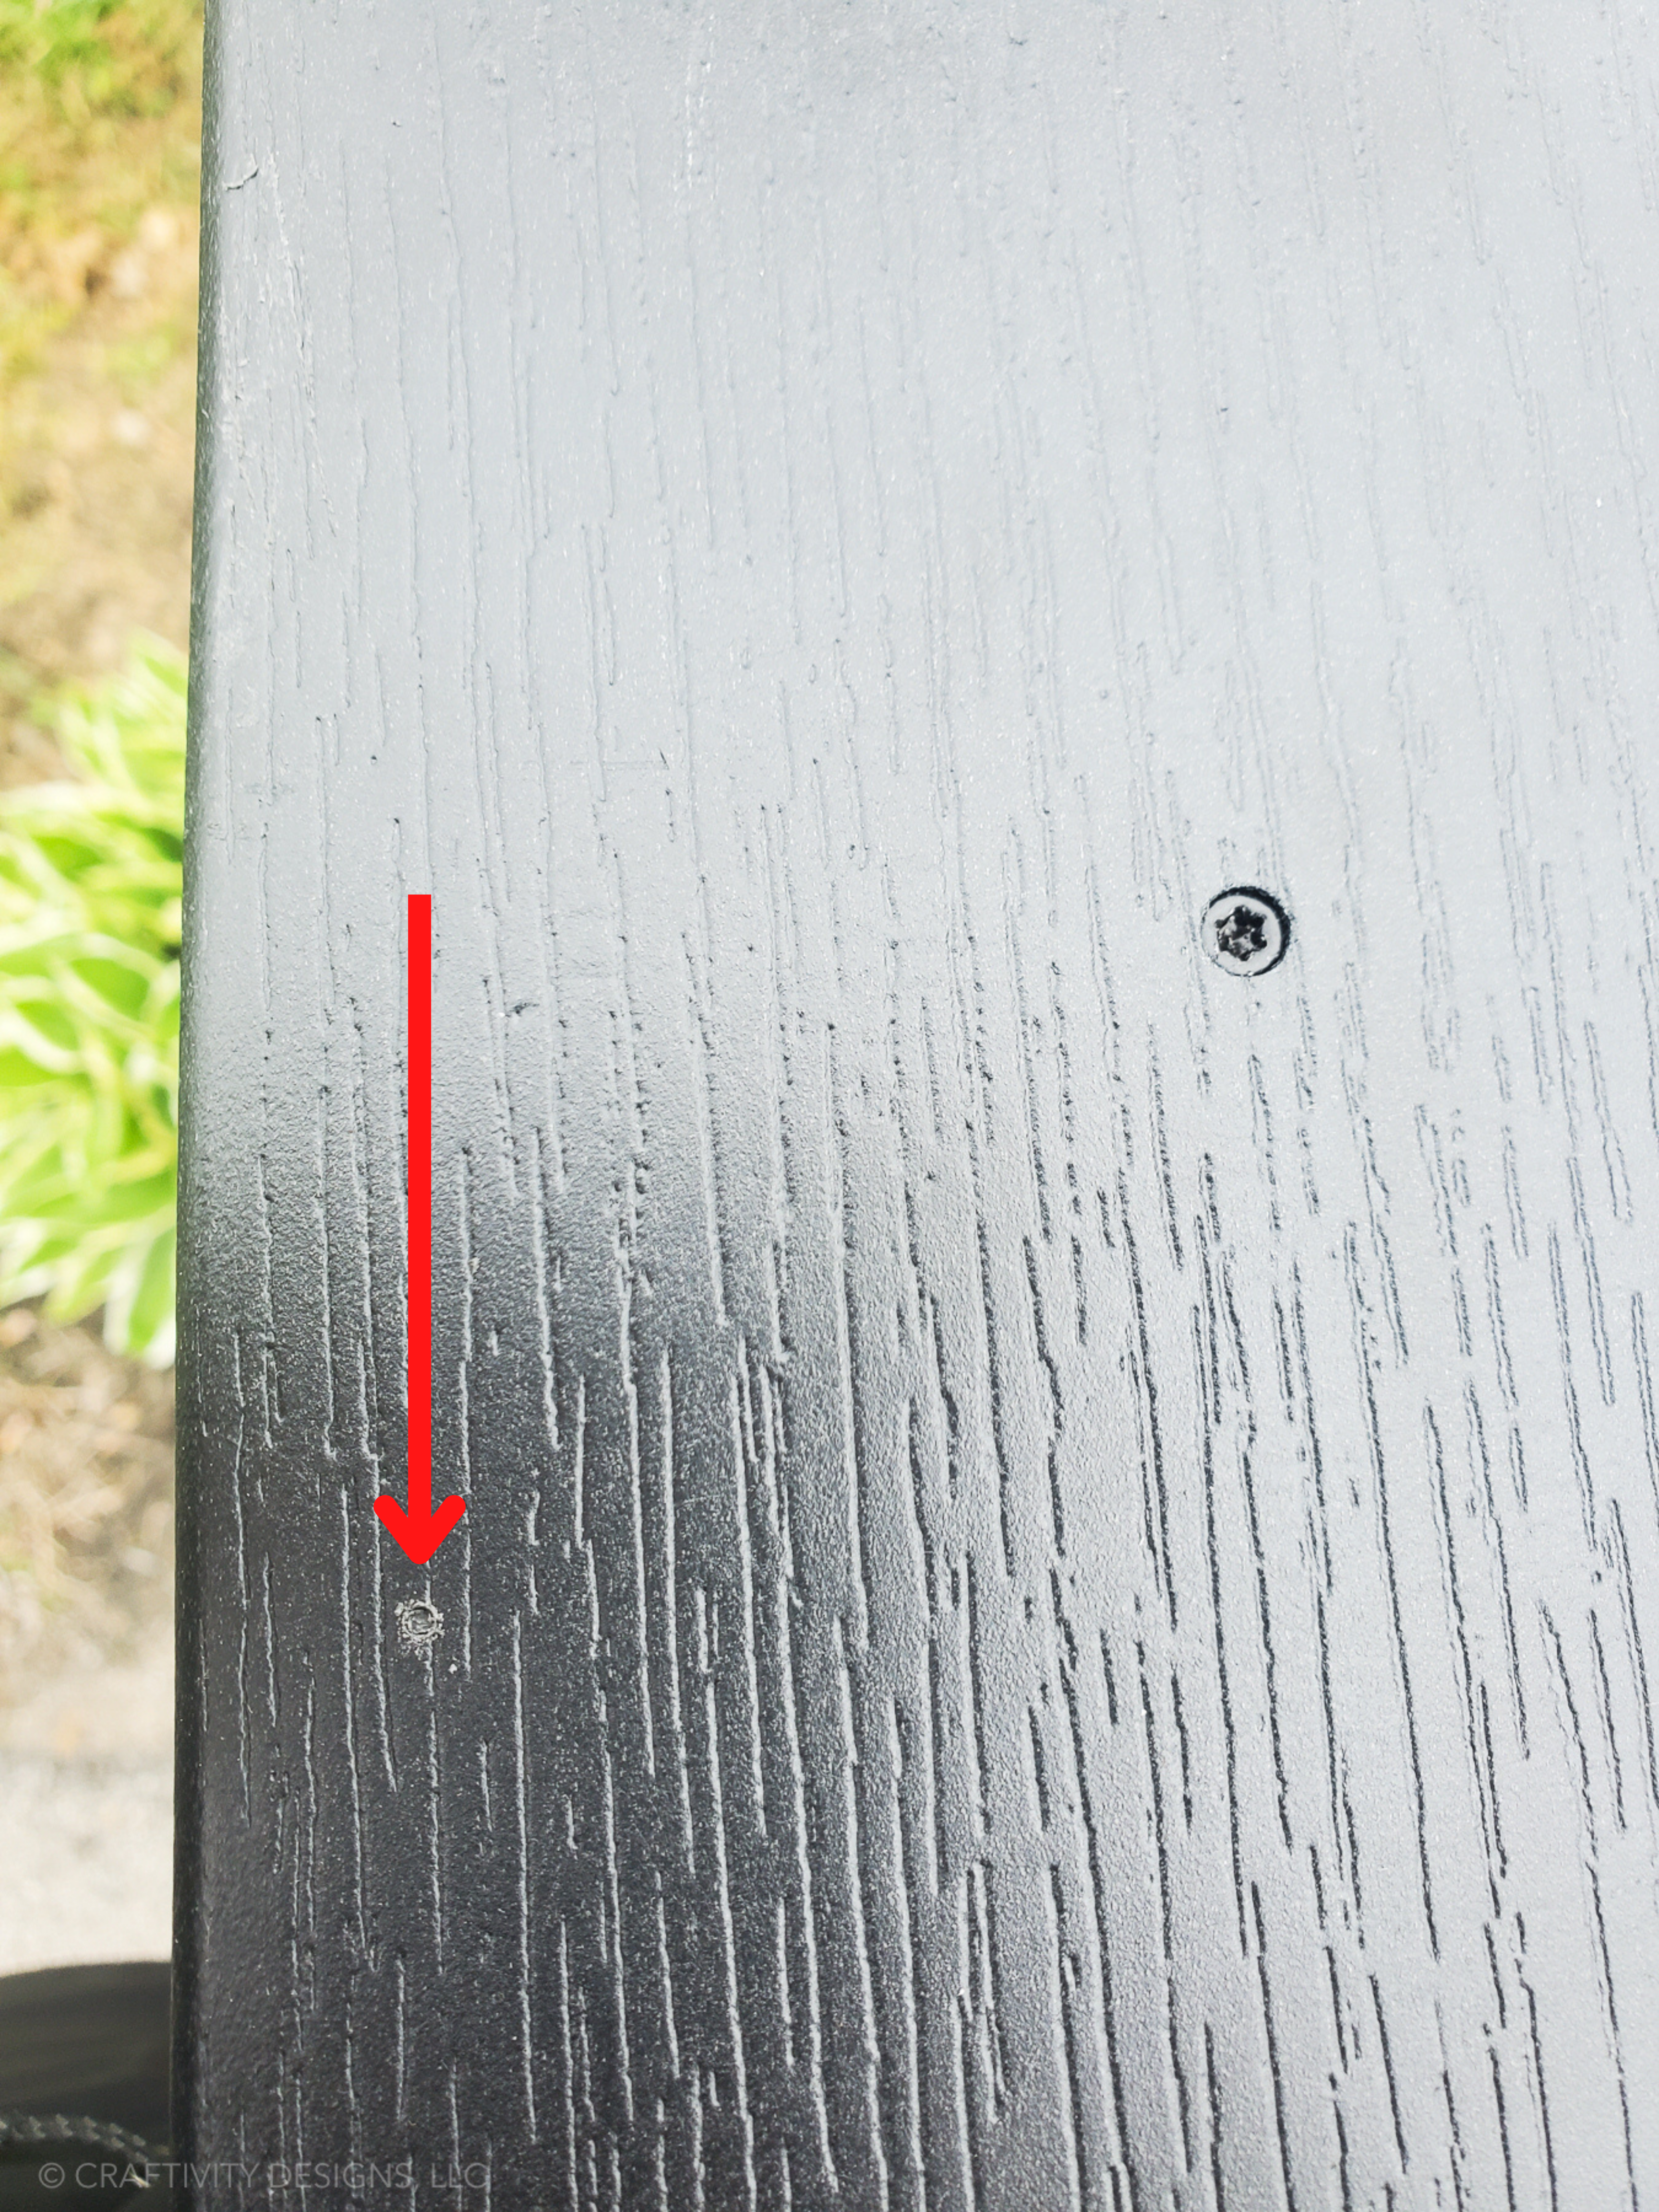
- Drill starter holes at marked locations with a drill bit. Do not go all the way through the baseplate.

- Place the mailbox back on to the baseplate and attach with screws and washers.

Frequently Asked Questions
No, a mailbox post does not have to be installed with concrete. While concrete will provide a stable foundation for the post, it is not required.
In lieu of concrete, you can use other hard materials to pack around the post such as a few large rocks, drainage rock, and tamped dirt.
To skip digging, purchase a no-dig mailbox post which is essentially a screw-in post that you twist into the dirt.
Yes, you can use Quikrete to install a mailbox post. This fast-drying concrete mix does not require mixing and can be poured directly into the mailbox post hole, making it great for DIYers.
Like this exterior decor idea? You might also like:
- How to Make a DIY House Number Sign (in minutes!)
- 10 Stunning Homes with Board and Batten Siding
- How to Make DIY Reflective Mailbox Numbers
Want to save this exterior DIY project? Pin it!
